Why This Recipe Works
We’ve all been there. The kitchen smells incredible. The pumpkin cake is baked, cooled, and waiting. You’ve watched three videos. You’ve read the comments. You start unrolling that towel and hold your breath, hoping, praying the cake doesn’t crack in half.
I felt that exact fear the first time I attempted a pumpkin roll with cream cheese filling. Mine cracked. It crumbled a little at the edge. And honestly? It still tasted amazing, covered in filling and dusted with powdered sugar. But I knew I could do better.
This recipe is the one I wish I’d started with. It’s a classic American fall dessert built on simple ingredients and one critical technique: rolling the cake while it’s still warm. That’s the secret engine behind a smooth spiral that doesn’t break. Here’s everything I’ve learned so you don’t have to make my mistakes.
Ingredients and Tools for Pumpkin Roll
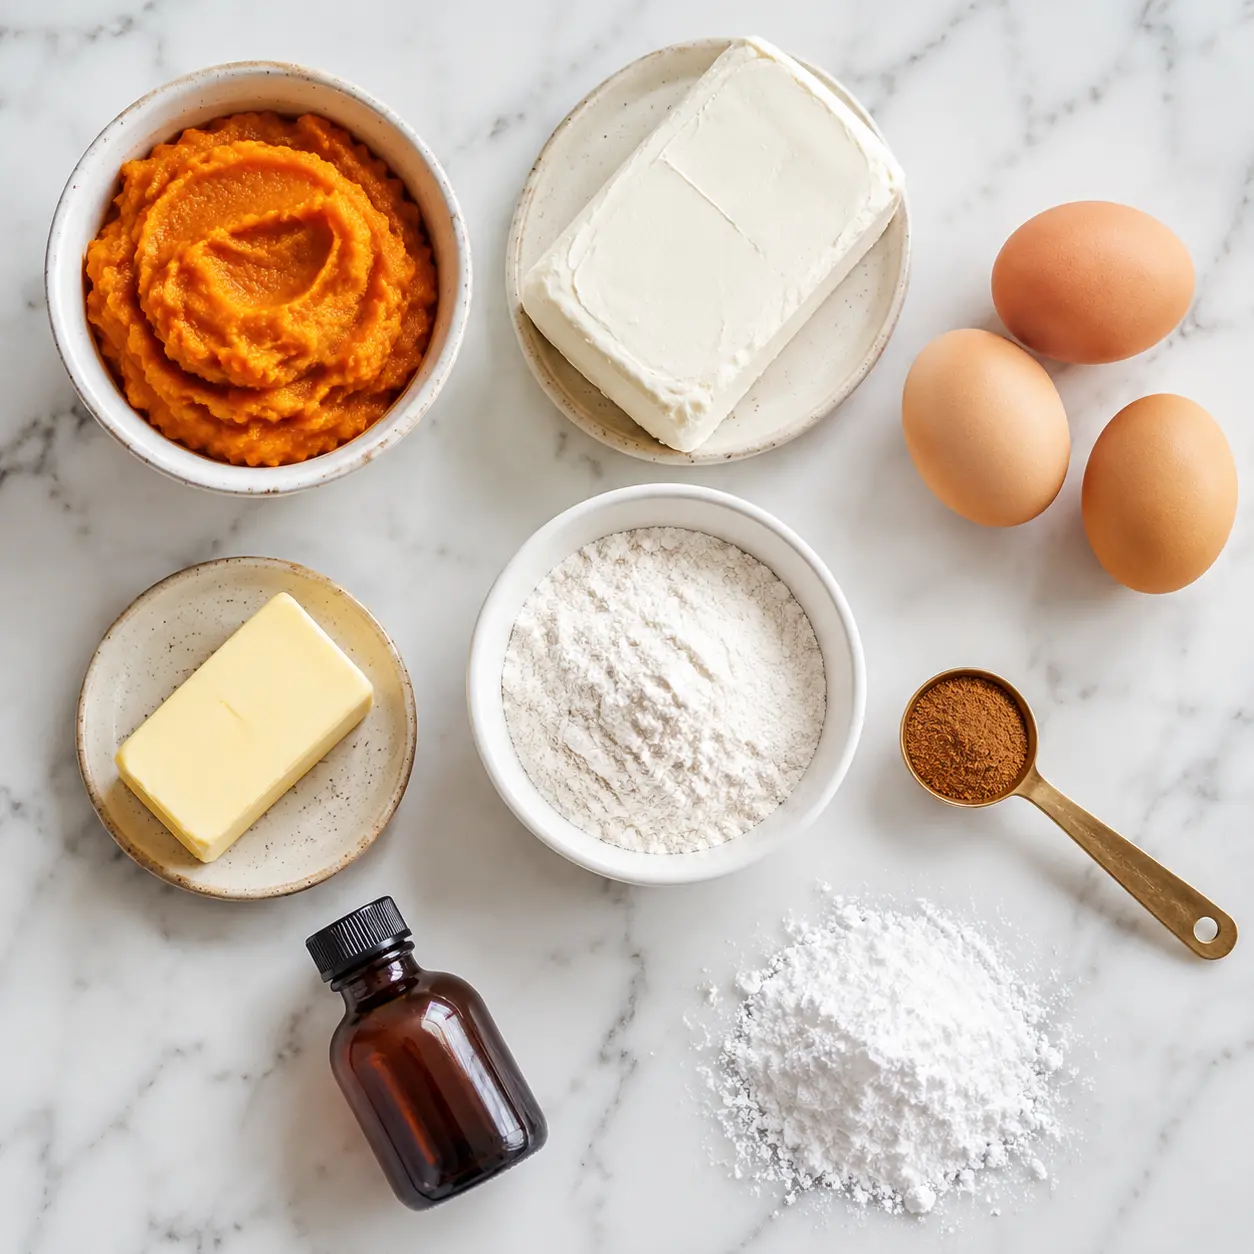
The ingredient list for this pumpkin roll with cream cheese filling is short and honest. No weird additions. No expensive specialty items. Just classic baking staples that come together into something that looks far more complicated than it actually is.
- For the cake: all-purpose flour, granulated sugar, large eggs, and 100% canned pumpkin puree. Not pumpkin pie filling, which is pre-sweetened and spiced. Pure pumpkin gives you control over the sweetness.
- The spices: ground cinnamon, ground ginger, ground nutmeg, and a pinch of salt. Together they mimic that warm pumpkin pie spice blend without needing a special jar.
- For the cream cheese filling: room temperature cream cheese, unsalted butter, confectioners’ sugar, a spoonful of pumpkin puree, and vanilla extract.
Ingredient Notes
That tablespoon of pumpkin puree in the filling might seem odd. Trust me, it’s there to tie the flavors together. It makes the filling taste like part of the cake instead of just a dollop of sweet cream on top.
Room temperature cream cheese and butter are non-negotiable. Cold dairy creates lumps that no amount of beating will fully smooth out. Take them out of the fridge about an hour before you start. This is one of those small things that separates a silky, professional-grade filling from a slightly grainy one.
Essential Tools
Before you mix anything, make sure you have these on hand. Nothing here is exotic, but each tool plays a specific role.
- 10×15-inch jelly roll pan: This size matters. A regular sheet pan is too big and results in a thin, brittle cake. A half-sheet pan is too large; the cake will be too thin to roll.
- Waxed paper or parchment paper: For lining the pan so your cake releases cleanly.
- A clean kitchen towel: Not terry cloth. You want a smooth, lint-free cotton towel. A flour sack towel is perfect. The texture of terry cloth can imprint onto the soft cake.
- A serrated knife: For slicing those clean, bakery-style pieces after chilling.
- Plastic wrap: This is your secret weapon for the final roll. It guides the cake without sticking and keeps it snug while it chills.
How to Make Pumpkin Roll with Cream Cheese Filling
Now for the main event. The steps for this pumpkin roll with cream cheese filling aren’t hard, but the timing matters. Once you understand why each step exists, the whole process clicks into place.
Stage One: Mix the Batter
Heat your oven to 375 degrees F while you work. Butter that jelly roll pan generously and line the bottom with waxed paper or parchment. This lining is your insurance policy. Without it, you risk the cake sticking to the pan, which makes the whole rolling process a nightmare.
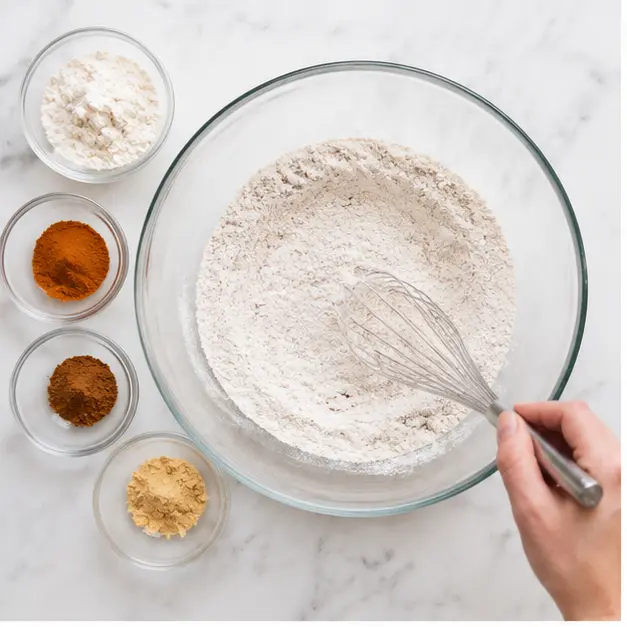
Whisk the flour, cinnamon, baking powder, ginger, nutmeg, and salt in a medium bowl. This does more than combine ingredients. It aerates the flour and distributes the spices evenly so you don’t get a pocket of cinnamon in one bite and nothing in the next.
In a large bowl, beat the sugar and eggs until well blended. The mixture should look pale and slightly thick. Then mix in the pumpkin puree. The color shift is beautiful. That bright orange batter tells you something wonderful is about to happen. Stir in the dry ingredients just until combined. Overmixing develops gluten, which would make the cake tough instead of tender and flexible.
Stage Two: Bake and Cool
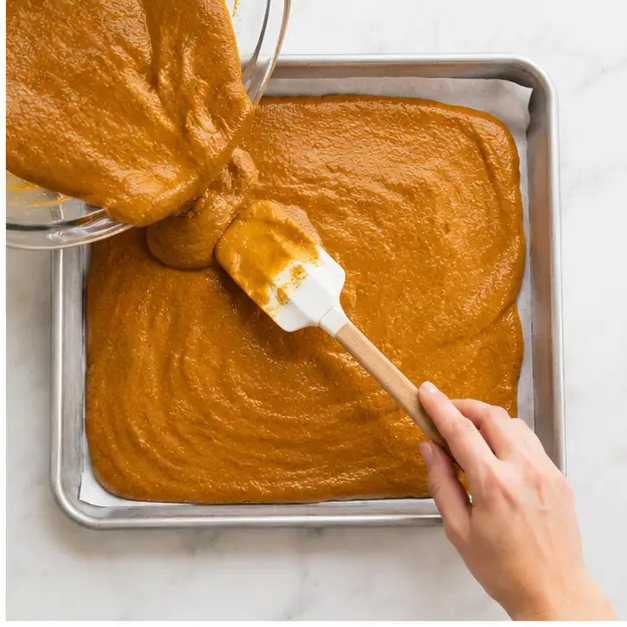
Pour the batter into your prepared pan and spread it evenly. An offset spatula makes this easy. Get the corners filled and the surface relatively smooth.
Bake for about 15 minutes. The cake is done when a toothpick inserted in the center comes out clean. You’ll also notice the top feels springy to a gentle touch. This is where many people go wrong. A slightly overbaked cake is a dry cake. A dry cake cracks. So watch the time and trust the toothpick.
Once it’s out of the oven, leave the cake in the pan on a wire cooling rack for exactly 10 minutes. Not five. Not twenty. Ten. This short rest allows the cake to set slightly, which helps it release from the paper, but it doesn’t allow it to cool enough to become stiff and brittle.
Stage Three: The Kitchen Towel Roll
This is the moment of truth, but don’t let the pressure get to you. The kitchen towel method is the classic Swiss roll technique, and it works.
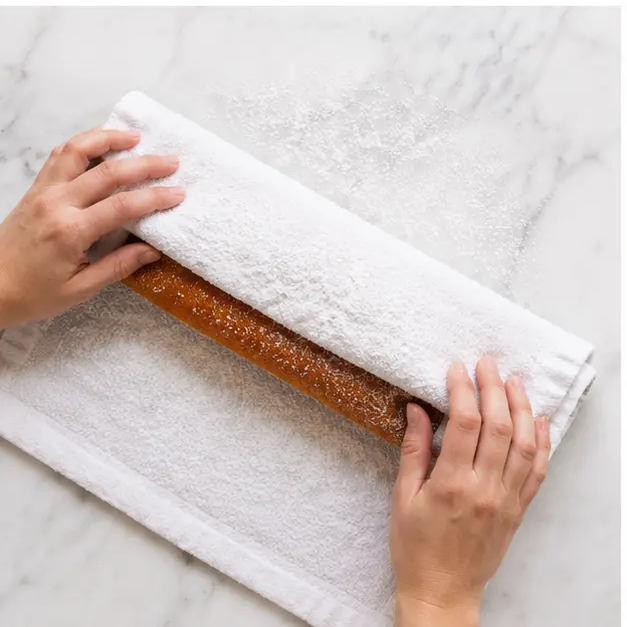
Place your clean kitchen towel on the counter and dust it lightly with confectioners’ sugar. This prevents the cake from sticking to the fabric. Carefully turn the warm cake out onto the towel. Peel off the waxed paper.
Here’s the key: roll the cake up in the towel while it’s still warm. Start from a short end and roll gently but firmly into a log, towel and all. Rolling the warm cake sets a memory into the sponge. It teaches the cake to hold that curve.
Let the rolled cake cool completely in the towel, which takes about 30 minutes. This step is critical. If you try to unroll a warm cake, it’ll just spring back into a flat sheet. Patience here saves you from cracks later.
Stage Four: Fill and Re-Roll
While the cake cools, make the filling. Beat the softened cream cheese, confectioners’ sugar, softened butter, the remaining tablespoon of pumpkin puree, and vanilla extract until silky smooth. It should be thick enough to hold its shape when you lift the beater, not runny like a glaze.
Now for a trick some bakers don’t know: pop the filling in the fridge for 10 to 15 minutes while the cake finishes cooling. A slightly chilled filling spreads more cleanly and doesn’t soften the cake’s texture as you work.
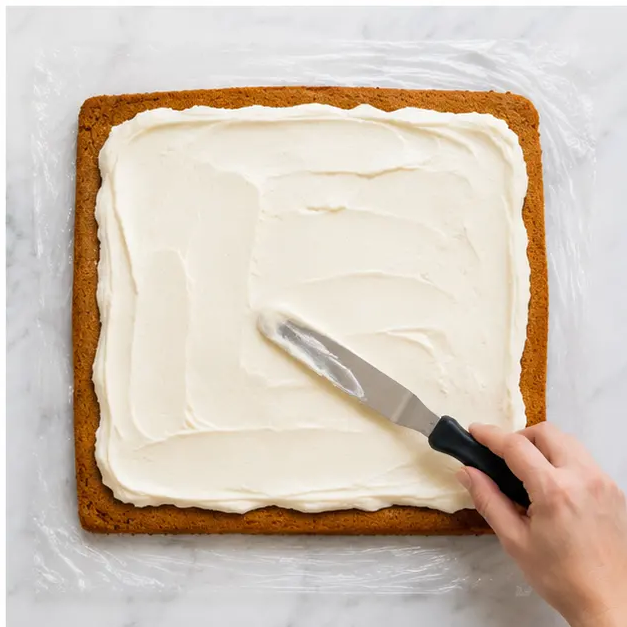
Cover your workspace with a large sheet of plastic wrap. Gently unroll the cooled cake and place it on the plastic. Spread the cream cheese filling evenly over the surface, leaving a small border around the edges. When you re-roll the cake (this time without the towel), use the plastic wrap to guide it. This gives you a tight, even spiral and keeps the cake from sticking to your fingers.
Wrap the finished pumpkin roll securely in plastic, place it seam side down on a plate, and refrigerate for at least 2 hours. This chill time is what makes clean slicing possible.
Tips for the Best Pumpkin Roll
A few small habits make the difference between a good cake and a memorable one. These tips apply to any pumpkin roll recipe, but they’re baked into this one.
- Use 100% canned pumpkin. Pumpkin pie filling is pre-spiced and sweetened, which throws off the balance of this recipe. Look for a can that lists only pumpkin as the ingredient.
- Roll while warm, every time. This is the single most important technique for cracking prevention. Once the cake cools flat, it loses its flexibility.
- Don’t skip the plastic wrap for the final roll. It’s the easiest way to get a clean, tight spiral without tearing the cake.
- Chill before slicing. A warm or room-temperature roll becomes a gooey mess when cut. Two hours in the fridge at minimum. Overnight is even better.
- Use a serrated knife and wipe it between cuts. This gives you those clean, bakery-style slices with visible cream cheese spirals instead of smeared edges.
Pumpkin Roll Variations
Once you’ve mastered the base pumpkin roll with cream cheese filling, there’s plenty of room to play. These are optional additions to the classic recipe, so feel free to experiment depending on your mood or what’s in your pantry.
- Add a crunch: Sprinkle 1/2 cup of finely chopped pecans or walnuts over the cream cheese filling before rolling. Add a little texture contrast to the soft cake.
- Boost the spice: Try a pinch of allspice in the batter instead of or alongside the ginger. It deepens that cozy pumpkin pie spice profile.
- Make it gluten-free: Swap the all-purpose flour for your favorite 1-to-1 gluten-free baking flour blend. Several readers have reported fantastic results with this swap, and the texture holds up surprisingly well.
- Cut the sugar: For a less sweet version, reduce the confectioners’ sugar in the filling by 1/4 cup. The tang of the cream cheese comes through more prominently.
- Dairy-free option: Use vegan cream cheese and vegan butter alternatives. The structure still holds, and the flavor stays close to the original.
Troubleshooting Pumpkin Roll Problems
Even with the best instructions, things can go sideways. Here’s how to rescue a pumpkin roll with cream cheese filling when the universe throws you a curveball.
❌ The cake cracked when rolling. → ✅ Don’t panic. This happens to everyone. Once the filling is spread and the cake is rolled, the filling masks small cracks beautifully. For larger breaks, press the edges together gently and let the chill time hold everything in place. Your finished roll will still look gorgeous.
❌ The cake stuck to the towel. → ✅ You either used a towel with a textured surface or didn’t dust it with enough confectioners’ sugar. For future attempts, use a smooth cotton or flour sack towel and be generous with the powdered sugar dusting. As a fix, don’t try to pull the cake off. Instead, place the whole thing in the fridge for a few minutes. The cold makes the cake release more easily from the fabric.
❌ The cake is sticky or wet on top. → ✅ This is a feature, not a bug. Pumpkin cake is naturally moist, and that moisture helps it roll without cracking. A dry, flaky cake might sound preferable, but it will crack the moment you try to bend it. If the sticky surface bothers you, dust it lightly with extra confectioners’ sugar before rolling the finished roll.
❌ The filling is too runny. → ✅ Your cream cheese or butter was too warm, or the mixture was overbeaten. Pop the filling in the fridge for 15 minutes to thicken it back up before spreading. You want a thick, spreadable consistency like frosting, not pourable.
❌ My slices are messy. → ✅ The roll wasn’t chilled long enough. This pumpkin roll with cream cheese filling needs at least 2 hours in the fridge to set. Use a serrated knife and clean it between each cut. Wipe the blade with a damp cloth to get those perfect spirals.
How to Store and Freeze Pumpkin Roll
This is the true make-ahead fall dessert. In fact, the pumpkin roll with cream cheese filling tastes even better the day after it’s made. The flavors have time to meld, and the texture settles beautifully.
Refrigerator: Store the wrapped roll in the fridge for 3 to 5 days. Keep it tightly wrapped in plastic wrap so it doesn’t dry out or absorb other flavors from your fridge.
Freezer: Yes, you can absolutely freeze it. Wrap the chilled, filled roll tightly in plastic wrap, then again in aluminum foil or place it in a freezer-safe container. It will keep for up to 2 to 3 months. When you’re ready to enjoy it, thaw it overnight in the refrigerator. Don’t thaw at room temperature, which can make the cake soggy.
Make-ahead timeline: You can prepare the baked cake, roll it in the towel, and refrigerate it unfilled for up to a day before you need it. Then simply fill, re-roll, and chill for 2 hours before serving. This flexibility makes it perfect for busy Thanksgiving kitchens.
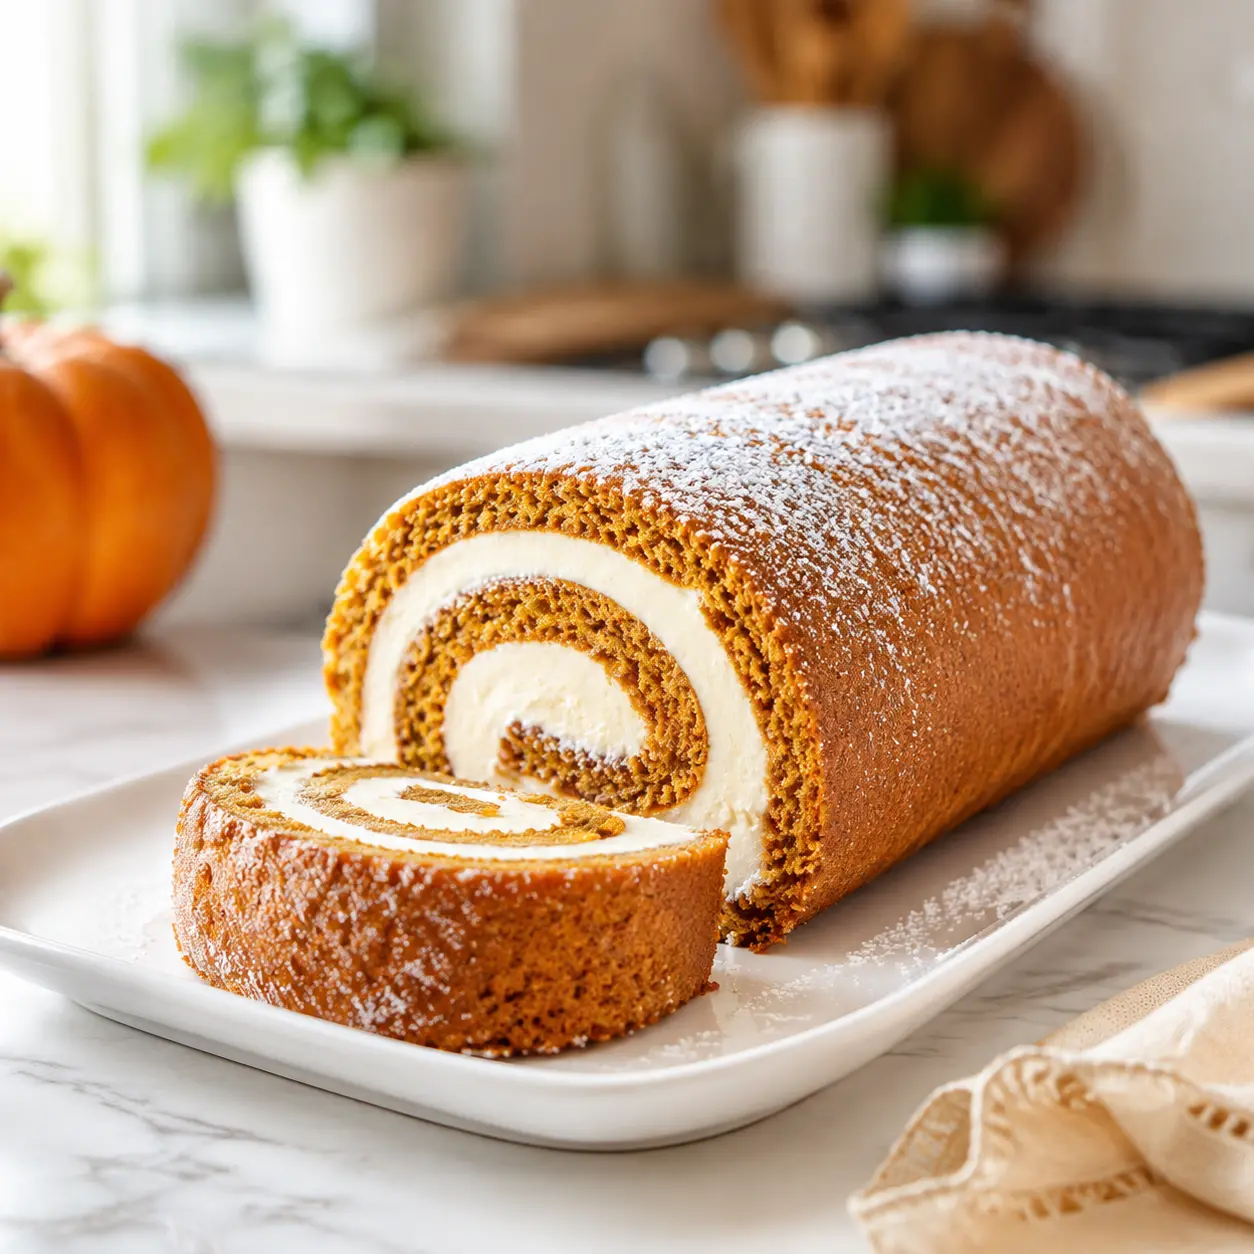
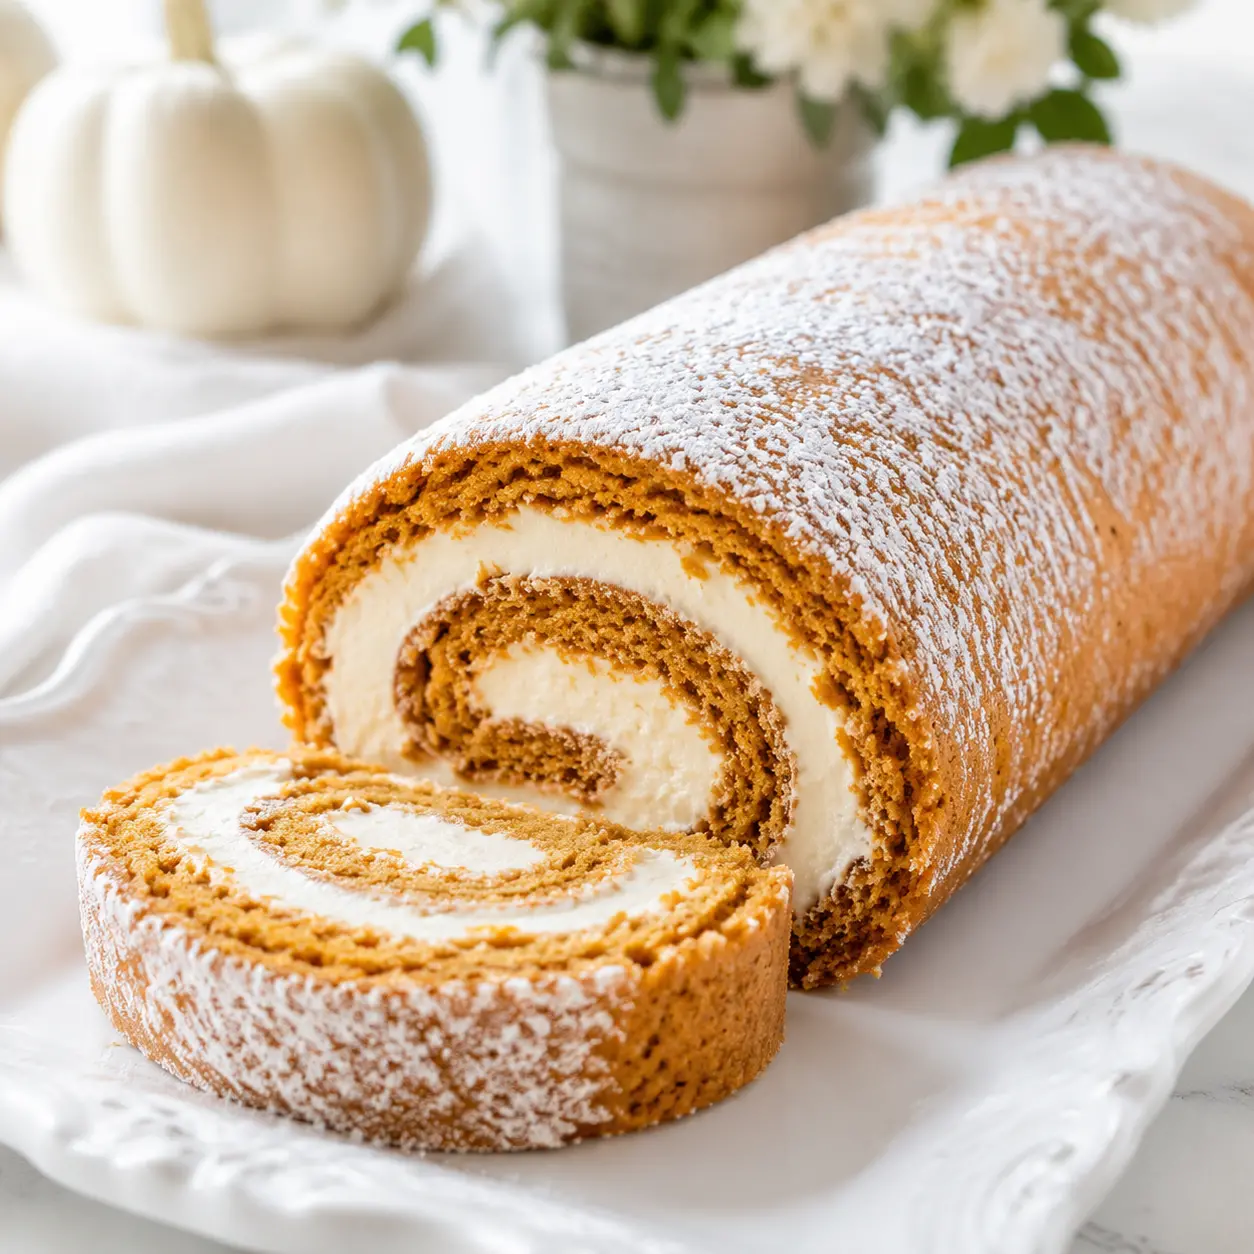
When you’re ready to serve, dust the top generously with confectioners’ sugar. Slice about a half inch off one end to reveal the pretty spiral, then cut into even slices. Watching that golden and white swirl come into view is honestly one of the most satisfying moments in baking.
Frequently Asked Questions
If you’re ready to build your fall baking confidence, start here. Master the pumpkin roll with cream cheese filling, and you’ve officially leveled up as a baker. The technique carries over to other Swiss rolls and jelly roll desserts too.
Feeling inspired? I’d love to see how yours turns out. Come follow me on Pinterest for more baking inspiration and share your beautiful spiral creations with me.
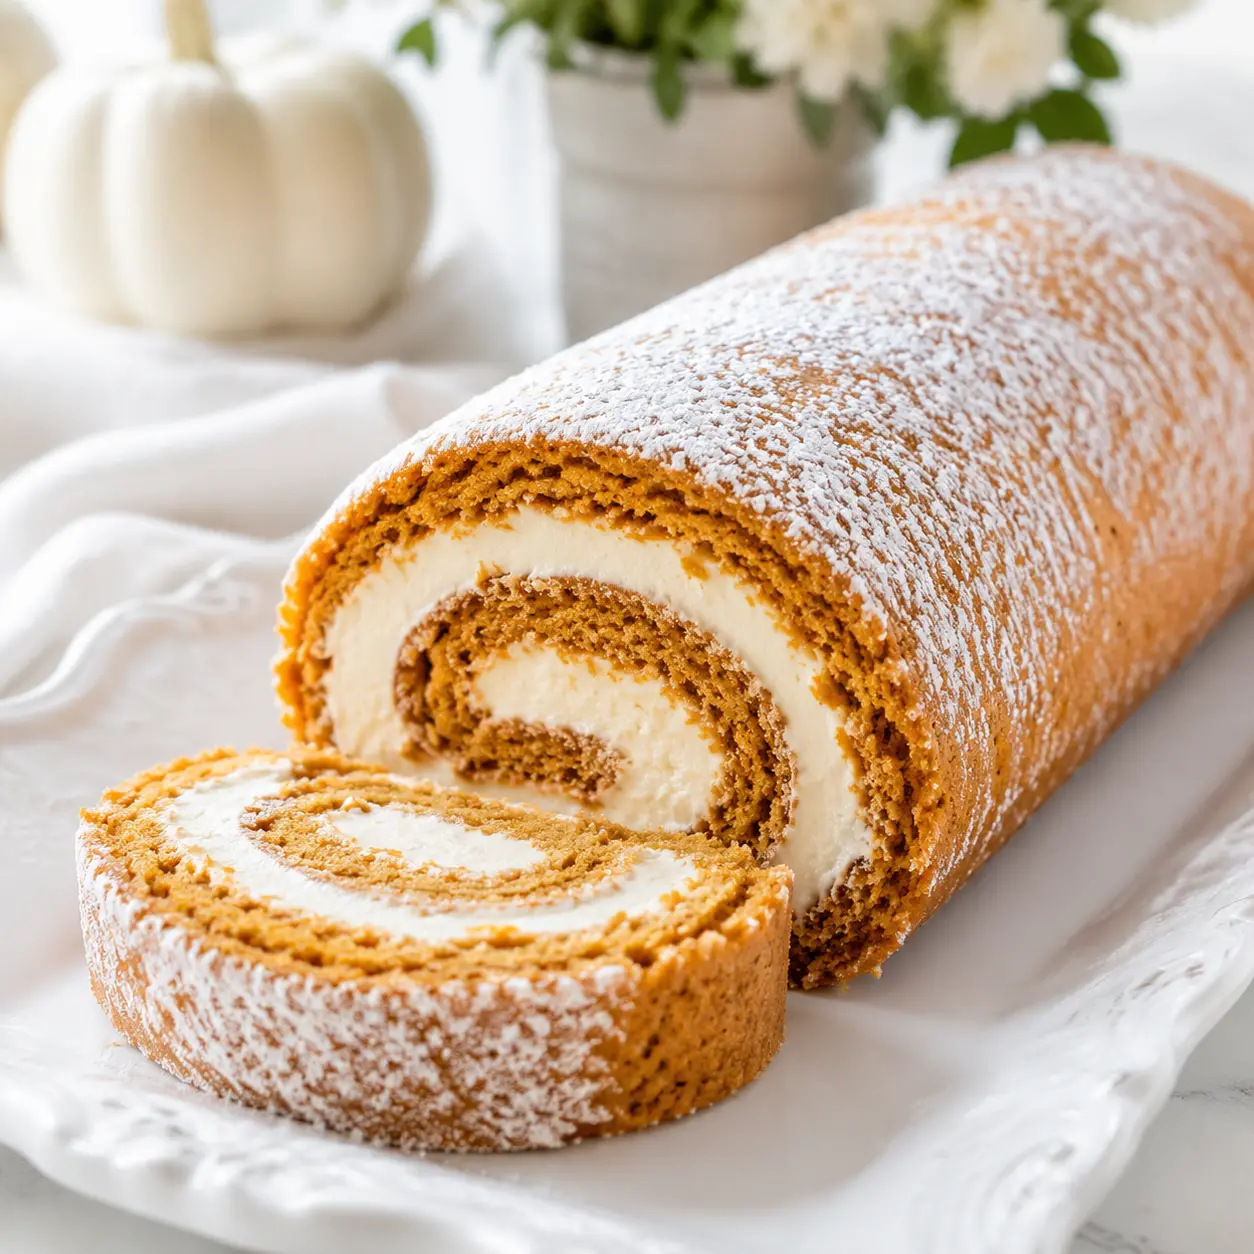
Classic Pumpkin Roll with Cream Cheese Filling
Ingredients
Method
- Heat the oven to 375 degrees F. Butter a 10x15-inch jelly roll pan and line the bottom with waxed paper.
- Whisk together the flour, cinnamon, baking powder, ginger, nutmeg, and salt in a medium bowl.
- In a large bowl, beat the sugar and eggs with an electric mixer until well blended. Mix in the 2/3 cup pumpkin puree, then stir in the flour mixture until just combined. Pour the batter into the prepared pan and spread it evenly.
- Bake until a toothpick inserted in the center comes out clean, about 15 minutes. Cool the cake in the pan on a wire rack for 10 minutes.
- Turn the cake out onto a clean kitchen towel and peel off the waxed paper. Starting with a short end, roll the cake and towel together into a log. Cool completely, about 30 minutes.
- In a separate bowl, beat the softened cream cheese, powdered sugar, butter, the remaining 1 tablespoon pumpkin puree, and vanilla until the mixture is silky smooth.
- Cover your work surface with a large sheet of plastic wrap. Gently unroll the cooled cake and set it on the plastic wrap.
- Evenly spread the cream cheese filling over the cake, then roll it up again without the towel, using the plastic wrap to help guide it. Wrap securely, place the roll seam side down on a plate, and refrigerate until fully chilled, about 2 hours.
Nutrition
Notes
Tried this recipe?
Let us know how it was!Source: Learn More About This Dish
Can this pumpkin roll be made and frozen?
Absolutely. Bake, roll, fill, and chill the cake. Then wrap it tightly in plastic wrap and aluminum foil. It freezes beautifully for up to 2 to 3 months. Thaw overnight in the refrigerator, dust with fresh confectioners’ sugar, and slice. This is the ultimate make-ahead fall dessert.
Can you use sweet potato instead of pumpkin?
Yes. You’ll need about 2/3 cup of roasted and pureed sweet potato that has been drained of excess moisture. Sweet potato has a slightly deeper, earthier flavor than pumpkin, but the texture works beautifully in this recipe. Just make sure the puree is thick, not watery, so the batter holds its structure.
Why does my pumpkin roll get sticky?
Sticky cake isn’t a sign of failure. Pumpkin is naturally moist, and that moisture is what makes the cake flexible enough to roll without cracking. If the surface especially bothers you, dust the finished roll with a little extra confectioners’ sugar before serving. A dry, flaky cake is actually much harder to roll successfully.
Why is my pumpkin roll wet or soggy?
A soggy pumpkin roll usually means the cake was underbaked or the filling was too warm when spread. Make sure a toothpick comes out clean and the roll chills fully, at least 2 hours. Whipping the filling too much can also make it loose, so beat just until silky smooth.
Do pumpkin rolls need to be refrigerated?
Yes, because of the cream cheese filling. The USDA recommends refrigerating any dessert containing cream cheese within 2 hours. Store the roll tightly wrapped in plastic wrap; it will stay fresh for 3 to 5 days. Always serve the pumpkin roll chilled for the cleanest, most presentable slices.