Classic Plum Cake: Sticky Upside Down Plum Cake
Ingredients
Method
- Preheat the oven to 375°F (190°C), or 350°F (175°C) if using convection. Butter a 9-inch round cake pan and line the bottom with parchment paper.
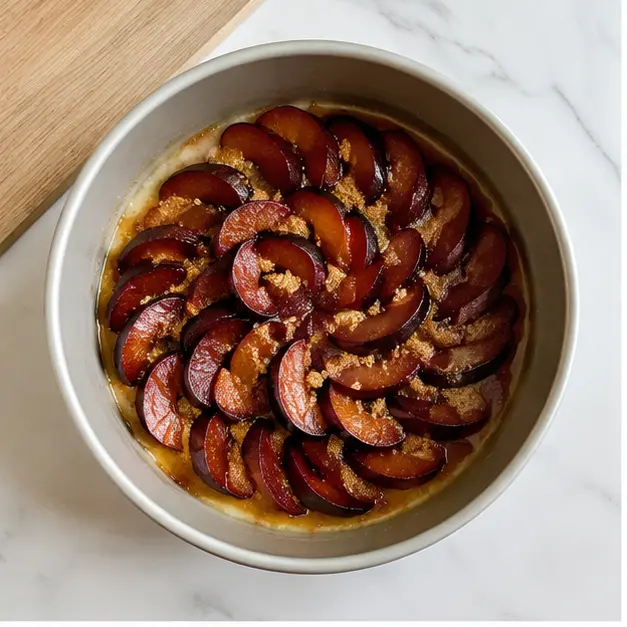
- Drizzle the 2 tablespoons of melted butter into the bottom of the pan, scatter the brown sugar evenly over it, and arrange the plum slices in a snug, overlapping layer on top.
- In a large mixing bowl, sift together the flour, baking powder, baking soda, cinnamon, nutmeg, allspice, and salt.
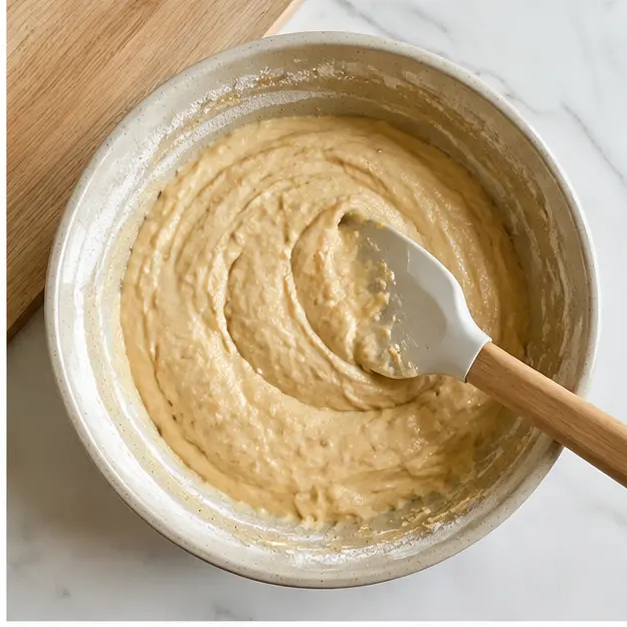
- Add the egg, milk, and remaining melted butter to the dry ingredients. Stir gently with a spatula until just combined; avoid overmixing.
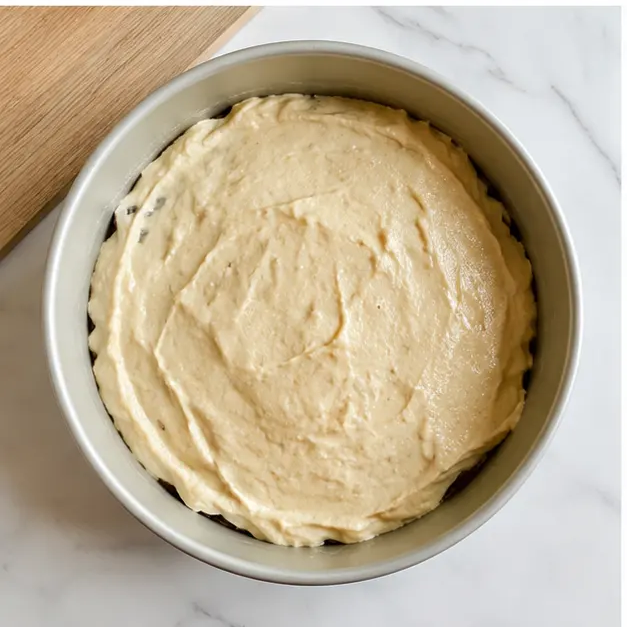
- Spoon the batter over the plums and use the back of the spoon to smooth it into an even layer.
- Bake for 45 minutes, or until the cake is golden brown and a toothpick inserted in the center comes out clean.
- Cool in the pan for 30 minutes, then carefully invert the cake onto a serving plate. Serve warm or at room temperature with whipped cream or yogurt.
Nutrition
Notes
Tried this recipe?
Let us know how it was!Why This Classic Plum Cake Recipe Works
I spotted them at the farmers market on Saturday, tucked between the Honeycrisps and the last sad peaches. The air had that cool September bite, the kind that makes you want to turn the oven on just for the warmth of it. And there they were. A whole crate of firm, crimson plums, so deep purple they almost looked black in the morning light.
This classic plum cake is the cake I bake every September when the first cool morning hits my kitchen window. It’s a delicious bridge between seasons, the last great stone fruit of summer caramelized on top of a buttery, golden cake. The calendar says fall is still a few weeks away. But one whiff of this fresh plum cake in the oven and you’ll be there early.
There’s a reason this style of homemade plum cake has been a cult classic for decades. The legendary NYT plum torte, the German Zwetschgenkuchen, the Italian versions, they all share the same DNA. Simple butter cake, ripe plums, warm spices, a hot oven. No electric mixer. No pastry skills. If you can stir, you can make this easy plum cake. It’s famously forgiving.
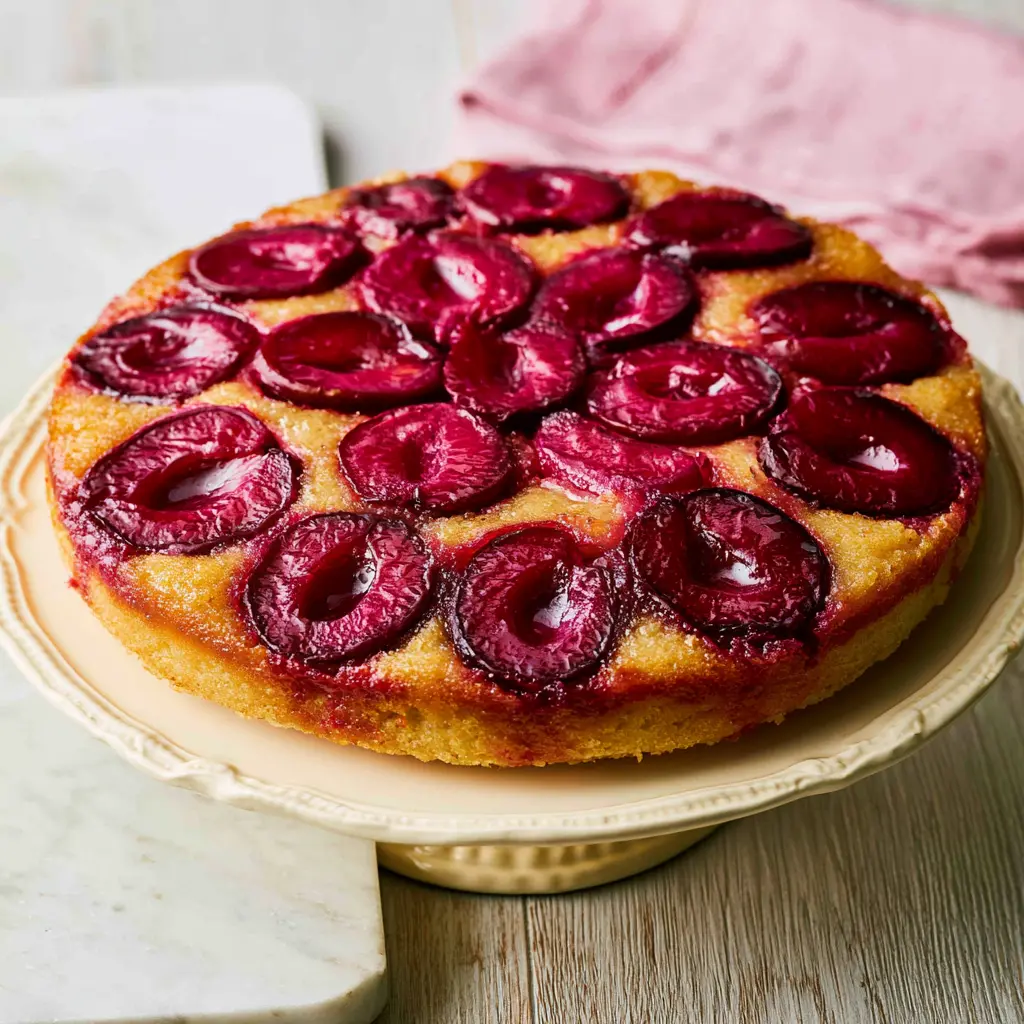
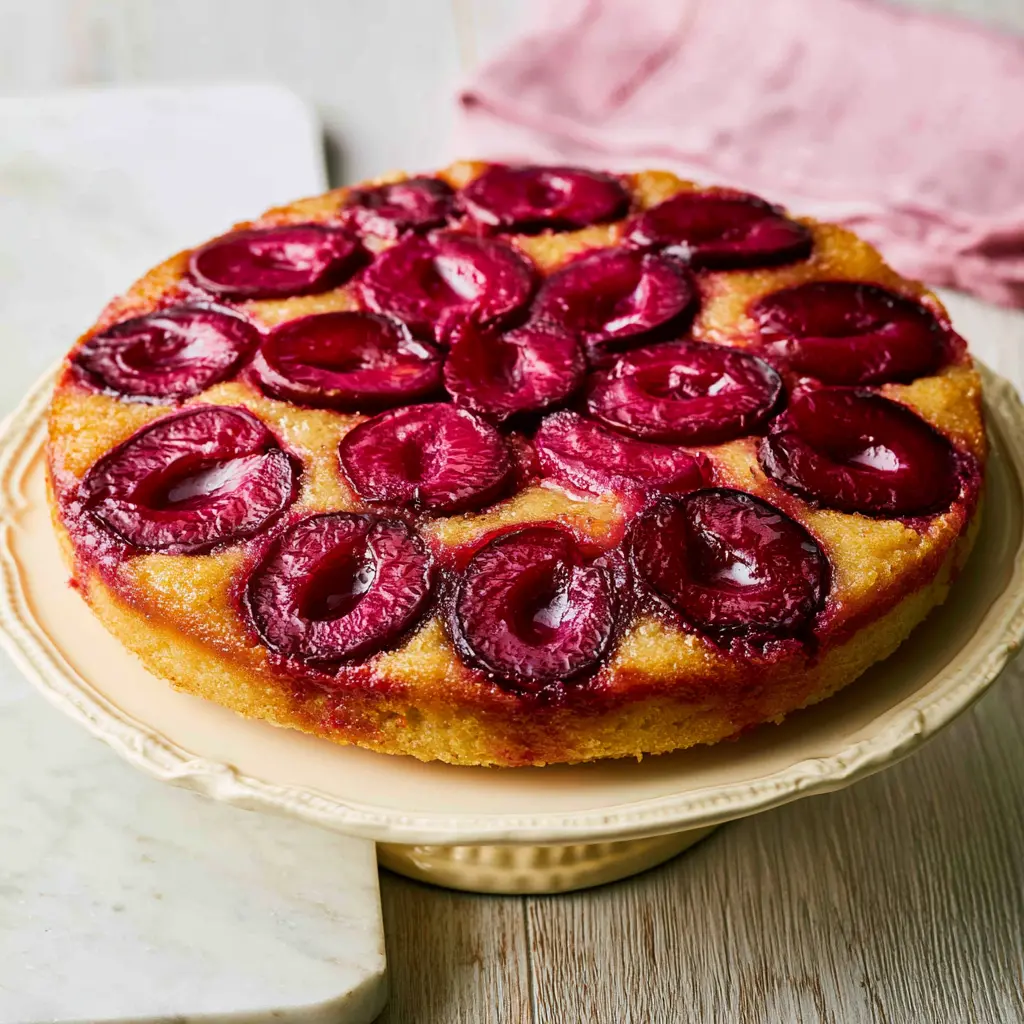
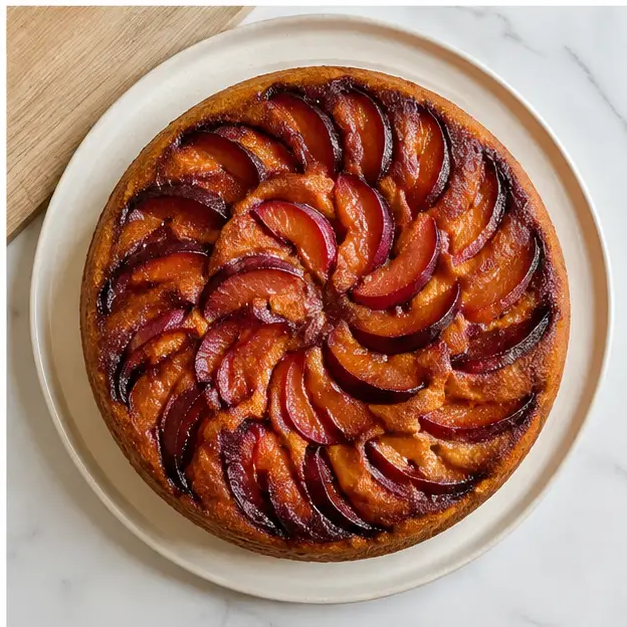
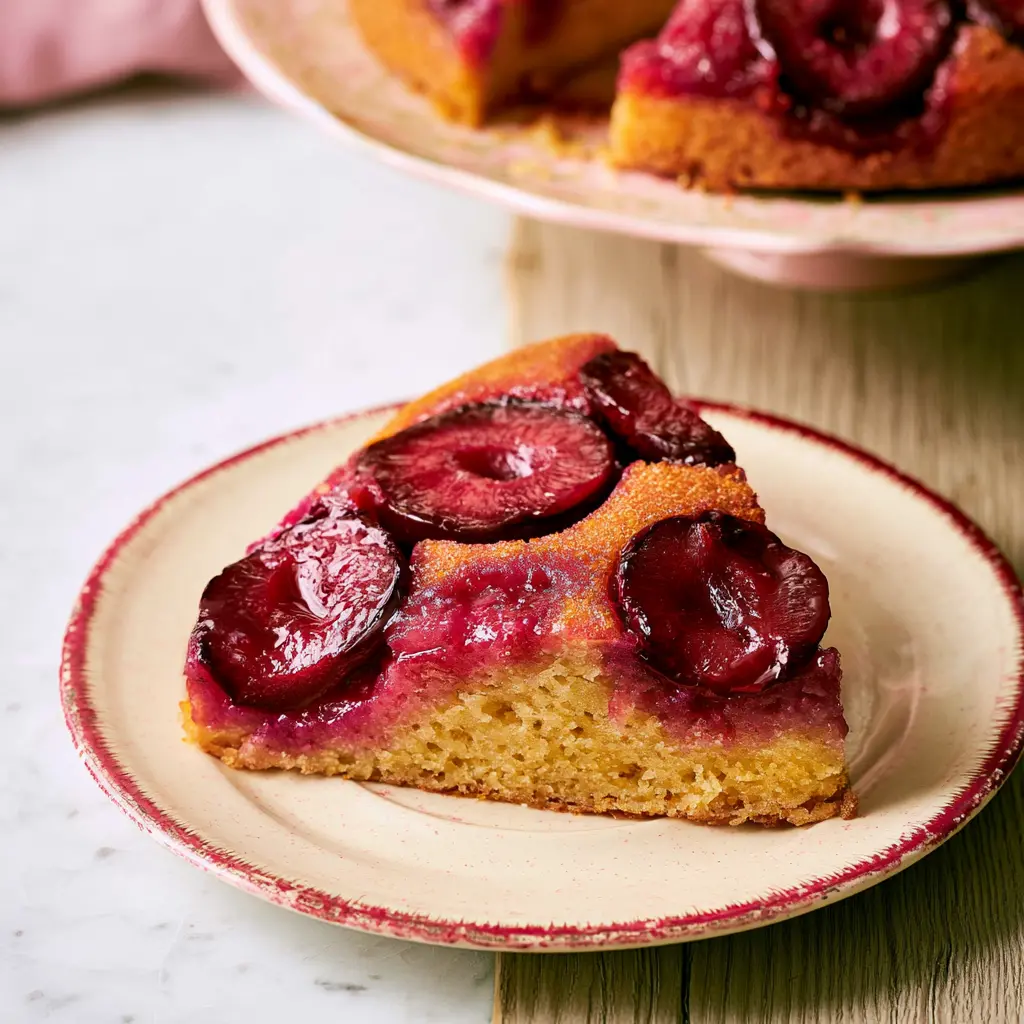
What makes this version special? It’s an upside down cake. The plums rest in melted butter and dark brown sugar at the bottom of the pan. As they bake, the fruit turns jammy and the sugar caramelizes into a sticky, glossy glaze. Flip it onto a plate and you’ve got a crown of ruby plum halves sitting on a tender, moist crumb. It looks like you fussed for hours when really, you just stirred things together in one bowl.
This classic plum cake recipe makes the perfect coffee cake for a slow Sunday morning, or a showstopper dessert when friends come over. Trust me on this one. I baked it four times in the last two weeks, just to make sure it was right before sharing it with you.
Classic Plum Cake Ingredients
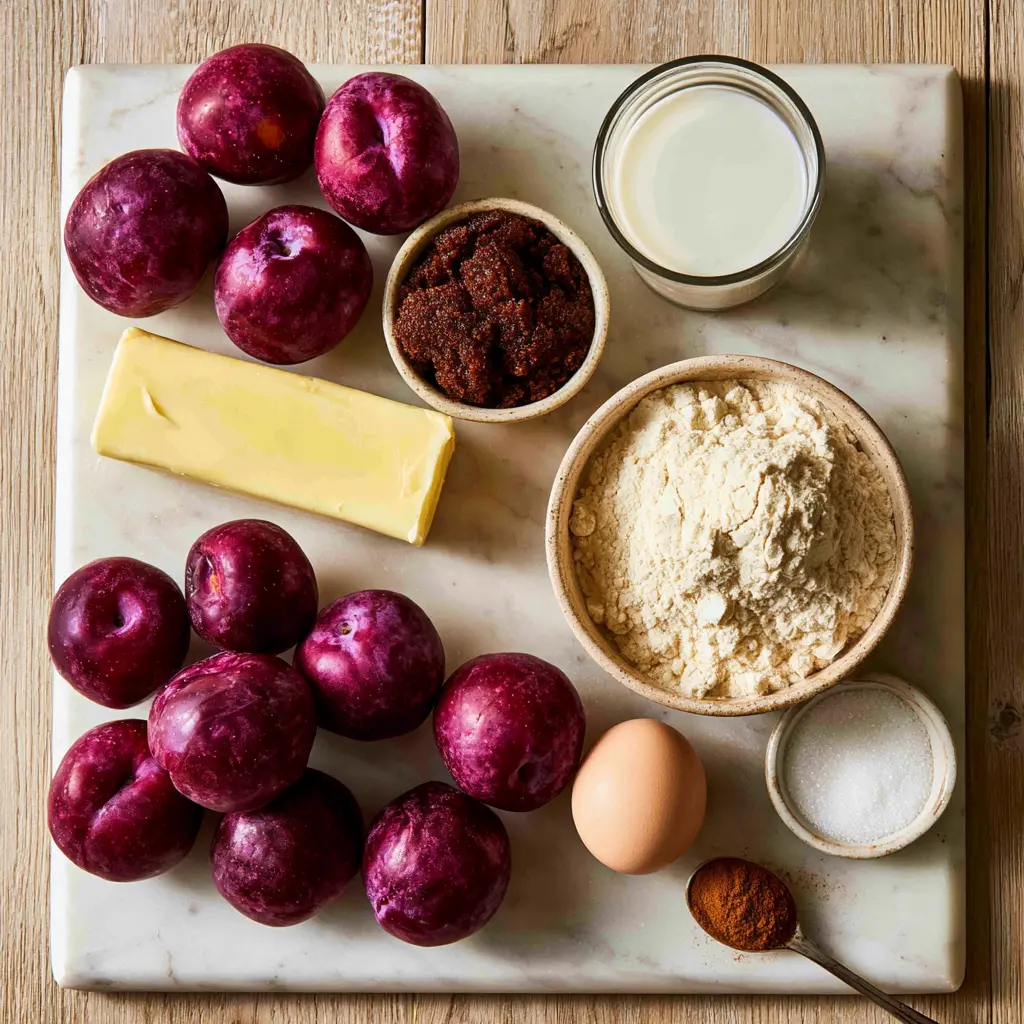
Fresh plums are the heart of this fresh plum cake, so choose them carefully. You want firm-ripe plums, not the soft squishy ones you snack on. Santa Rosa plums are my favorite here. They’re tart enough to balance the sweet batter, and they hold their shape beautifully in the oven. Italian prune plums work great too, if you can find them. That’s actually the traditional choice for German plum cake.
Here’s what you’ll need for the rest of the batter:
- Unsalted butter: 2 tablespoons melted for the pan, plus 1/2 cup melted for the batter
- Dark brown sugar: 1/4 cup packed, scattered in the pan to create that sticky topping
- All-purpose flour: 2 cups, sifted with the leaveners and spices
- Baking powder and baking soda: 1 teaspoon each, for the perfect lift
- Ground cinnamon, nutmeg, and allspice: the warm spice trio that makes this taste like fall baking
- Granulated sugar: 1 cup, for the batter
- One large egg and 1 cup whole milk: for richness and a tender crumb
The batter is wonderfully simple. No creaming method needed, no stand mixer. You sift the dry ingredients together, pour in the wet ingredients, and stir gently with a spatula until just combined. That’s it. The thick, glossy batter is supposed to look that way. It’s the secret to a classic plum cake with a sturdy, moist crumb that holds up to all those juicy plums.
One note on the spices. If allspice isn’t in your pantry, just use an extra 1/4 teaspoon of ground cinnamon instead. No one will know. I’ve done it plenty of times.
How to Make This Classic Plum Cake
This classic plum cake comes together in about 75 minutes, most of which is hands-off oven time. Here’s how the four major stages break down.
Stage 1: Prep the Pan and Arrange the Plums
Start by preheating your oven to 375°F (190°C), or 350°F (175°C) if you’re using convection. Butter a 9-inch round cake pan and line the bottom with parchment paper. This step matters more than you think. The parchment keeps the caramelized plum topping from sticking to the pan, so your cake releases cleanly when you invert it.
Drizzle the 2 tablespoons of melted butter into the bottom of the pan, then scatter the brown sugar evenly over it. Now arrange your plum slices in a snug, overlapping layer. I like to fan them out in a spiral pattern, but honestly, any arrangement works. Just make sure the bottom of the pan is fully covered. The plums will shrink slightly as they bake, so a snug layer is exactly what you want.
Stage 2: Make the One-Bowl Batter
In a large mixing bowl, sift together the flour, baking powder, baking soda, cinnamon, nutmeg, allspice, and salt. Then add the egg, milk, and remaining melted butter right on top of the dry ingredients. Stir gently with a spatula until just combined. Do not overmix. Overmixing develops gluten and makes the cake tough, and nobody wants a tough plum cake.
This batter will look thick, and that’s exactly right. It’s supposed to be more like a thick muffin batter than a pourable cake batter. That thickness is what keeps the plum slices from sinking and what prevents the fruit juices from making the cake soggy. The dense, buttery batter hugs the fruit instead of letting it fall to the bottom.
Stage 3: Assemble and Bake
Spoon the batter over the plums and use the back of the spoon to smooth it into an even layer. Don’t worry about spreading it perfectly. It will even out as it bakes. Pop the pan into the preheated oven and bake for 45 minutes, or until the cake is golden brown and a toothpick inserted in the center comes out clean.
If your plums were especially juicy, the cake might need a few extra minutes. That’s normal. Check it at 45 minutes, and if the center still looks wet, give it up to 10 more minutes. The fruit can release more liquid than you expect, and the cake needs time to catch up.
Stage 4: Cool and Invert
Here’s the part where patience pays off. Let the cake cool in the pan for exactly 30 minutes before inverting. If you flip it too soon, the caramelized topping will stick to the pan and you’ll lose those beautiful plum tops. Trust me, I learned this the hard way on my first attempt. The topping was delicious scraped off the parchment, but it wasn’t pretty.
To invert, place a serving plate over the top of the pan, hold them together firmly, and flip. Give it a gentle shake if needed. Lift the pan away, peel off the parchment, and admire that gorgeous, jammy plum topping. Serve warm or at room temperature. The smell alone will bring everyone into the kitchen.
Tips for the Best Sticky Plum Cake
Over years of baking with fresh fruit, I’ve learned a few things the hard way. Here are the tips that matter most for this moist plum cake:
❌ Using soft, overripe plums. They turn mushy and make the cake soggy.
✅ Use firm-ripe plums that hold their shape. Think Santa Rosa or Italian prune plums, not the dripping-ripe ones you eat over the sink.
❌ Overmixing the batter. It activates gluten and turns your cake tough.
✅ Stir gently with a spatula until the flour just disappears. A few lumps are totally fine.
❌ Inverting the cake too early. The topping will stick and you’ll lose the plums.
✅ Cool in the pan for exactly 30 minutes. Set a timer. That’s the sweet spot where the caramel sets enough to release cleanly.
❌ Using an 8-inch pan without adjusting the time.
✅ Add 5 to 7 minutes of baking time if you swap to a smaller pan. The batter is thicker and needs more time to bake through.
❌ Overcrowding the pan with too many plums. Too much fruit releases extra liquid, which can create a gummy middle.
✅ Use about 8 medium plums in that snug, single layer. And if you’re nervous, use fewer. The cake is forgiving either way.
❌ Skipping the parchment. You’ll regret it when the plums stick.
✅ Always line the bottom with parchment paper after buttering the pan. It makes release effortless.
If your plums are on the sweeter side, you can cut the granulated sugar down to 3/4 cup. The caramelized brown sugar on top will still give you that sticky, toffee-like finish.
Classic Plum Cake Variations
The beauty of this classic plum cake is how easily it adapts. I love a recipe that meets you where you are, whether that’s a different fruit or a different pan. Here are a few of my favorite variations:
- Different fruit: This batter works beautifully with peaches, nectarines, apricots, cherries, or even apples and pears later in the season. If you use canned or frozen fruit, drain it well first.
- Spice swaps: No allspice? Use an extra 1/4 teaspoon of cinnamon. Want more warmth? Add a pinch more nutmeg. The recipe welcomes small tweaks.
- Pan options: A 9-inch cake pan is ideal, but an 8-inch pan works if you add 5 to 7 minutes of baking time. A springform pan also works well and makes unmolding even easier.
- Almond flour twist (optional): If you want a denser, chewier crumb, you can replace half of the all-purpose flour with almond flour. This is an optional addition, not part of the base recipe, but it’s a lovely variation when you’re in the mood to experiment.
I’ll be honest, the base recipe is so good that I rarely change much. But it’s nice to know the options are there when you’re staring at a bowl of apricots wondering what to do with them. That’s the joy of stone fruit baking. One simple batter, a whole season of possibilities.
How to Store and Reheat Plum Cake
This classic plum cake keeps surprisingly well, which makes it great for making ahead. Here’s what I recommend:
- Room temperature: Store under a cake dome for up to 2 days. The topping will stay sticky and delicious.
- Refrigerator: Wrap it tightly and refrigerate for up to 5 days. The flavors actually deepen overnight as the caramelized plums settle into the crumb.
- Reheating: Pop individual slices in the microwave for 15 to 20 seconds. That revives the sticky texture and makes the plums jammy again. Cold slices are also excellent with a dollop of Greek yogurt.
If you’re serving this for company, you can absolutely bake it the day before. Just wrap it well once it’s completely cool, then reheat gently before serving. Nobody will ever guess it wasn’t baked that afternoon.
Classic Plum Cake Recipe FAQ
What to Serve with Classic Plum Cake
This classic plum cake is wonderful on its own, but a little something creamy takes it over the top. Here’s what I reach for:
- Lightly sweetened whipped cream: Classic, simple, and lets the caramelized plums shine.
- Crème fraîche: The tanginess is a perfect foil for the sweet, jammy topping.
- Greek yogurt: My breakfast choice. Cold, thick yogurt with a warm slice of this cake is unbeatable.
- A hot cup of coffee or spiced tea: This is the ultimate September coffee cake. The warm spices beg for a mug in your other hand.
Got a long weekend ahead? Perfect timing. This classic plum cake is a love letter to both the last of summer and the start of fall baking season. When you pull it out of the oven, golden at the edges and bubbling with jammy fruit, you’ll understand why it’s been a family favorite for generations.
Tag me when yours comes out of the oven. I want to see those caramelized plum tops. And if you’re looking for more seasonal baking ideas, follow me on Pinterest for recipes that celebrate the slow turn of the seasons.
Some cakes are made for September. This one is.
Source: Learn More About This Dish
What is traditional plum cake?
A traditional plum cake is a simple butter cake topped with fresh plum halves, popular across Europe in many forms. The German Zwetschgenkuchen uses tart prune plums on a yeast or shortcrust base, while the Italian version is more like a rustic torte. In America, the term usually means a golden cake studded with jammy plums and warm spices, just like this classic plum cake.
What is special about plum cake?
Plum cake is special because it captures that perfect sweet-tart balance. The plums turn jammy and caramelized in the oven while the butter cake underneath stays tender and moist. It’s also one of those rare bakes that feels fancy enough for dessert but casual enough for a morning coffee cake. The fruit does all the heavy lifting.
What’s the difference between a cake and a torte?
A torte traditionally uses more eggs and less flour than a standard cake, which gives it a richer, denser crumb. Many tortes also include ground nuts. That said, the terms are used loosely these days. The famous NYT plum torte is really more of a simple butter cake, and honestly, nobody cares what you call it once they taste it.
Where did the NYT plum torte recipe come from?
The New York Times plum torte was created by food writer Marian Burros and first published in 1983. It became a cult classic because the paper reprinted it every September for over 20 years after thousands of reader requests. That recipe is the reason so many of us associate plum torte with the start of fall baking season. This classic plum cake shares that same nostalgic spirit.
Can I use frozen plums?
Yes, but thaw them first and drain them very well. Frozen plums release a lot of liquid as they thaw, and too much moisture can make the cake soggy. Pat the slices dry with paper towels before arranging them in the pan. Fresh plums give the best texture, but frozen ones work in a pinch when plum season is long gone.
How should I store plum cake and how long does it last?
Keep this moist plum cake under a cake dome at room temperature for up to 2 days, or wrap it tightly and refrigerate for up to 5 days. To revive the sticky topping, microwave individual slices for 15 to 20 seconds before serving. The cake also freezes well for up to 3 months in individual slices.