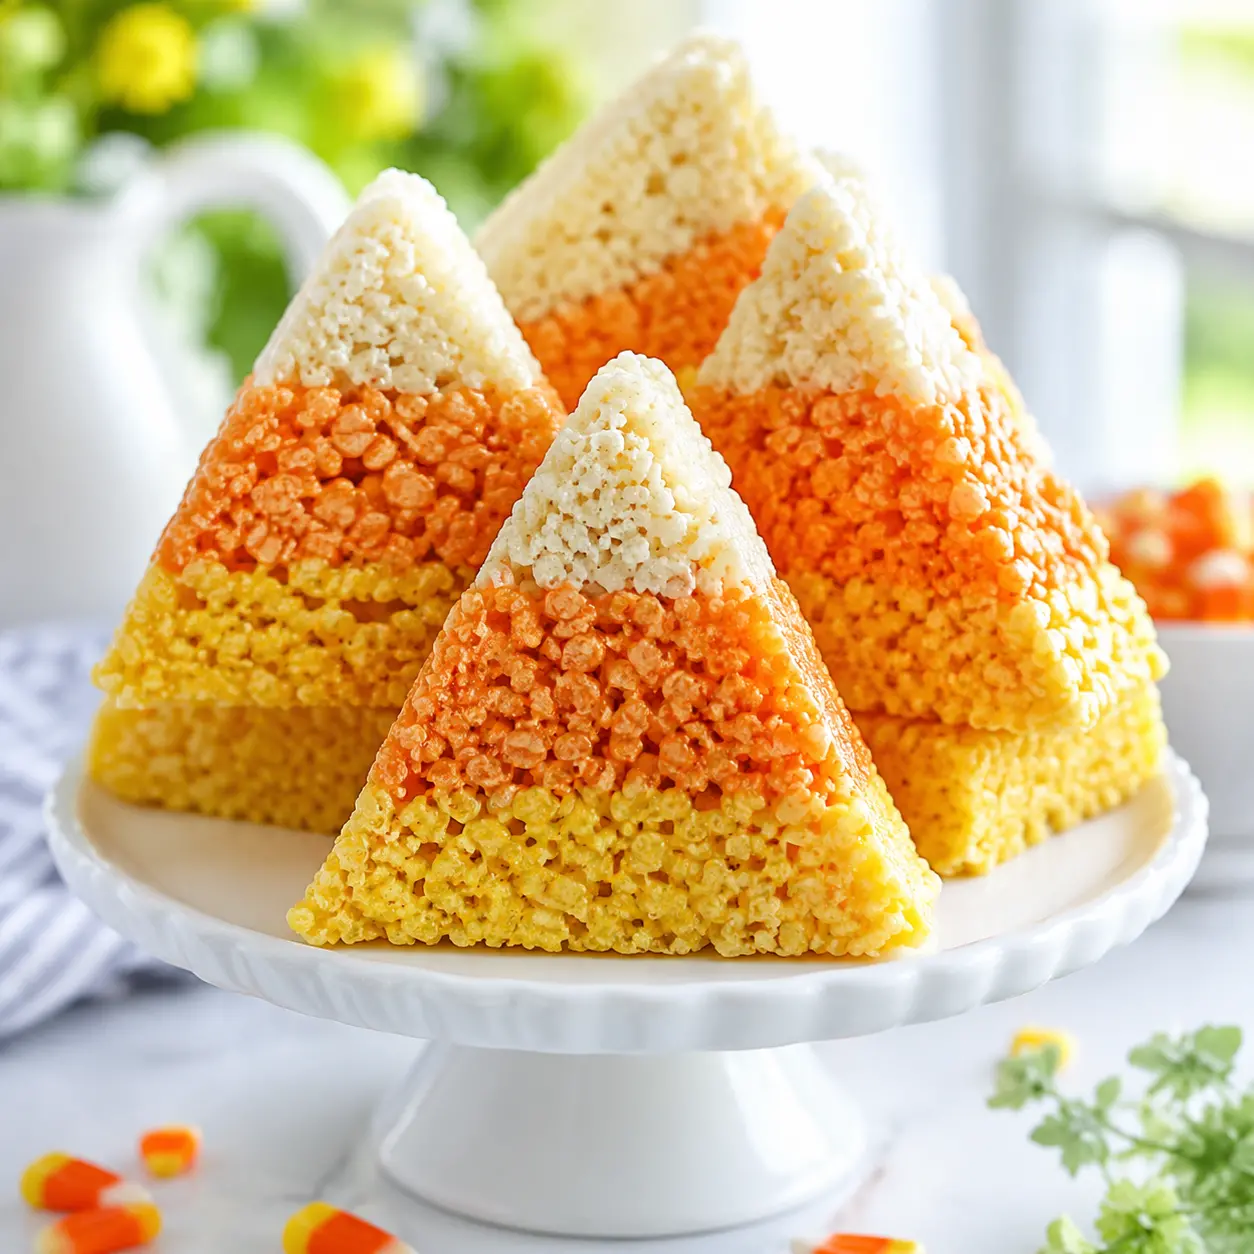
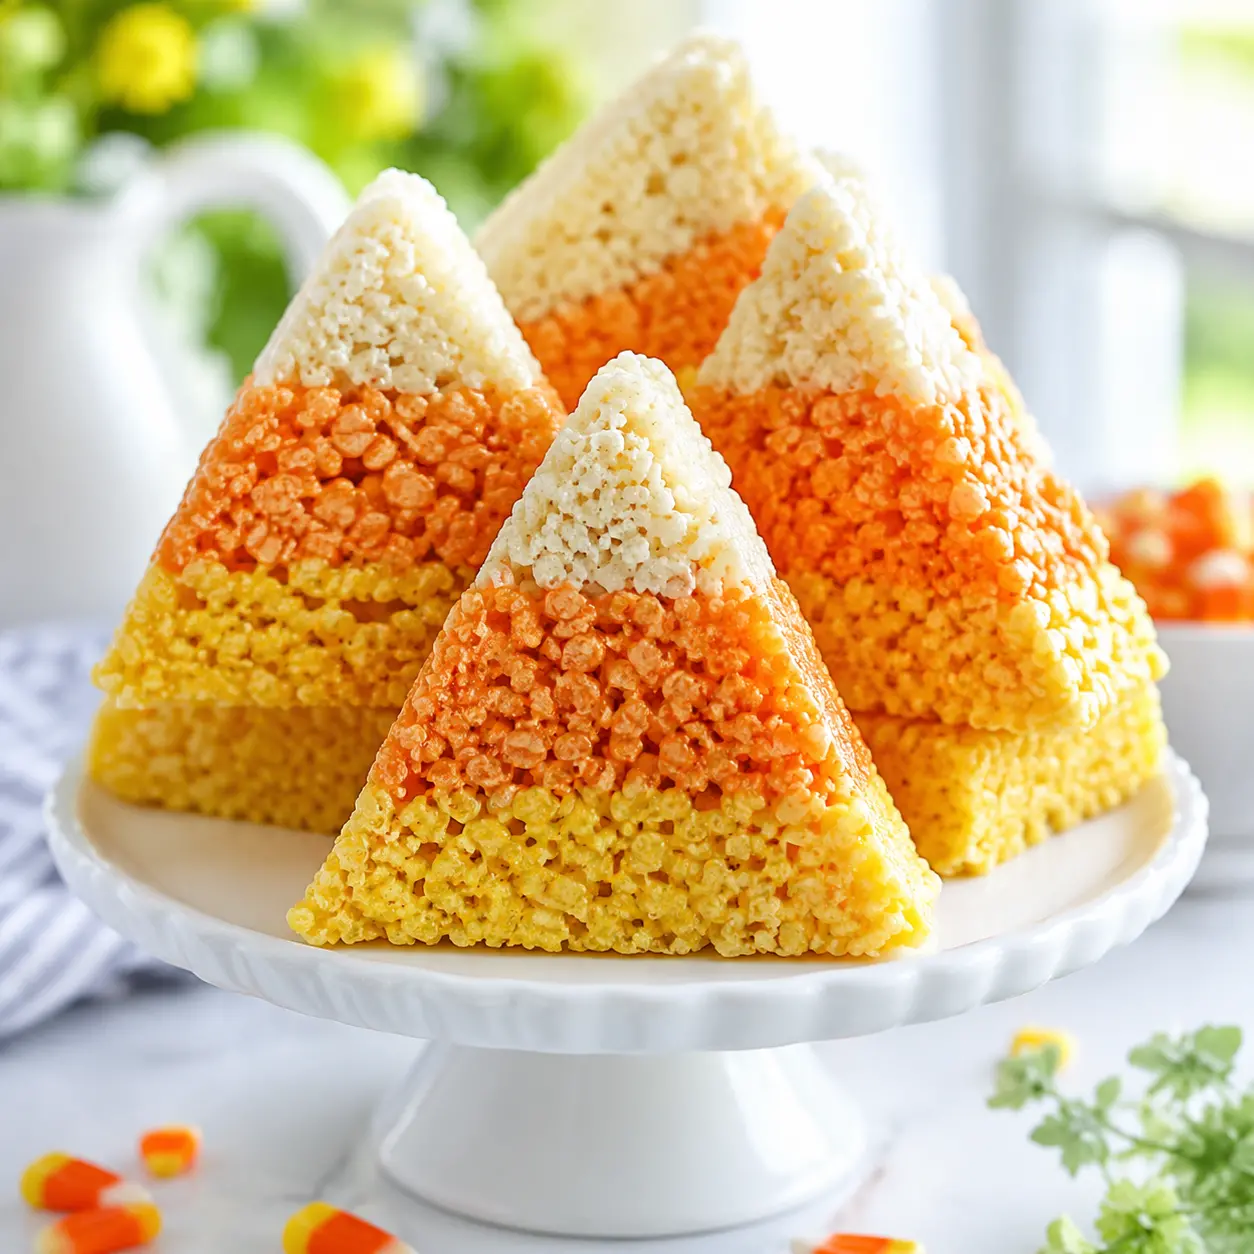
Candy Corn Rice Krispie Treats
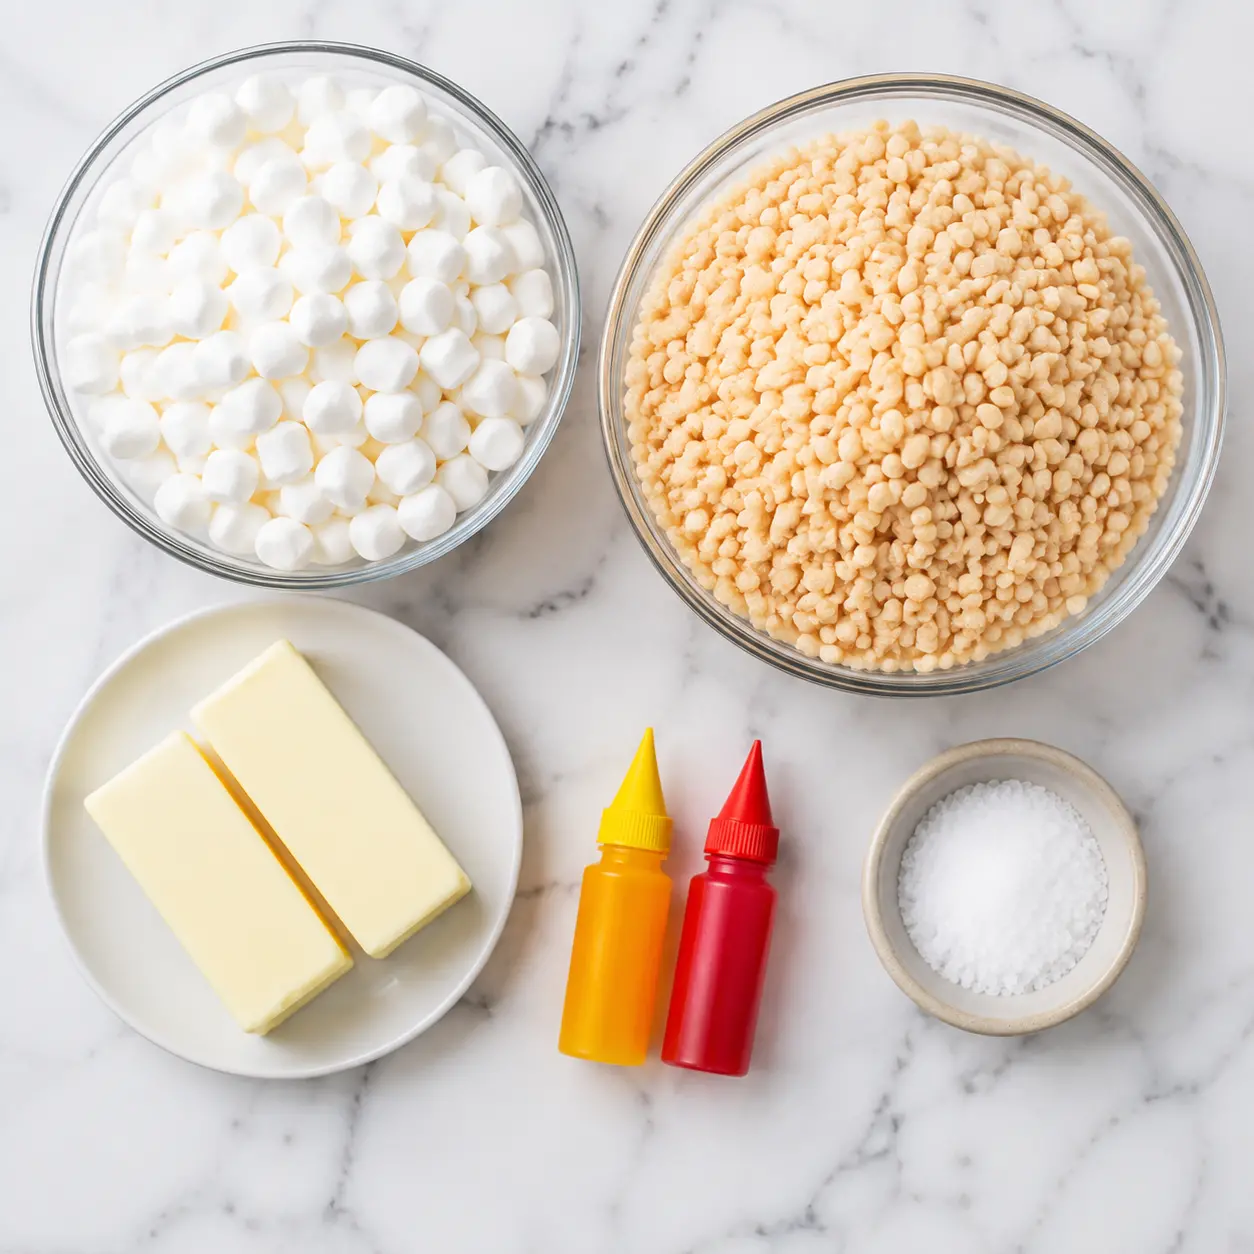
Ingredients
Method
- Coat a 9-inch round cake pan with nonstick cooking spray or rub the inside generously with extra butter.
- For the yellow layer, combine the first portion of marshmallows, butter, and salt in a large microwave-safe bowl. Microwave on high for 30 seconds, then stir. If it isn't completely smooth, heat in 15-second increments until melted. Mix in the yellow food coloring, then add the first amount of crisp rice cereal and stir until everything is well coated.
- With lightly buttered hands, press the yellow mixture around the sides of the pan to form a thick ring, packing it firmly against the edges.
- In the same bowl, make the orange layer using its ingredients and adding the red food coloring to turn it orange. Press this mixture into the pan just inside the yellow ring to create another circle.
- In a clean bowl, melt the remaining marshmallows, butter, and salt for the white layer. Fold in the remaining rice cereal and press the mixture into the center of the pan to fill the opening.
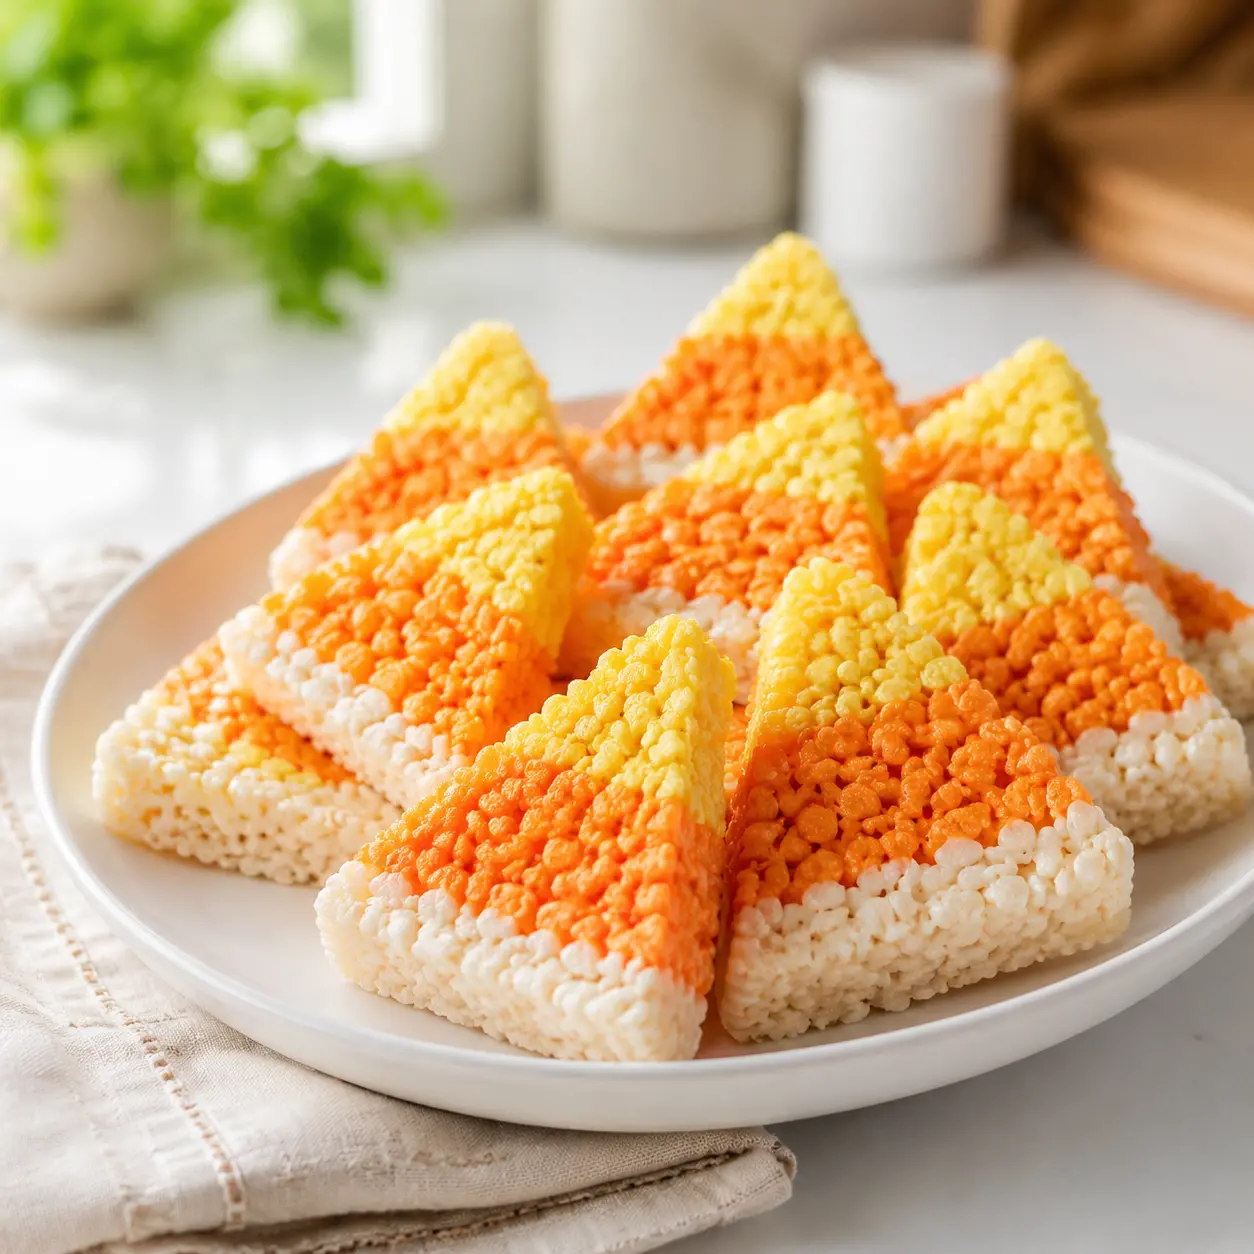
- Let the treat cool completely, at least 2 hours, then cut into triangles before serving.
Nutrition
Notes
Tried this recipe?
Let us know how it was!Why You’ll Love These Candy Corn Rice Krispie Treats
Every year I tell myself I’m going to be organized about Halloween. And every year, somehow, October 30th finds me staring at a store shelf of sad, overpriced party favors, wondering where I went wrong. Sound familiar? But honestly, these candy corn rice krispie treats changed everything for me. They’re the rare recipe that looks like you spent hours on it when the active time is like 20 minutes, maybe less if you’re not letting your kid “help” measure the marshmallows.
I know what you’re thinking. Another Pinterest fail waiting to happen, right? I’ve been there. My very first attempt at these was a disaster of epic proportions. The layers bled into each other, creating this weird, pinkish-brown blob that looked more like a science experiment than a fall dessert. But then I figured out the secret, and it’s so stupidly simple I almost didn’t believe it myself.
The magic? It’s all about letting each layer set in the fridge for a few minutes before you press in the next one. That’s it. That’s the whole trick. These festive halloween rice krispie treats are genuinely foolproof once you know this one little thing.
Here’s why you’ll love this recipe:
- **No oven required.** It’s a no-bake halloween dessert, perfect for those hot September days that pretend summer isn’t over.
- **Only 5 ingredients** (plus food coloring). Most of which you probably already have in your pantry right now.
- **Kid-approved and parent-approved.** It’s a fun, hands-on activity that doesn’t destroy the kitchen. Mostly.
- **Impressively cute.** These candy corn shaped treats get genuine “wait, you MADE those?” reactions at every single party.
These are my go-to for classroom halloween treats and halloween party snacks. They’re cute, portable, and don’t require a fork. What more could you want?
How to Make Candy Corn Rice Krispie Treats
Alright, let’s get into the actual process. The full recipe card is up above, so here I want to walk you through the why and how of each stage. Trust me, understanding the reasoning makes the whole thing way less stressful.
Stage 1: The Yellow Layer (Your Foundation)
First things first, coat a 9-inch round cake pan with nonstick spray or rub it generously with butter. Don’t skimp on this step. You’ll thank yourself later when the treats slide out without a fight.
Now, for the yellow layer. This is the layer that forms the outer ring of your candy corn shape, so it’s the biggest portion. You’re going to melt 2 1/2 cups of mini marshmallows with 2 tablespoons of butter and a big pinch of fine sea salt. Microwave in 30-second bursts, stirring between each, until it’s completely smooth.
Here’s a little secret that blew my mind the first time: the yellow layer uses yellow gel food coloring, sure, but the orange layer also starts with yellow! That’s the genius of this recipe. You mix the orange layer in the same bowl, and you only add 1 or 2 drops of red gel food coloring to turn it orange. Less dishes, less fuss. It’s the small wins that matter.
Once your marshmallow mixture is smooth and bright yellow, fold in 2 1/4 cups of crisp rice cereal. Stir until every piece is coated. You want it well mixed, but don’t overwork it into a dense paste. Light and fluffy is the goal.
Now for the fun part. With lightly buttered hands, press the yellow mixture around the edges of the pan to form a thick ring. Pack it firmly against the sides. You’re essentially building a bowl out of cereal.
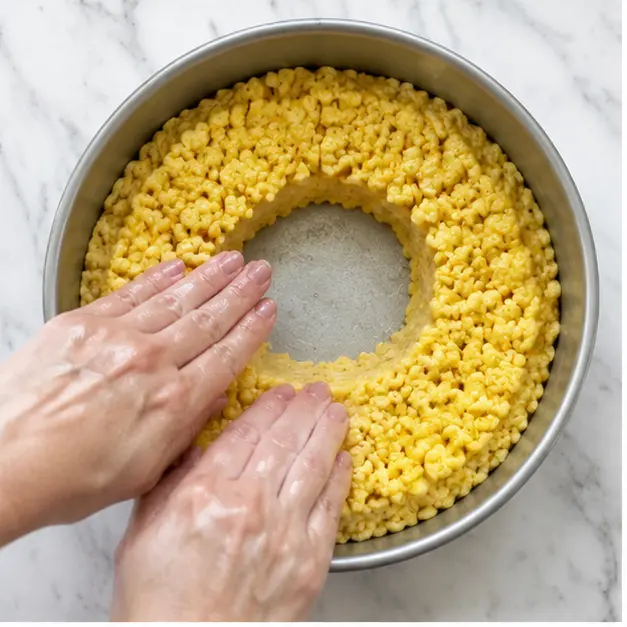
Stage 2: The Orange Layer
Here’s the part where my first batch went sideways. If you try to press the orange layer directly against the warm yellow layer, the colors will blend into a murky mess. Patience is key. Pop the pan in the fridge for about 10 minutes, or just let it sit until the yellow layer is set and isn’t sticky to the touch.
Once you’re ready, use the same bowl to make the orange layer. Melt 1 3/4 cups of marshmallows with 2 tablespoons of butter and a pinch of salt. Add your 5 drops of yellow gel food coloring and 1 to 2 drops of red. Start with 1 drop for a lighter orange, go with 2 if you want it deeper and more autumnal.
Fold in your crisp rice cereal. For this layer, you’ll need 1 1/4 cups plus 2 tablespoons. Press this mixture into the pan, just inside the yellow ring. Try to keep the circle as even as you can, so the final white center sits nicely in the middle.
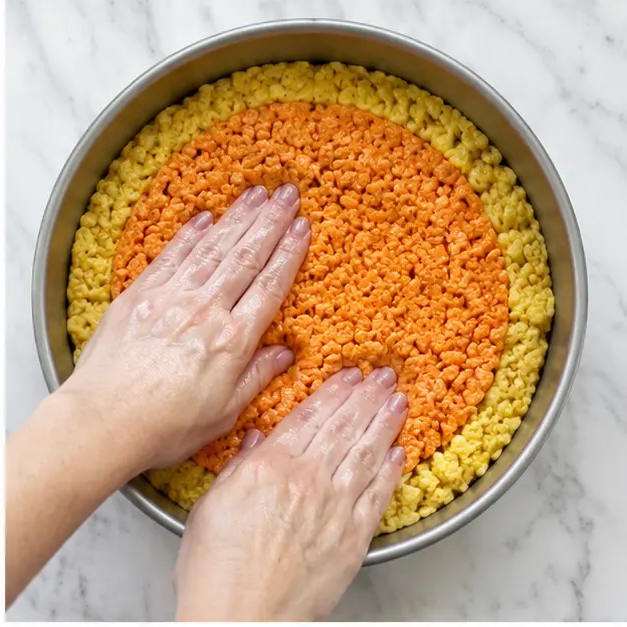
Stage 3: The White Center
Give that orange layer a few minutes in the fridge to set as well. This is the moment to be really careful. The whole design depends on these layers staying separate and distinct.
Now, grab a clean bowl. This is important. If you use the same bowl without washing it, you’ll get little bits of orange and yellow in your white layer, and the whole candy corn illusion falls apart. I learned this the hard way, of course.
Melt 3/4 cup of marshmallows with 1 tablespoon of butter and a pinch of salt. This layer is the smallest, so it needs the least of everything. Fold in 3/4 cup of crisp rice cereal and press the mixture into the center of the pan, filling the opening between the orange ring. You’re looking for a bullseye effect here.
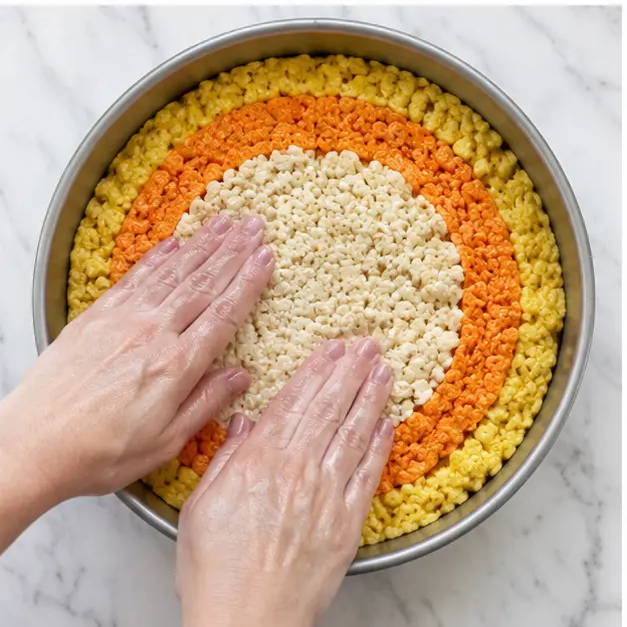
Stage 4: Cutting the Triangles
This is where the waiting game comes in, and trust me, it’s worth it. Let the layered rice krispie treats cool completely. I know, I know. You want to cut into them right away. I totally get it. But if you slice them too early, they’ll crumble and squish, and all your hard work will be ruined.
I usually let mine sit for at least 2 hours on the counter. If you want a firmer set, you can pop the whole pan in the fridge for about an hour. Then, the fun part. Run a sharp knife under hot water, dry it off, and slice the round into triangles, like you’re cutting a pizza. Wipe the knife clean between cuts for neat edges. That’s the trick for those clean, picture-perfect candy corn shapes.
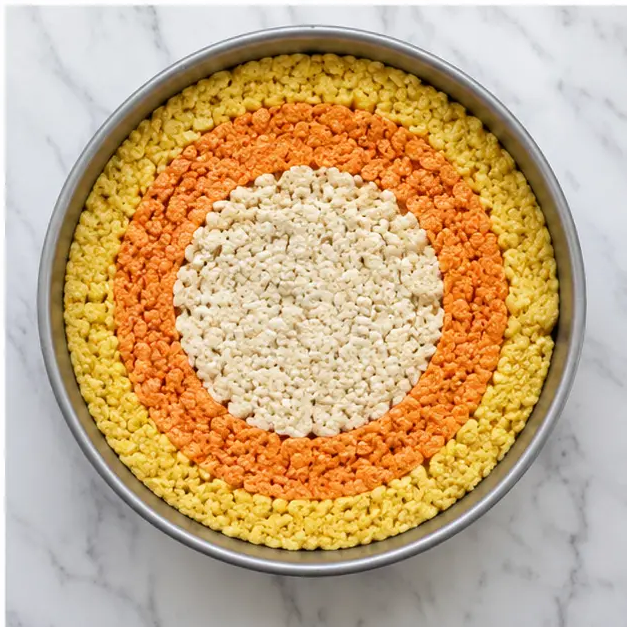
Tips for Making the Best Halloween Rice Krispie Treats
I’ve made these candy corn marshmallow treats more times than I can count, and I’ve picked up a few tricks along the way. These are the little details that separate a good batch from a great one.
Always Use Gel Food Coloring
Liquid food coloring is the enemy of these treats. It adds extra moisture to the marshmallow mixture, which can make the rice cereal soggy. Plus, the colors are just not as bright and vibrant. Gel food coloring is concentrated, so you get beautiful, bold colors without altering the texture.
- **Yellow:** 5 drops of yellow gel.
- **Orange:** 5 drops of yellow plus 1-2 drops of red. Start with 1 drop for a softer, more pastel orange.
Don’t Overheat the Marshmallows
This is probably the most common mistake. If you nuke the marshmallows for too long, they get stiff and hard, and your treats will end up dry and brittle instead of soft and chewy. Always microwave in 30-second intervals and stir between each. The residual heat will melt any remaining lumps. This trick works for all crispy rice cereal bars, so keep it in your back pocket.
Press Gently
You want to press the mixture firmly enough that it holds together, but gently enough that it stays light. Over-packing the cereal will result in rock-hard bars. Think of it like giving the mixture a firm hug, not a wrestling move.
If the mixture is sticking to your fingers, butter your hands again. Or, you can place a piece of parchment paper over the top and press down on that. It works like a charm and keeps your hands from looking like a gooey, marshmallow-y disaster.
Baking Halloween Treats with Kids
This is one of my favorite kids halloween baking activities. It’s messy, but it’s the good kind of messy. The measuring and pouring is easy enough for little hands, and pressing the layers into the pan is genuinely fun. My daughter loves getting her hands sticky and squishing the colorful mixture into place. Just lay down some newspaper or parchment paper on the counter first. You’ll be glad you did.
Crazy Good Variations to Try
One of the best things about this recipe is how easy it is to adapt. Here are some of my favorite ways to switch it up:
- **Swap the Colors:** Use green, purple, and orange for a spooky alternative. Or do a rainbow for a birthday party.
- **Add Mix-Ins:** Sprinkle in some Halloween M&Ms or white chocolate chips when you press the final layers.
- **Change the Shape:** Instead of triangles, use cookie cutters to cut the cooled rounds into ghost, pumpkin, or cat shapes. This is a great option for younger kids who might not be into the candy corn thing.
- **Go Brown Butter:** For an extra nutty, decadent flavor, brown your butter before adding the marshmallows. It takes the treats to a whole other level.
How to Store Candy Corn Rice Krispie Treats
Got leftovers? If you have any, that is. I find these cute halloween treats disappear fast. Store the treats in an airtight container at room temperature for up to 3 days. They’re honestly best served the same day you make them, when they’re at their peak of softness and chew.
If it’s hot out (looking at you, August), I recommend storing them in the fridge. The marshmallows can get a little soft and gooey in warm weather. While they’ll keep for up to 5 days in the fridge, I think they’re best within the first 2 days. The texture gets a bit more firm when chilled, which some people actually prefer, especially for cutting clean slices.
You can also freeze them for longer storage. Wrap the entire pan or individual triangles tightly in plastic wrap, then store in a freezer-safe bag for up to 6 weeks. To thaw, just leave them on the counter at room temperature. Honestly, they’re so good that they’ll probably be gone before you even have to think about freezing.
Serving Ideas for Halloween Parties
Presentation is everything, right? Here’s how I like to serve these candy corn rice krispie treats so they look extra special. If you’re serving these at a Halloween party, try this:
- **Line a platter** with parchment paper and arrange the triangles in a circular pattern. It looks super intentional and festive.
- **Wrap individual treats** in clear cellophane bags tied with orange and black ribbon. They make perfect party favors or classroom treats.
- **Serve on a stick.** Insert a lollipop stick into each triangle for a cute, portable dessert that’s perfect for little hands.
I love to pair them with a big bowl of apple cider. The flavors just work, and it makes for a super cute fall spread. This is one of my favorite fall baking ideas that doesn’t involve turning on the oven.
Frequently Asked Questions
Final Thoughts
Look, I know that making a layered treat can feel intimidating. There’s always that voice in your head whispering, “you’re going to end up with a single-colored mess.” But I’m telling you, with this candy corn rice krispie treats recipe, you’ve got this in the bag. The steps are simple, the payoff is huge, and the flavor is exactly that nostalgic, buttery, crispy-chewy magic we all grew up loving.
If yours come out looking more like candy-blob than candy corn, congratulations, you made it authentically. They’ll still vanish. There are no mistakes in my kitchen, just “rustic” treats.
When you walk into that classroom party with a plate of these halloween rice krispie treats, your kid is going to be SO proud. I can just see it now. You’ll be the parent who brought the best dessert, and honestly, it only took you 20 minutes of active time. It’s the kind of win that makes you feel like maybe you do have this whole parenting-slash-hosting-slash-adulting thing figured out after all.
Want more fall baking ideas and easy no-bake treats? Come hang out with me over on my Pinterest page where I’m constantly pinning new seasonal inspiration. I’d love to see how yours turn out!
Source: Learn More About This Dish
What food coloring is needed for these treats?
You’ll need gel food coloring in yellow and red. The yellow layer uses 5 drops of yellow. The orange layer uses 5 drops of yellow plus 1 to 2 drops of red. Gel is important because liquid coloring adds moisture that can make the cereal soggy.
How do you layer the colors without them mixing?
The secret is chilling each layer before adding the next. After pressing the yellow ring, refrigerate the pan for about 10 minutes until it’s set. Then add the orange layer, chill again, and finally press in the white center. Keeping the layers cool prevents the colors from bleeding together.
Can I make these ahead of time and store them?
Absolutely. Store them in an airtight container at room temperature for up to 3 days, or in the fridge for up to 5. They’re best within the first couple of days. You can also freeze them for up to 6 weeks, just thaw at room temperature before serving.
What is the trick to making these treats perfectly?
Don’t overheat your melted marshmallows. Microwave in 30-second intervals and stir between each burst. Also, let the treats cool completely for at least 2 hours before slicing. Use a buttered or wet knife, and wipe it clean between cuts for those neat edges.