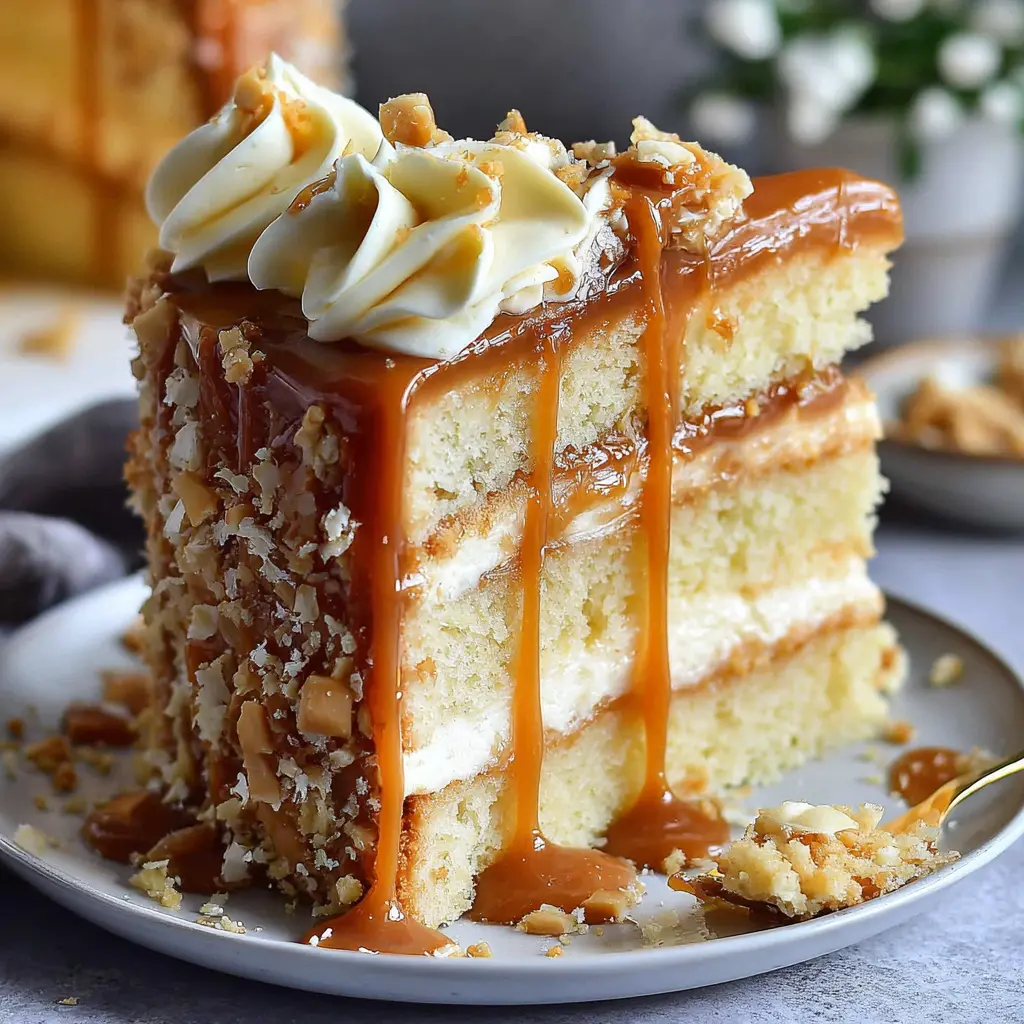
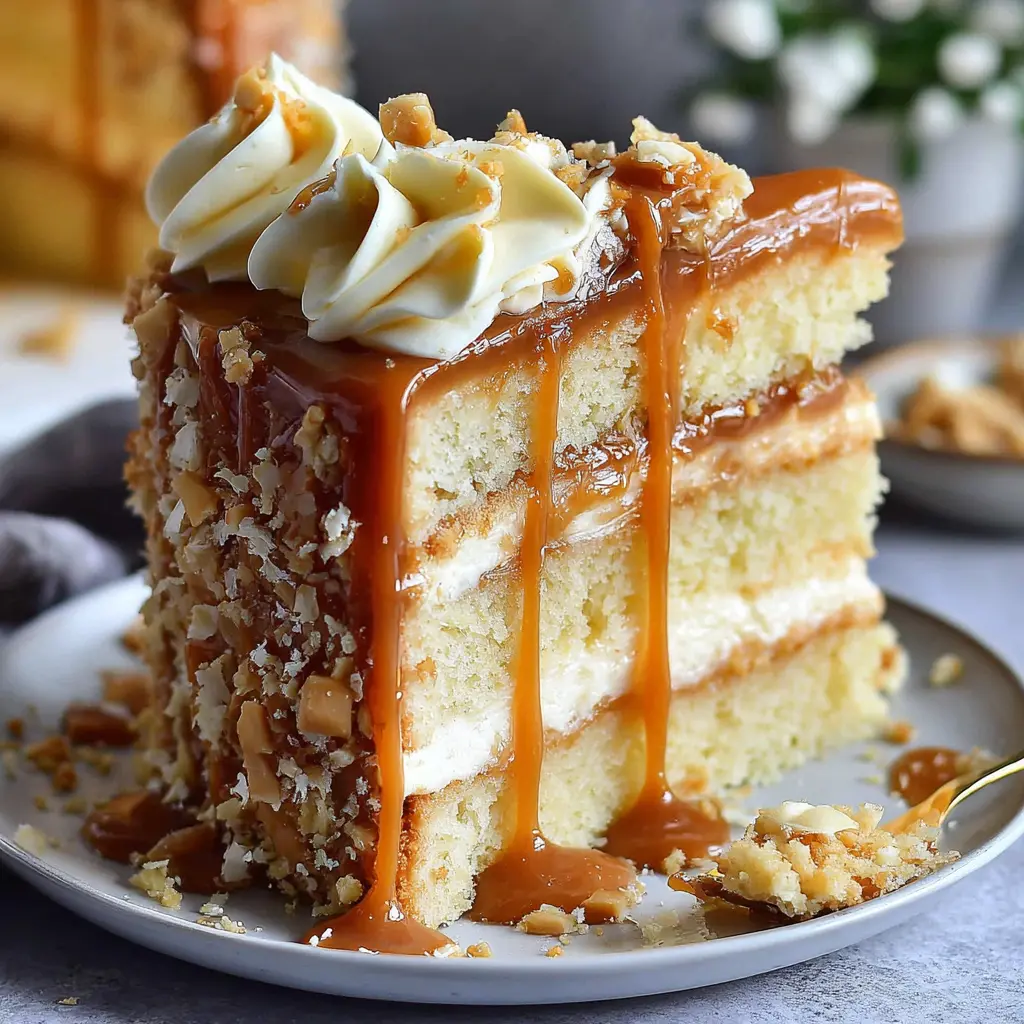
Rich Vanilla Caramel Cream Cake Recipe
Ingredients
Method
- Preheat your oven to 350°F (175°C). Grease and flour two 8-inch round cake pans, then line the bottoms with parchment paper and set aside. In a medium mixing bowl, cream together the butter and sugar until light and fluffy. Beat in the eggs one at a time, then continue mixing on high speed for about 3 minutes, until the mixture becomes pale and airy. Stir in the vanilla extract or paste. In a separate bowl, whisk together the flour, baking powder, and salt. Add the dry ingredients to the creamed mixture in three additions, alternating with the milk and beginning and ending with the dry mixture. Mix until just combined, being careful not to overbeat. Evenly divide the batter between the prepared pans and smooth the tops with the back of a spoon or spatula. Bake for 30 to 40 minutes, or until a toothpick inserted into the center comes out clean. Let the cakes cool in the pans for 5–10 minutes, then turn them out onto a wire rack to cool completely.
- For the frosting, beat the softened butter until smooth and fluffy. Gradually add the powdered sugar, one cup at a time, and mix until fully incorporated. Add ⅓ cup of the cooled caramel sauce and beat again until light and fluffy. If the frosting appears too thick, add 1 to 2 tablespoons of cream or milk to adjust the consistency.
- To assemble the cake, place one cake layer on a serving plate or cake stand. Use a fork to gently poke holes across the surface of the cake. Carefully pour about ⅓ cup of the caramel sauce over the top, allowing it to seep into the holes. Spread a thick layer of frosting over the caramel-soaked layer. Add the second cake layer on top, with the flattest side facing up. Repeat the process of poking holes, drizzling with the remaining caramel sauce, and spreading on the frosting. For an extra touch, sprinkle flaky sea salt over the top if desired.
Notes
Tried this recipe?
Let us know how it was!Remember That Caramel Cake You Always See in Bakery Windows?
I do. I used to walk past this little bakery near my old apartment in Portland, and there it was. A tall, glorious thing with caramel dripping down its sides like it was melting in slow motion. I’d press my nose to the glass like a kid and think, “I could never make that.” And honestly? The first two times I tried, I was right. I ruined the caramel. It seized up, turned into a gritty, crystallized mess. I almost gave up. But then I figured out the trick. And now? One bite of this Vanilla Caramel Cream Cake and you’ll never buy a store cake again. It’s that good.
Why This Vanilla Caramel Cream Cake Works
This isn’t just another layer cake recipe. The magic here is in the balance. You’ve got a soft, tender vanilla cake that’s moist enough to stand up to a rich caramel frosting without falling apart. The cake itself uses buttermilk, which reacts with the baking powder to create a super soft crumb. And the caramel? It’s not that scary, complicated thing you think it is. Caramel is just sugar and cream. It’s magic, not math. I promise you can do this.
I also love that this recipe feels special. It’s the kind of cake you make for Mother’s Day or a spring brunch. It looks like you spent all day on it, but the actual hands-on time is pretty reasonable. You can even make the caramel sauce a day ahead. That’s a game changer if you’re busy.
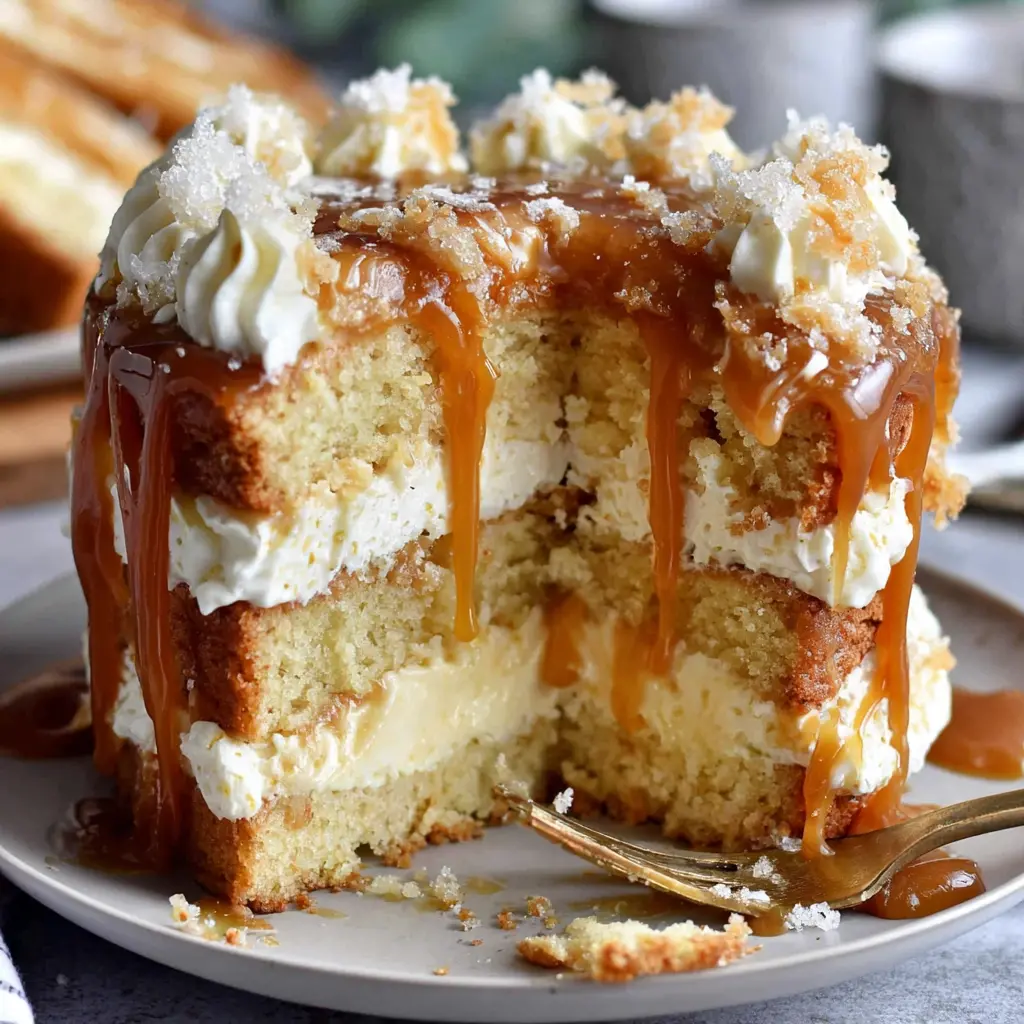
Key Ingredients for the Cake
Let’s talk about what goes into this cake. You probably have most of this stuff already. That’s one of the things I love about it. It’s not asking you to hunt down weird ingredients at a specialty store.
Unsalted Butter. Make sure it’s softened. Not melted, not cold. Softened butter creams with the sugar properly and traps air, which gives you a lighter cake. If you forget to take it out of the fridge, cut it into small cubes and let it sit for 15 minutes. That usually does the trick.
Buttermilk. This is the secret to a moist vanilla cake. The acid in buttermilk tenderizes the gluten, so you get a soft, fine crumb. Don’t have buttermilk? You can make a quick substitute by adding a tablespoon of lemon juice or white vinegar to a cup of whole milk. Let it sit for 5 minutes. It’ll thicken and curdle a bit. That’s exactly what you want.
Vanilla Extract. Use the real stuff. Not imitation. It makes a difference here because the vanilla flavor really shines through. I always keep a big bottle from Costco in my pantry.
Eggs. Room temperature eggs are crucial. They emulsify into the batter much better than cold eggs. Just put them in a bowl of warm water for 5 minutes before you start. Easy.
How to Make Vanilla Caramel Cream Cake
I’m not going to rewrite the recipe card here. That’s what the recipe card is for. But I do want to walk you through the process so you know what to expect. It’s not complicated, but a few things make a big difference.
First, cream the butter and sugar until it’s light and fluffy. This takes about 3 to 4 minutes with an electric mixer. Don’t rush it. You want it to look pale and almost like a thick paste. Then add the eggs one at a time, beating well after each. Scrape down the bowl. I always forget to do this, and then I find a pocket of butter at the bottom. So don’t be like me. Scrape the bowl.
Now here’s the important part. Alternate adding the dry ingredients and the buttermilk. Start with flour, add half the buttermilk, then more flour, then the rest of the buttermilk. End with flour. Mix just until combined. Overmixing develops gluten, and that makes a tough, dense cake. We don’t want that. Mix until the last streak of flour disappears, then stop. I mean it. Stop.
Divide the batter evenly between two 9-inch cake pans. I use a kitchen scale to make sure they’re equal. It’s a little extra effort, but it means your layers bake evenly. Bake at 350°F for about 25 to 30 minutes. You’ll know they’re done when a toothpick inserted in the center comes out clean, or when the cake springs back when you lightly touch it.
Caramel Frosting Recipe
This caramel frosting is the star of the show. It’s made with granulated sugar, butter, heavy cream, and a little vanilla. That’s it. Four ingredients. But you have to be patient.
The key to caramel is controlling the sugar crystals. If any undissolved sugar gets into the pot while it’s boiling, it can cause the whole thing to seize. So here’s what I do. I put the sugar in a heavy-bottomed saucepan, and I don’t stir it. I just let it melt over medium heat, swirling the pan occasionally. It’ll start to melt around the edges first. Be patient. It takes a few minutes.
Once the sugar is completely melted and a deep amber color (think the color of a copper penny), you add the butter. Be careful here. It will bubble up and steam. That’s normal. Stir it until the butter is melted. Then slowly pour in the heavy cream while stirring. Again, it will bubble up. Keep stirring. Let it boil for one minute, then remove it from the heat and stir in the vanilla.
Let the caramel cool for about 15 to 20 minutes before you use it. It needs to thicken up. If it’s too thin, it will just run off the cake. If it’s too thick, you can reheat it gently or stir in a little more cream.
Common Mistakes & Fixes
Mistake: The caramel is grainy or crystallized.
Solution: This usually happens if you stirred the sugar while it was melting or if a sugar crystal fell into the pot. Next time, just swirl the pan. Don’t stir. If it’s already grainy, you might be able to save it by adding a little water and reheating gently, but honestly, it’s often better to start over.
Mistake: The caramel is too thin.
Solution: Let it cool longer. It thickens as it cools. If it’s still too thin after 20 minutes, you can simmer it for another minute or two to evaporate more water.
Mistake: The caramel is too thick.
Solution: Reheat it gently in the microwave for 10-second intervals, stirring in between. Or add a tablespoon of heavy cream and stir it in. It will thin right out.
Mistake: The cake layers are dry.
Solution: You probably overbaked them. Check them at 22 minutes next time. Also, make sure your buttermilk is fresh. Old buttermilk loses its acidity and doesn’t tenderize the cake as well.
Tips for the Best Cake
I’ve learned a few things over the years. Here are the ones that make the biggest difference.
Room temperature ingredients are not optional. I know, I know, it’s annoying to plan ahead. But cold butter doesn’t cream properly, and cold eggs can cause the batter to curdle. Just set everything out an hour before you start. It’s worth it.
Don’t overmix the batter. I already said this, but I’ll say it again. Mix until the flour disappears. Then stop. If you see a few tiny lumps, that’s fine. They’ll bake out.
Level your cake layers. Once the cakes are completely cool, use a serrated knife to cut off the domed tops. This gives you a flat surface for stacking. You can also use unflavored dental floss to slice the layers in half if you want four thin layers instead of two thick ones. Just wrap the floss around the cake, cross the ends, and pull. It’s so satisfying.
Do a crumb coat. Before you do the final layer of frosting, spread a thin layer all over the cake. This traps the crumbs so they don’t show up in the final coat. Chill the cake for 15 minutes after the crumb coat. Then do the final frosting. It looks so much cleaner.
Use the caramel drip technique. For that bakery look, let the caramel drip down the sides of the cake. Spoon it around the edge and let it fall naturally. Then fill in the top. It looks amazing with very little effort.
Frequently Asked Questions
How to Store and Freeze Leftovers
This cake is pretty forgiving when it comes to storage. If you’re going to eat it within a couple of days, just keep it in an airtight container at room temperature. The caramel will stay soft and the cake will stay moist. If you need it to last longer, move it to the fridge. It’ll be fine for up to a week. Just take it out about 30 minutes before you serve it so it can come back to room temperature.
For freezing, I recommend freezing the cake layers before you frost them. Wrap each layer tightly in plastic wrap, then in foil. They’ll keep for about 3 months. When you’re ready to use them, thaw them overnight in the fridge. Then make the caramel and frost the cake. It’s like having a homemade cake kit ready to go.
If you have leftover cake slices, you can freeze those too. Wrap each slice in plastic wrap and then put them in a zip-top bag. They’re perfect for a random Wednesday night when you need a little something sweet.
Reheating and Serving Suggestions
Honestly, this cake is best at room temperature. But if you want a warm slice, you can microwave it for about 10 to 15 seconds. Just enough to soften the caramel and make the cake a little warm. Don’t overdo it, or the caramel will get runny.
For serving, a slice of this Vanilla Caramel Cream Cake is pretty perfect on its own. But if you want to go all out, serve it with a scoop of vanilla ice cream or a dollop of lightly sweetened whipped cream. A few fresh berries on the side are nice too, especially in the spring. Raspberries or strawberries add a little tartness that cuts through the sweetness.
I also love this cake for brunch. It sounds a little decadent, but trust me. A slice with a cup of coffee is a beautiful thing. Your guests will think you’re a pastry chef.
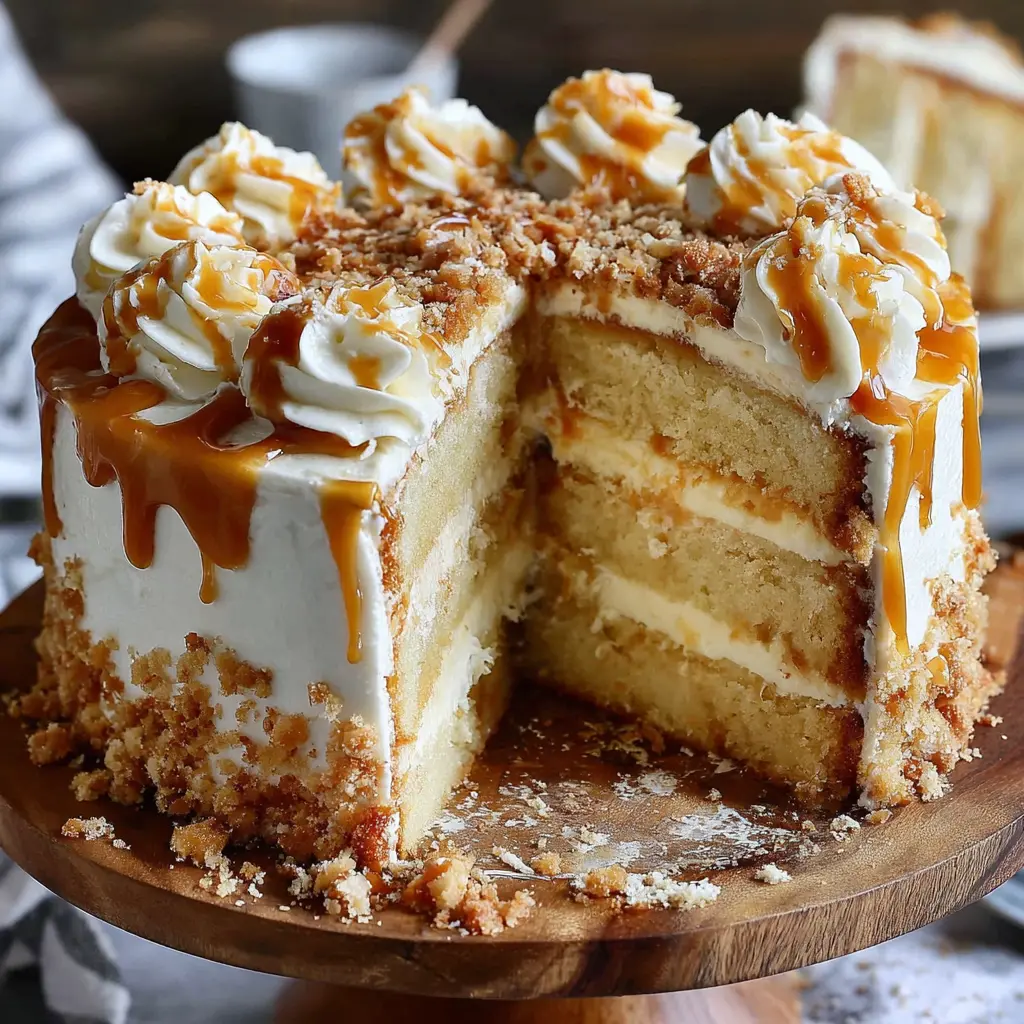
Go Ahead, Be the Hero of Your Kitchen
When you slice into this cake at your Mother’s Day brunch, and everyone gasps a little, and your mom maybe even cries happy tears (it’s happened, I’m not kidding), you’ll know it was worth every minute. The caramel dripping between the layers, the cream frosting snow white, that first bite where the soft crumb meets the rich, buttery caramel. It’s a moment.
I want to see it. Tag me if you share a photo. I want to celebrate with you. And if you need more inspiration, check out my Pinterest boards for more spring baking ideas. Go ahead. Be the hero of your kitchen. You’ve got this.
Source: Nutritional Information
How do you store Vanilla Caramel Cream Cake?
This cake can sit at room temperature in an airtight container for a couple of days. After that, pop it in the fridge. It’ll last up to a week. Just let it come to room temperature before serving for the best texture.
What do I do if my caramel is too thin?
Let it cool down more. Caramel thickens significantly as it cools. If it’s still too thin after 20 minutes, you can simmer it for another minute to evaporate some water. Or just stir in a little more cream and let it cool again.
What do I do if my caramel is too thick?
Gently reheat it. You can microwave it in 10-second bursts, stirring each time, or warm it on the stovetop over low heat. Stir in a tablespoon of heavy cream to thin it out. Easy fix.
Why is my caramel gummy and chewy once set?
You overheated it. Caramel that’s cooked too long becomes hard and chewy. Next time, cook it only until it reaches a thick, pourable consistency. Watch it carefully. It goes from perfect to overdone quickly.
Can I make this Vanilla Caramel Cream Cake ahead of time?
Absolutely. You can bake the cake layers a day ahead and wrap them tightly in plastic wrap. The caramel sauce can also be made a day ahead and stored in the fridge. Reheat it gently before frosting the cake.
Can I freeze this cake?
Yes. You can freeze the unfrosted cake layers for up to 3 months. Wrap them well in plastic wrap and then foil. Thaw overnight in the fridge before frosting. The frosted cake can also be frozen, but the caramel might weep a little when thawed.
What if I don’t have buttermilk?
No problem. Add a tablespoon of lemon juice or white vinegar to a cup of whole milk. Let it sit for 5 minutes. It will thicken and curdle slightly. That’s your buttermilk substitute. Works every time.
Can I use a different pan size?
You can use three 8-inch pans for thinner layers, but reduce the baking time to about 20 to 22 minutes. Or use a 9×13-inch pan for a single-layer sheet cake. Bake that for about 35 to 40 minutes.