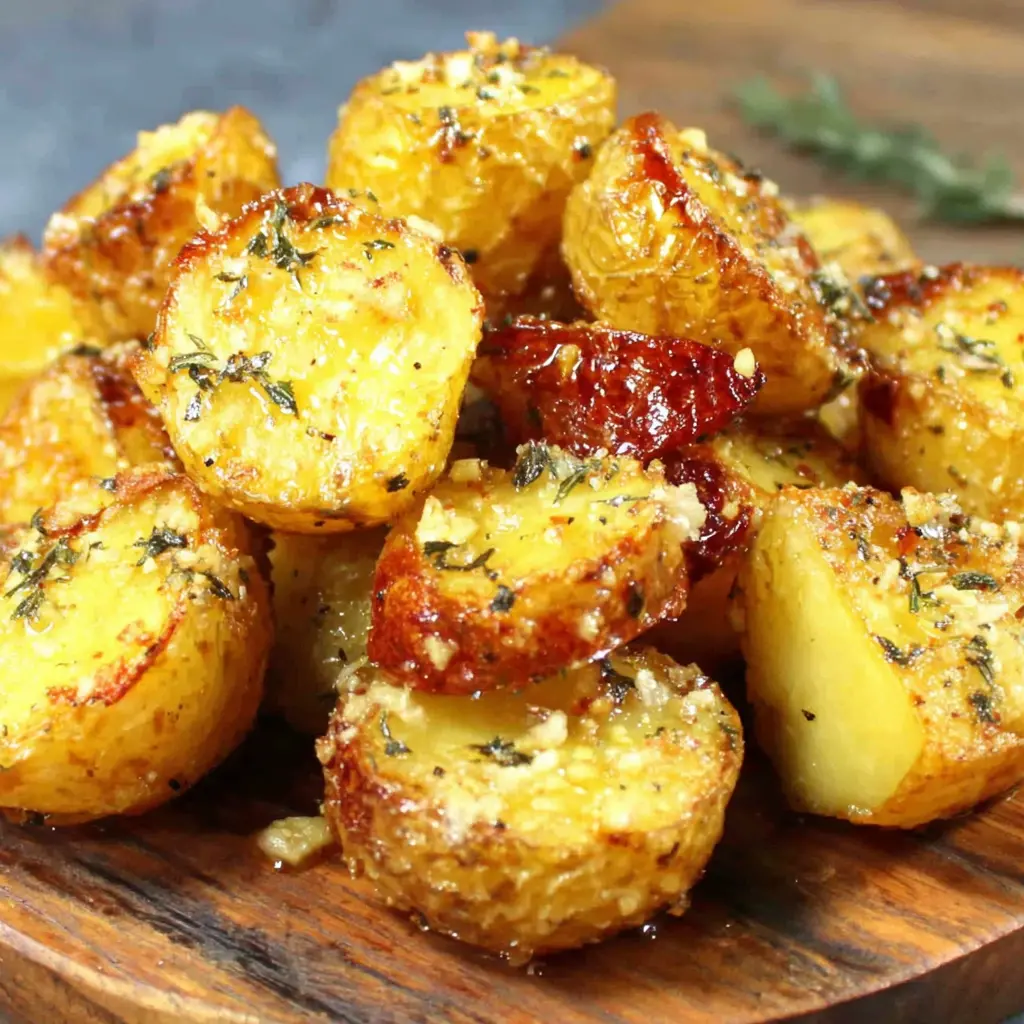
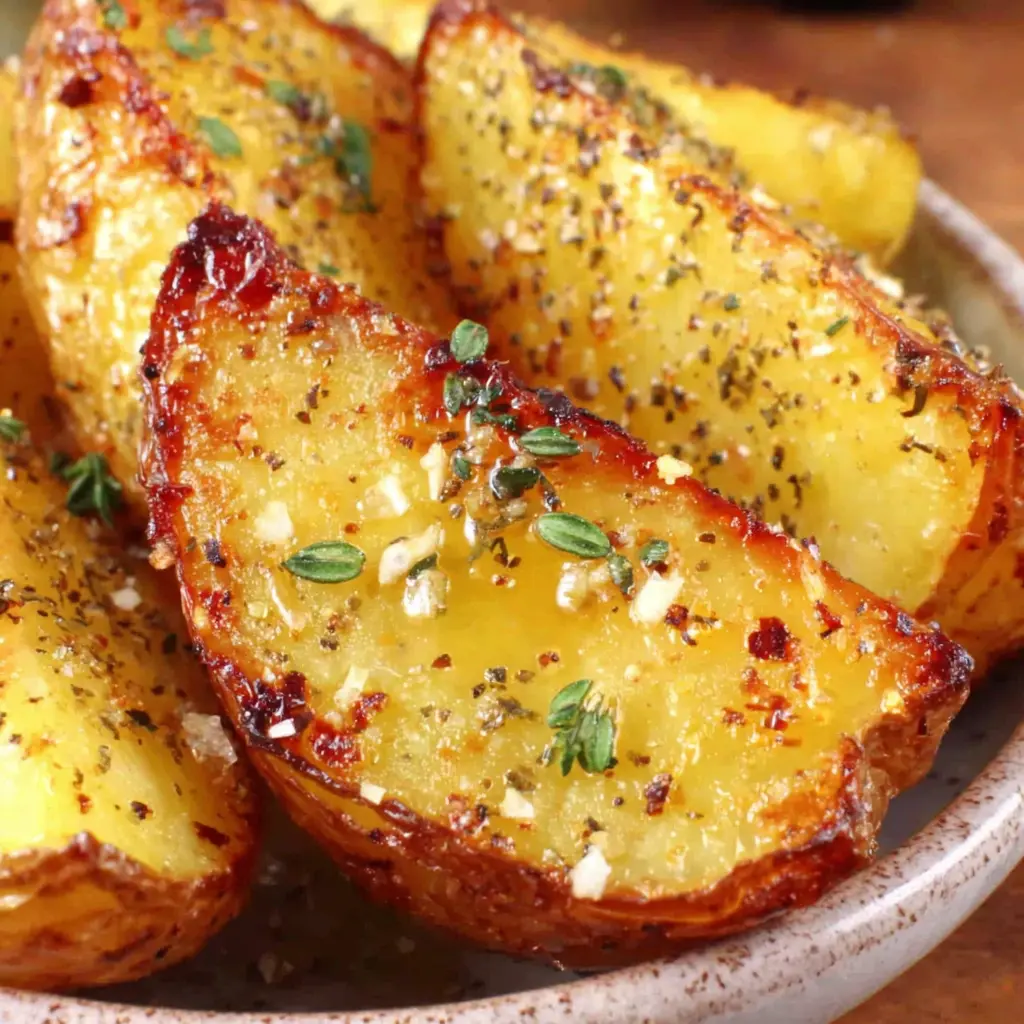
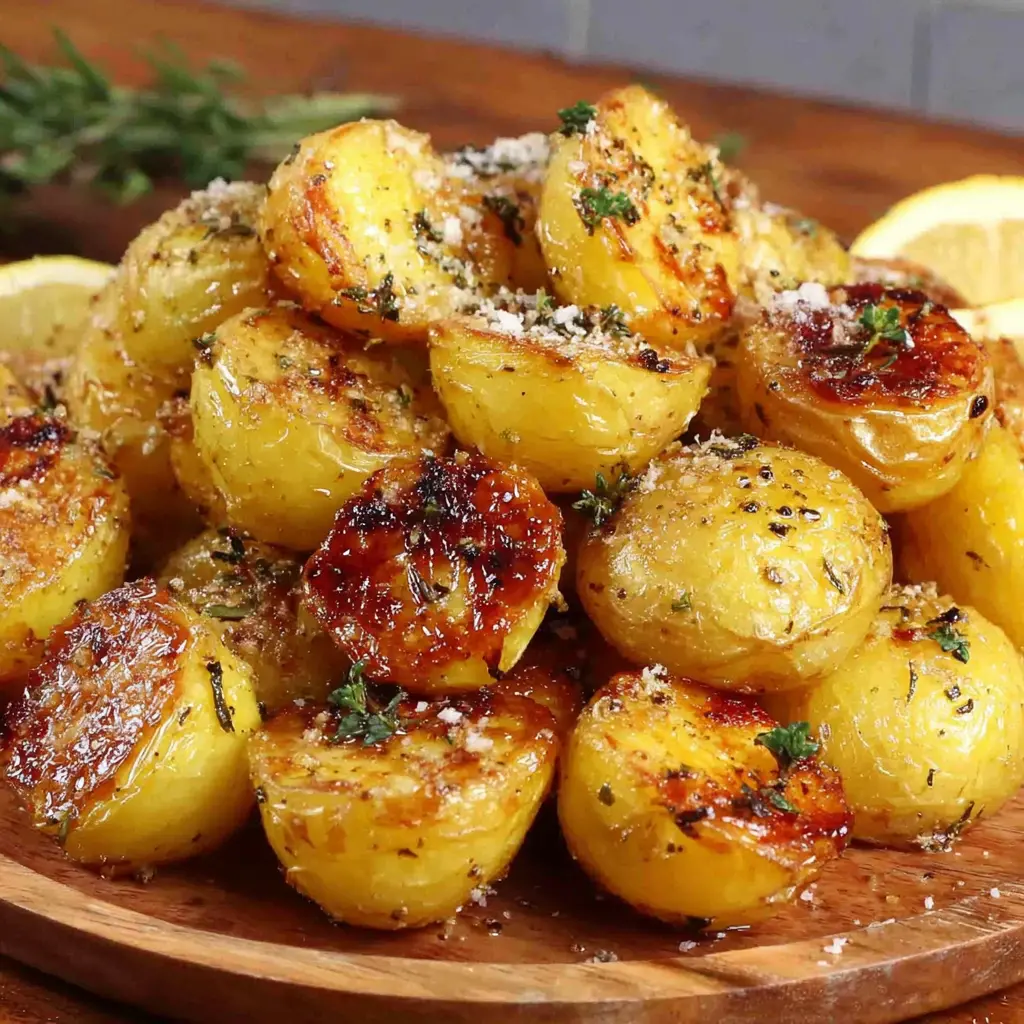
Crispy Lemon Garlic Roasted Potatoes
Ingredients
Method
- Preheat your oven to 400°F (200°C). Set your oven rack in the middle position.
- Wash and dry the potatoes. Cut into wedges or large chunks about 2 inches each. Soak in cold water for 15 minutes if time allows, then drain and dry thoroughly.
- In a large bowl, whisk together olive oil, lemon juice, minced garlic, dried oregano, salt, and pepper.
- Add the potatoes to the bowl and toss until each piece is coated with the marinade.
- Spread the potatoes evenly in a roasting pan. Pour the broth around the potatoes (not over them).
- Cover the pan loosely with aluminum foil and roast for 30 minutes.
- Remove the foil and roast uncovered for another 30-40 minutes, tossing gently halfway through, until potatoes are golden and crispy on the edges.
- Check doneness by piercing with a fork; potatoes should be tender inside.
- Optionally sprinkle extra oregano and a squeeze of lemon juice before serving. Serve warm.
Nutrition
Notes
Tried this recipe?
Let us know how it was!Why Are My Roasted Potatoes Never Crispy Enough?
You know that frustration. You spend time chopping, tossing, and roasting. You pull the pan out of the oven, and instead of golden, crackly edges, you’re looking at pale, sad, slightly steamed potatoes. I’ve been there. More times than I want to admit.
The thing is, getting that perfect crust on a Roasted Lemon Garlic Potatoes dish isn’t about some secret ingredient you have to hunt down. It’s about a few simple techniques that most recipes just gloss over. I used to skip them, and my potatoes were always just okay. Not great. Just okay.
Then I figured out the real trick. It’s not just high heat, though that helps. It starts with a little water bath first. Parboiling. I know, it sounds like an extra step you don’t have time for. But trust me, it’s the difference between mediocre and memorable. And when you add bright lemon and savory garlic to the mix? Oh, this is going to be so good, I can already tell.
Why This Recipe Works
So what makes these roasted lemon garlic potatoes different from every other batch you’ve tried? Let me break it down. It’s not magic, it’s just a little bit of science and a whole lot of testing. I ruined many batches before I learned these simple tricks.
First, we parboil the potatoes. This softens the outer layer just enough so that when you toss them with oil, the edges rough up. More rough edges mean more surface area, which means more spots for browning. It’s like creating a thousand little nooks and crannies for the oil and seasoning to grab onto.
Second, we use a combination of lemon juice and zest. The juice gives you that bright, acidic punch that cuts through the richness of the olive oil. The zest? That’s where the real lemon flavor lives. It’s more aromatic, more intense. And it doesn’t make the potatoes soggy the way too much juice can.
And third, we roast at 425°F. This high temperature is key to achieving a crispy skin while keeping the inside fluffy and soft. It’s the sweet spot. Not so hot that the garlic burns before the potatoes are done, but hot enough to get that deep golden color you’re after. I can smell that garlic from here, and it smells like home.
Ingredients You’ll Need
Before we get to the how, let’s talk about the what. The ingredient list for these garlic and lemon potatoes is short, which is part of the beauty. But each one plays a specific role.
- Yukon Gold or baby potatoes: These are my go-to. Yukon Golds have a buttery, creamy texture that holds up well to roasting. Baby potatoes are great too, especially if you want to skip the chopping. They’re naturally sweet and have a thin skin that crisps up beautifully.
- Extra virgin olive oil: Don’t skimp here. You need enough oil to coat every piece. It’s the carrier for all that flavor, and it’s what helps the potatoes brown. Use a good one, it matters.
- Garlic: Fresh garlic, minced or finely grated. I use a microplane for this. It dissolves into the oil and coats the potatoes evenly, so you don’t end up with one piece that’s overloaded and another that’s bland.
- Lemons: You’ll need both the juice and the zest. One lemon usually gives you about 2 tablespoons of juice and a good teaspoon of zest. Roll the lemon on the counter before juicing to get the most out of it.
- Dried oregano: This is my secret weapon. It adds an earthy, slightly floral note that pairs perfectly with the lemon. If you have fresh oregano, even better, but dried works great here.
- Salt and black pepper: Kosher salt is best for roasting. It’s easier to pinch and distributes more evenly. Don’t be shy with it. Potatoes need salt to taste like themselves.
- Vegetable or chicken broth: This is the liquid for the braising step. It adds flavor and helps the potatoes cook through without drying out. I usually use vegetable broth to keep things vegetarian.
How to Make Roasted Lemon Garlic Potatoes
Alright, let’s get to it. The process is straightforward, but I want to walk you through each step so you understand why we’re doing what we’re doing. No mysteries, just good cooking.
Step 1: Prep and Parboil
Start by washing your potatoes. If you’re using Yukon Golds, cut them into chunky pieces, about 1.5 inches. If you’re using baby potatoes, you can leave them whole or halve the larger ones. The key is uniform size so they cook evenly.
Put the potatoes in a large pot and cover them with cold water. Add a generous pinch of salt. Bring it to a boil and let them cook for about 7 to 10 minutes. You want them just tender enough that you can slide a knife through without resistance, but not so soft that they’re falling apart. Drain them well. Let them sit in the colander for a minute or two to steam dry. This is important. Excess water is the enemy of crispiness.
Step 2: Create the Crust
While the potatoes are still warm, return them to the pot or transfer them to a bowl. Add your olive oil, lemon zest, minced garlic, dried oregano, salt, and pepper. Toss everything together gently. You’ll see the edges start to rough up and get a little fuzzy. That’s exactly what you want. That’s where the crunch comes from.
Step 3: The Braise and Roast
Preheat your oven to 425°F. Spread the potatoes in a single layer on a baking sheet. Don’t overcrowd them, folks. If they’re too close together, they’ll steam instead of roast. Pour the broth into the pan, being careful not to wash the seasoning off the potatoes. The broth should come about a quarter of the way up the potatoes.
Roast for 20 minutes. Then, give them a stir and flip them over. Roast for another 15 to 20 minutes. The liquid should be mostly evaporated by now, and the potatoes should be golden and crispy on the outside. If they need a few more minutes, give them 5 more. No one’s timing is exact.
Step 4: Finish and Serve
Once the potatoes are done, squeeze the lemon juice over the top. Toss them gently to coat. The acid at the end wakes everything up. Transfer them to a serving dish and garnish with a little fresh parsley if you have it. Serve hot. They’re best right out of the oven, when the edges are still crackling.
Tips for the Best Potatoes
Over the years, I’ve picked up a few tricks that make a real difference. These aren’t just nice-to-haves. They’re the little things that separate a good batch from a great one. Let me share what I’ve learned.
Use the right potato. Starchy potatoes like Yukon Golds or Russets are best for roasting. They absorb flavor better and get fluffier on the inside. Waxy potatoes like reds can work, but they won’t be as creamy. I usually go for Yukon Golds. They’re my favorite.
Don’t skip the parboil. I know it’s tempting, especially when you’re short on time. But if you skip it, you’ll lose that crackly crust. The parboil softens the exterior, which then roughs up when you toss it with oil. More surface area means more browning. It’s non-negotiable.
Use a microplane for the garlic. Finely grated garlic dissolves into the oil and coats every piece evenly. If you use chopped garlic, it can burn in the oven. Grated garlic is more forgiving. It melts into the background and flavors everything without leaving those bitter, burnt bits.
Don’t overcrowd the pan. This is probably the most common mistake. If the potatoes are crowded, they’ll steam instead of roast. Use a large baking sheet, and make sure there’s space between each piece. If you’re doubling the recipe, use two pans.
Stir them halfway through. This ensures even browning and prevents the garlic from burning. Use a spatula to flip each piece. You want all sides to get a chance at the heat.
Let them rest. After you add the lemon juice, let the potatoes sit for a minute or two before serving. This lets the flavor soak in. But don’t wait too long. They’re best hot and crispy.
Flavor Variations to Try
Once you’ve mastered the basic recipe, you can start playing around. This lemon garlic seasoning is a great base, but it’s also a canvas for other flavors. Here are a few of my favorite twists.
- Herb Garden: Swap the dried oregano for fresh rosemary or thyme. Add them at the beginning of the roasting time. The herbs will crisp up and add a wonderful aroma.
- Mediterranean Twist: Add a teaspoon of ground cumin and a pinch of smoked paprika to the oil mixture. It gives the potatoes a warm, earthy flavor that’s perfect with grilled meats.
- Feta Finish: Crumble feta cheese over the hot potatoes just before serving. The salty, creamy cheese is a perfect contrast to the bright lemon and crispy edges.
- Spicy Kick: Add a pinch of red pepper flakes with the garlic. It’s not overwhelming, just a little warmth that builds as you eat.
Common Mistakes to Avoid
Common Mistakes & Fixes
Mistake: The potatoes are soggy, not crispy.
Solution: You likely overcrowded the pan or skipped the parboil. Make sure the potatoes are in a single layer with space between them. And don’t skip the parboil. It’s the foundation of the crust.
Mistake: The garlic is burnt and bitter.
Solution: Your oven temperature might be too high, or you added the garlic too early. Try adding the garlic halfway through the roasting time instead of at the start. You can also use a microplane to grate it finely, which helps it dissolve instead of burn.
Mistake: The potatoes are dry and hard.
Solution: You might have cooked them too long or at too high a temperature. Check your oven with a thermometer; it might be running hot. Also, make sure you have enough broth in the pan during the braising step. The liquid helps them cook through without drying out.
Mistake: The flavor is only on the surface.
Solution: This is where the parboil and the broth come in. When you parboil, the potatoes absorb some of the salted water, seasoning them from the inside out. And the broth adds flavor as they braise. Make sure you’re using enough salt in the water and a flavorful broth.
Storage and Reheating
If you have leftovers, and that’s a big if, here’s how to handle them. These roasted lemon garlic potatoes are best fresh, but they can be revived with a little know-how.
Storage: Let the potatoes cool completely, then transfer them to an airtight container. They’ll keep in the fridge for 3 to 5 days. I don’t recommend freezing them. The texture changes after thawing, and they won’t be as good.
Reheating: The best way to reheat them is in the oven. Spread them on a baking sheet and warm them at 350°F for about 10 minutes, flipping them halfway through. This helps restore some of the crispiness. If you’re in a hurry, you can use the microwave, but they won’t be as crispy. Microwave in short 10 to 20 second bursts at 50% power.
Serving: These potatoes are incredibly versatile. They’re perfect alongside grilled chicken, roasted fish, or a simple steak. I love them with a spring salad and a glass of lemonade. They also make a great addition to a holiday brunch table. Trust me, they’ll disappear fast.
Frequently Asked Questions
Final Thoughts
When you make these roasted lemon garlic potatoes, you’ll see how easy it is to get that perfect crunch. It’s not about being a professional chef or having fancy equipment. It’s about understanding a few simple principles and trusting the process. Once you nail this, you’ll never go back to plain roasted potatoes again. I promise.
I’d love to hear how they turned out. Tag me in your photos or leave a comment below. And if you’re looking for more inspiration, check out my Pinterest boards. I share tons of variations there. Now go make the best roasted potatoes of your life. You’ve got this.
Source: Health & Nutrition Research
How do I keep the Roasted Lemon Garlic Potatoes from drying out?
Make sure you’re using enough broth during the braising step. If your oven runs hot, add a little more liquid. I also recommend using an oven thermometer to check the actual temperature. And don’t over-roast them. They’re done when they’re golden and tender.
Why are my Roasted Lemon Garlic Potatoes not crispy?
The most common culprit is overcrowding the pan. The potatoes need space to brown, not steam. Also, make sure you parboiled them and let them steam dry before adding the oil. And check your oven temperature. 425°F is the sweet spot for crispiness.
Can I freeze these taters for later?
I don’t recommend it. Freezing changes the texture of the potatoes, making them mealy and soft when thawed. They’re best enjoyed fresh or within a few days of making them. If you have a lot, consider sharing them with a neighbor.
Can I double the recipe for a crowd?
Absolutely. Just make sure you use two baking sheets instead of one. Overcrowding is the enemy of crispiness. You might need to rotate the pans halfway through roasting to ensure even browning. The cooking time should stay about the same.