Classic Ghost Meringue Cookies
Ingredients
Method
- Separate the cold eggs one at a time, dropping each white into a very clean, dry mixing bowl. If any yolk or grease touches the whites, start again. Refrigerate the yolks for another use and let the whites sit at room temperature for about 30 minutes before beating.
- Beat the egg whites and cream of tartar on high speed until soft peaks form. Add the sugar slowly, one tablespoon at a time, beating constantly, until the meringue is glossy and holds stiff peaks. Rub a small amount between your fingers to check that it feels smooth, then beat in the vanilla.
- Preheat the oven to 200 degrees F. Line two baking sheets with parchment paper, using a dab of meringue under each corner to help the paper stay flat.
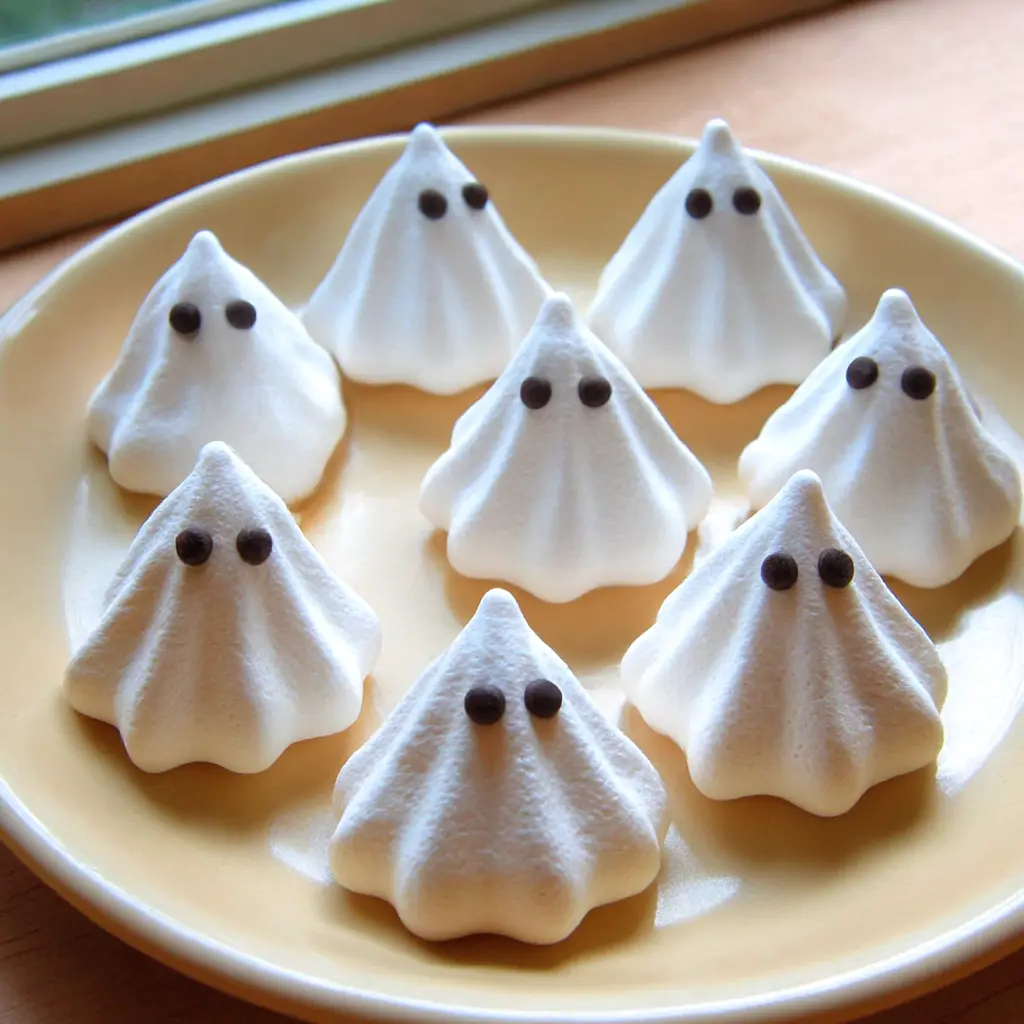
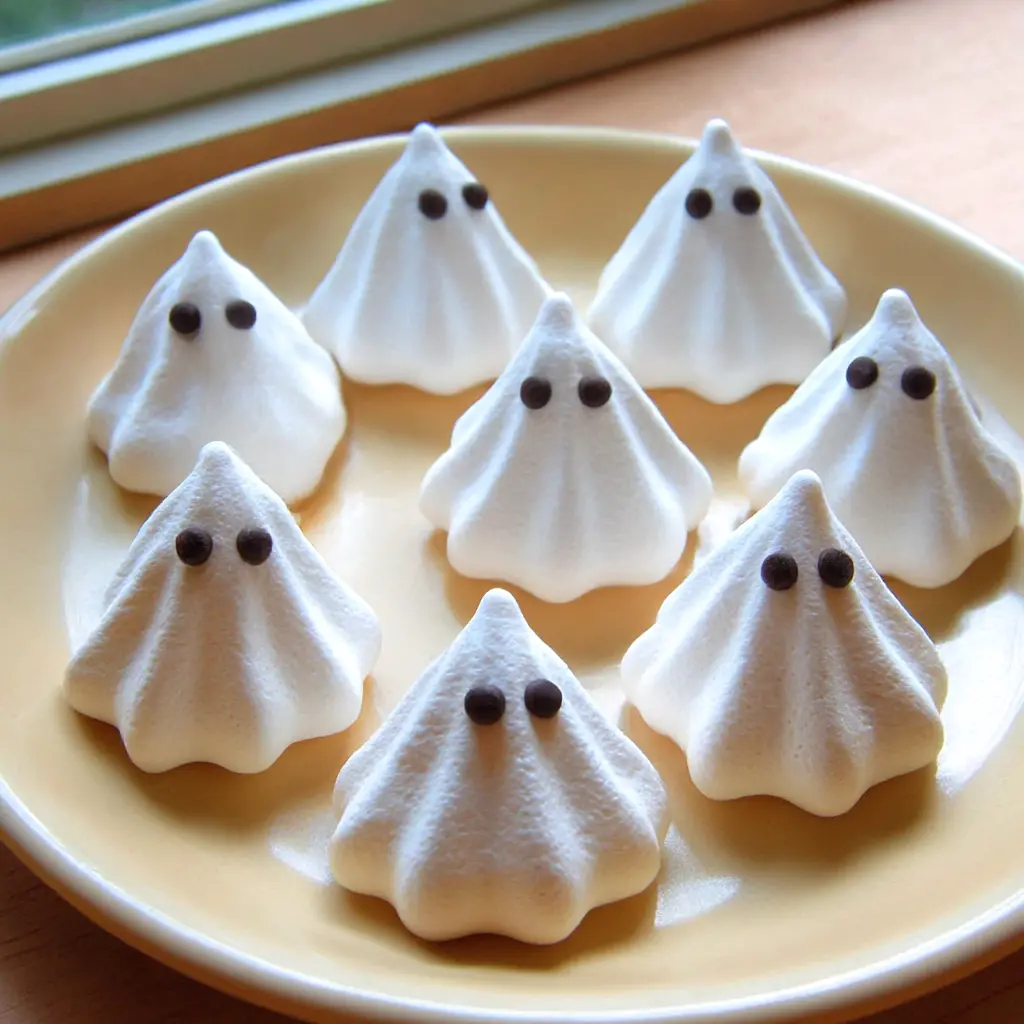
- Spoon the meringue into a large piping bag, or into a gallon-size zip-top bag with a 1/2-inch opening snipped from a lower corner. Pipe freeform ghost shapes about 2 inches wide and 3 to 4 inches tall, spacing them 2 inches apart. Gently press two miniature chocolate chips into each ghost for eyes.
- Bake for about 1 1/2 hours, rotating and swapping the baking sheets halfway through, until the ghosts are lightly golden and dry. Turn off the oven and leave the meringues inside with the door closed for 1 hour before removing them to cool completely.
Nutrition
Notes
Tried this recipe?
Let us know how it was!Why These Ghost Cookies Are Worth Starting Now
Halloween is officially 66 days away, and I know what you’re thinking. “Madison, it’s August. Relax.” But hear me out.
These ghost meringue cookies look like they came from a fancy bakery case, but they’re secretly five simple ingredients and embarrassingly easy. If the word meringue makes you nervous, stay with me. I spent years convinced it was reserved for pastry chefs with fancy thermometers and endless patience.
My first attempt at meringue ghosts was a disaster. Angry blobs. Lopsided, grumpy, and slightly terrifying in the wrong way. Derek called them “expressive.” But after a few batches, I cracked the code, and I promise, anyone can make these.
Plus, practicing now means you’ll be the person who brings homemade Halloween magic to the party instead of a last-minute bag of candy. That’s the goal, right?
Ingredient Notes: Simple but Not Boring
You need five things for these ghost meringue cookies, and you probably have most of them in your kitchen right now.
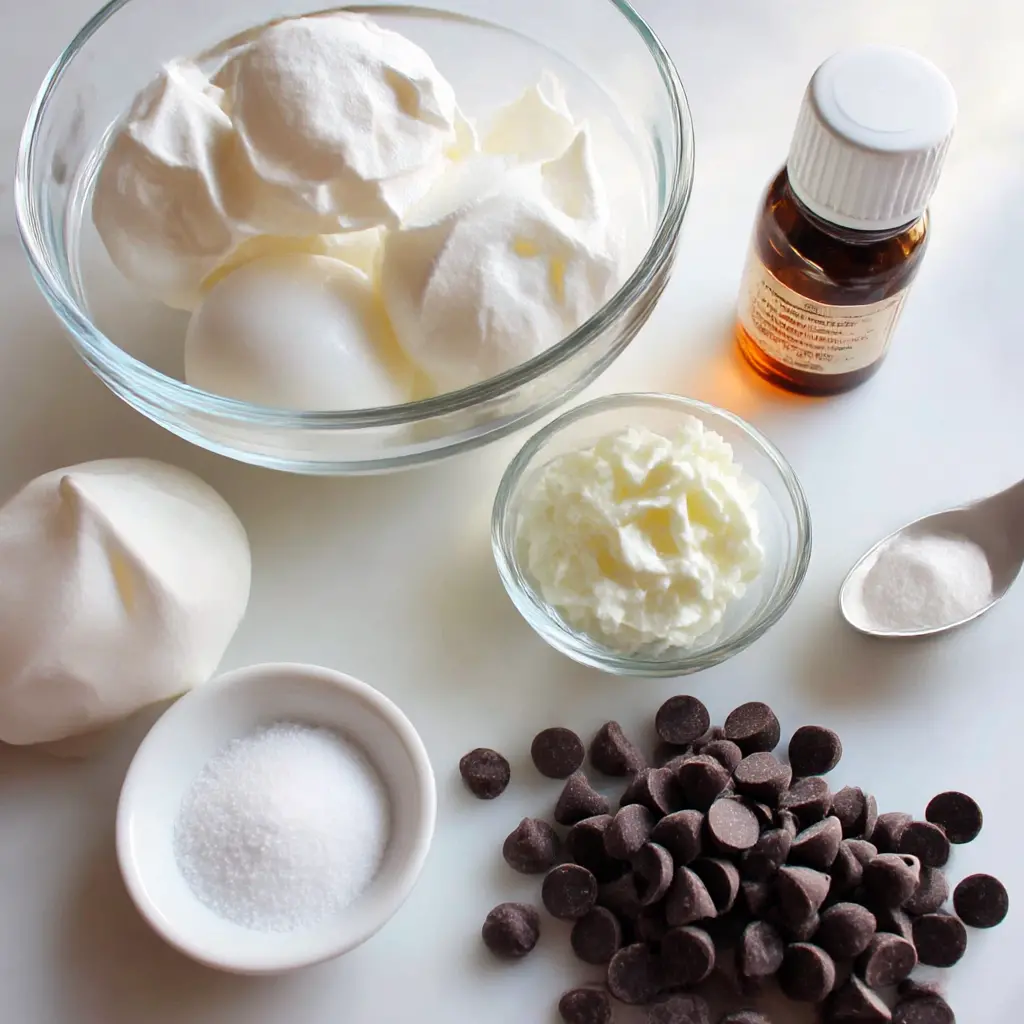
- Egg whites: Room temperature is non-negotiable. Cold whites take forever to whip and won’t give you those sturdy, glossy peaks.
- Cream of tartar: This is your safety net. It stabilizes the whites and keeps your meringue from deflating mid-pipe.
- Granulated sugar: Add it slowly, one spoonful at a time. It sounds fussy, but it’s what makes the texture silky instead of gritty.
- Vanilla extract: Pure vanilla makes these taste like little clouds of warmth.
- Miniature chocolate chips: Just for the eyes. You’ll use about two per ghost.
No fancy equipment needed either. A hand mixer works beautifully, and a sturdy zip-top bag replaces a pastry bag if you don’t own one. This is the kind of recipe that says “I love you” without saying a word.
How to Make Ghost Meringue Cookies
Making these halloween meringue cookies comes down to four simple stages. Let’s walk through each one so you feel confident before you even start.
Stage 1: Prep the whites. Separate your cold eggs one at a time, dropping each white into a very clean, dry bowl. If any yolk sneaks in, start over. Grease is the enemy here. Let the whites sit at room temperature for about 30 minutes, which helps them whip up faster and fuller.
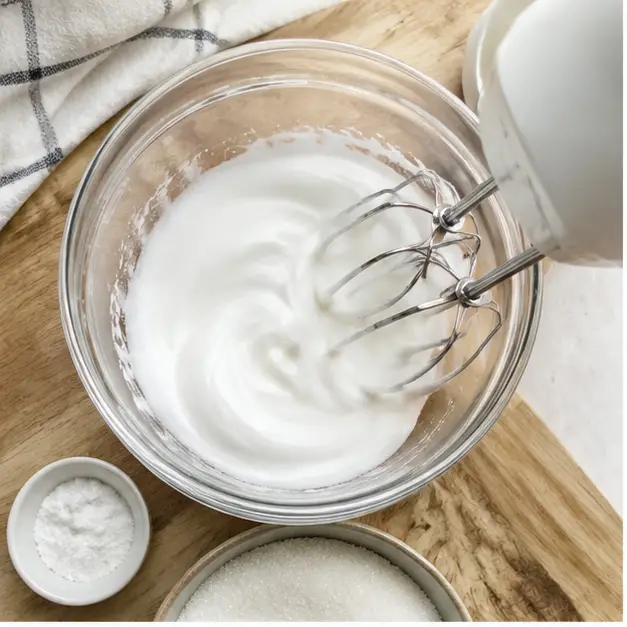
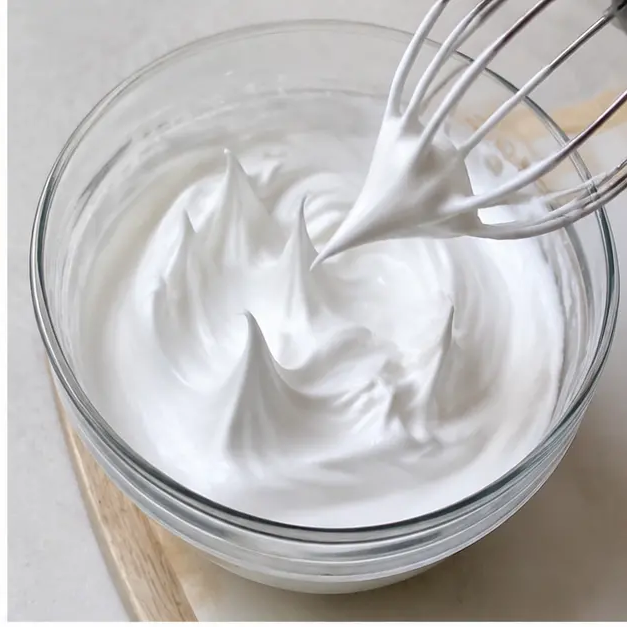
Stage 2: Whip to stiff peaks. Beat the whites with cream of tartar on high until soft peaks form. Then add the sugar slowly, one tablespoon at a time, beating constantly. You’re looking for glossy, stiff peaks that stand straight up when you lift the beater. Rub a little between your fingers; it should feel smooth, not gritty. I promise, you’ll see the shift happen right before your eyes.
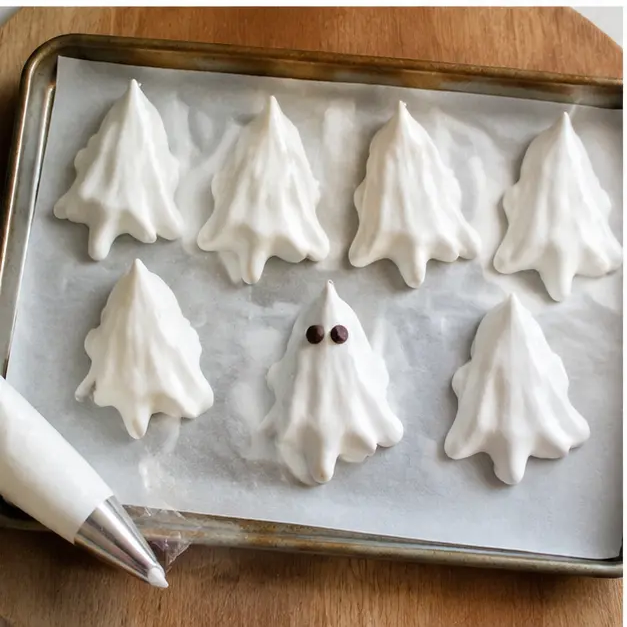
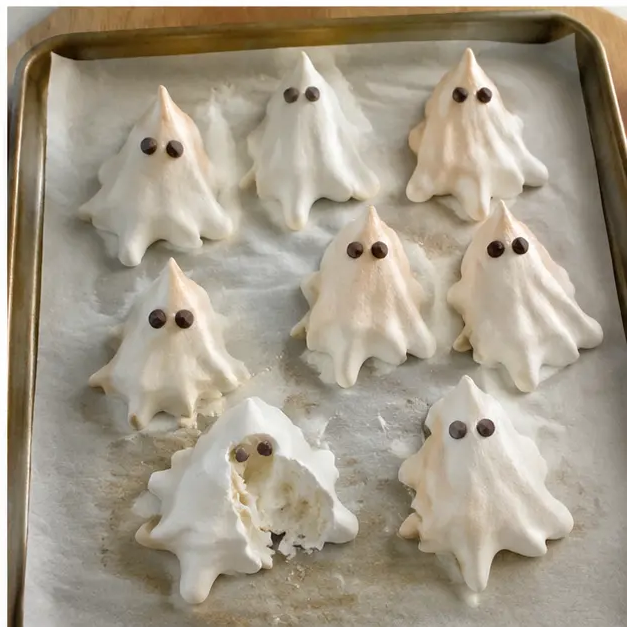
Stage 3: Pipe the ghosts. Spoon the meringue into a large piping bag, or a gallon zip-top bag with a half-inch opening snipped from a corner. Pipe freeform ghost shapes about 2 inches wide and 3 to 4 inches tall, spacing them 2 inches apart. Don’t overthink the shapes. A little wobble is charming. Gently press two chocolate chips into each ghost for eyes, and they’ll instantly come alive.
Stage 4: Bake low and slow. This is where the magic happens. At 200°F, you’re not baking, you’re drying. That’s what gives these crispy meringue cookies their feather-light, melt-in-your-mouth interior. Bake for about 1 1/2 hours, swapping the sheets halfway through, until the ghosts are lightly golden and dry. Then turn off the oven and leave them inside with the door closed for a full hour. I promise, the wait is worth it.
Tips for Perfect Meringue Every Time
After years of trial and error, these are the tips I swear by for this meringue ghosts recipe.
- Clean everything. Wipe your bowl and beaters with a little lemon juice or white vinegar to remove any trace of grease. It’s cheap insurance.
- Room temperature whites. Pull your eggs out 30 minutes before you start. Patience pays off.
- Add sugar slowly. Dumping it all at once deflates the foam. One tablespoon at a time, I promise, it makes a difference.
- Check your oven temperature. Ovens lie. An oven thermometer costs $8 and saves you from chewy meringues.
- Humidity is your enemy. If you’re baking on a rainy day, add 10 to 15 minutes to the bake time. If you’re lucky enough to live somewhere dry, consider it a gift.
If your ghosts lean a little, they’re just being dramatic. That’s their personality. Imperfect ghosts are still adorable ghosts.
Fun Variations to Make Them Your Own
Once you’ve mastered the classic version, you can play. Chocolate meringue ghosts are a huge hit in my house: melt a little extra chocolate and drizzle it over the baked cookies, or swirl a spoonful of cocoa into half the meringue before piping. Don’t overdo it, though, too much cocoa can weigh down the foam.
For color, add a drop of gel food coloring to the meringue before piping. Orange ghosts for Halloween, pastel ones for Easter, green ones for a spooky witch vibe.
And if you want to sparkle, a dusting of edible glitter makes these cute halloween treats homemade look straight out of a storybook. My daughter calls them “fairy ghosts.”
What to Do With Leftover Egg Yolks
This recipe uses three egg whites, which means you’ll have three yolks sitting in your fridge. Don’t toss them.
- Make a quick lemon curd for scones or toast.
- Whisk them into homemade ice cream custard for your next Sunday dessert.
- Use them in hollandaise sauce for a fancy weekend brunch.
- Or just brush them on pie crust or bread dough before baking for that golden shine.
Egg yolks also freeze beautifully. Pop them into a small jar with a pinch of salt or sugar, label it, and save them for another baking day.
How to Store Ghost Meringue Cookies
Here’s the thing about meringue cookie storage: these little ghosts are crisp as a whisper the day you make them, and they’ll stay that way if you treat them right.
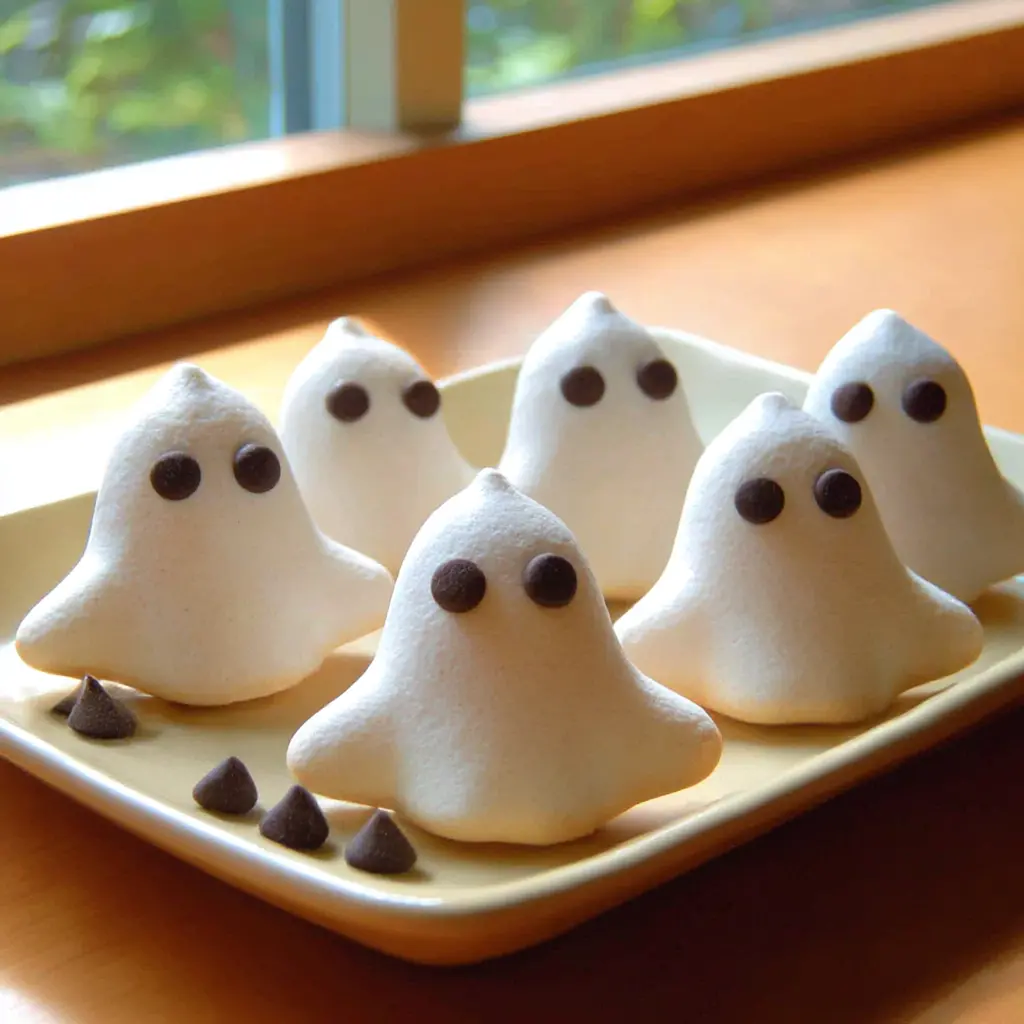
Store them in an airtight container at room temperature, layered between sheets of parchment paper. Do not refrigerate them. The fridge is full of moisture, and moisture makes meringue chewy and sticky.
On humid days, bake the ghosts a few minutes longer and keep the lid sealed tight. If yours do get sticky, re-crisp them in a 200°F oven for 10 minutes. They’ll bounce right back.
The best part? These meringue cookies last up to two weeks stored this way. That means you can bake them this weekend and be totally ready for Halloween night, zero panic.
Halloween Serving Ideas
These little guys deserve a proper debut. Here’s how I like to serve them.
- Pile them in a glass mason jar for the halloween party dessert table. The kids can see the little faces looking up at them.
- Use them as toppers on a pumpkin pie or chocolate cake. Guests will absolutely lose it.
- Float them in a bowl of vanilla ice cream. They shatter beautifully.
- Set a few on each plate as a sweet surprise with coffee after dinner.
However you serve them, watch the faces light up. That’s the moment it’s all worth it.
Frequently Asked Questions
Make This Halloween One to Remember
When you make these ghost meringue cookies, and you will, the first batch is the hardest. The second batch becomes your new October tradition. That’s how it happened for me, and I still smile every time I pull a tray of little pale ghosts out of the oven.
I want to see your ghosts, honest. Tag me when your batch comes out, or follow along on Pinterest for more spooky baking ideas and weeknight treats. There’s a whole board of Halloween baking waiting for you.
Halloween deserves a little homemade magic. And you, my friend, just became the person who makes it.
Source: Learn More About This Dish
Why are meringue cookies so addictive?
It’s that airy, melt-in-your-mouth texture. One bite and they dissolve into nothing, so you reach for another, then another. They’re light as air but packed with vanilla sweetness, and the crispy outside gives way to something almost cloud-like. Dangerous little things.
How do I know when the meringues are done?
They should be very light, completely dry to the touch, and lift easily off the parchment paper. A lightly golden tint on the peaks is your cue. If they feel tacky or bend instead of snapping, they need more time. That’s why the hour in the turned-off oven matters so much.
Why are my meringues chewy?
Chewy meringues mean moisture didn’t fully evaporate. Either the oven was too warm and baked them instead of drying them, or they picked up humidity from the air. Fix it by re-crisping them at 200°F for 10 minutes, and keep them in an airtight container on humid days.
How long do ghost meringue cookies last?
Kept in an airtight container at room temperature, these ghost meringue cookies stay crisp for up to two weeks. Avoid the refrigerator at all costs, it’s too humid and will make them sticky. Layer them with parchment and keep the lid sealed tight between servings.
What does cream of tartar do to meringue cookies?
Cream of tartar is your stabilizer. It creates a slightly acidic environment that helps the egg whites hold their structure, so they whip up faster and hold stiff peaks longer. Without it, your meringue is more likely to deflate or weep. Think of it as cheap insurance.
Can I use liquid egg whites from a carton?
Yes, you absolutely can. Just bring them to room temperature first and measure out 1/4 cup, which equals about 2 to 3 large egg whites. There is zero shame in the carton shortcut. We’re not doing pastry school here, we’re making Halloween magic.