




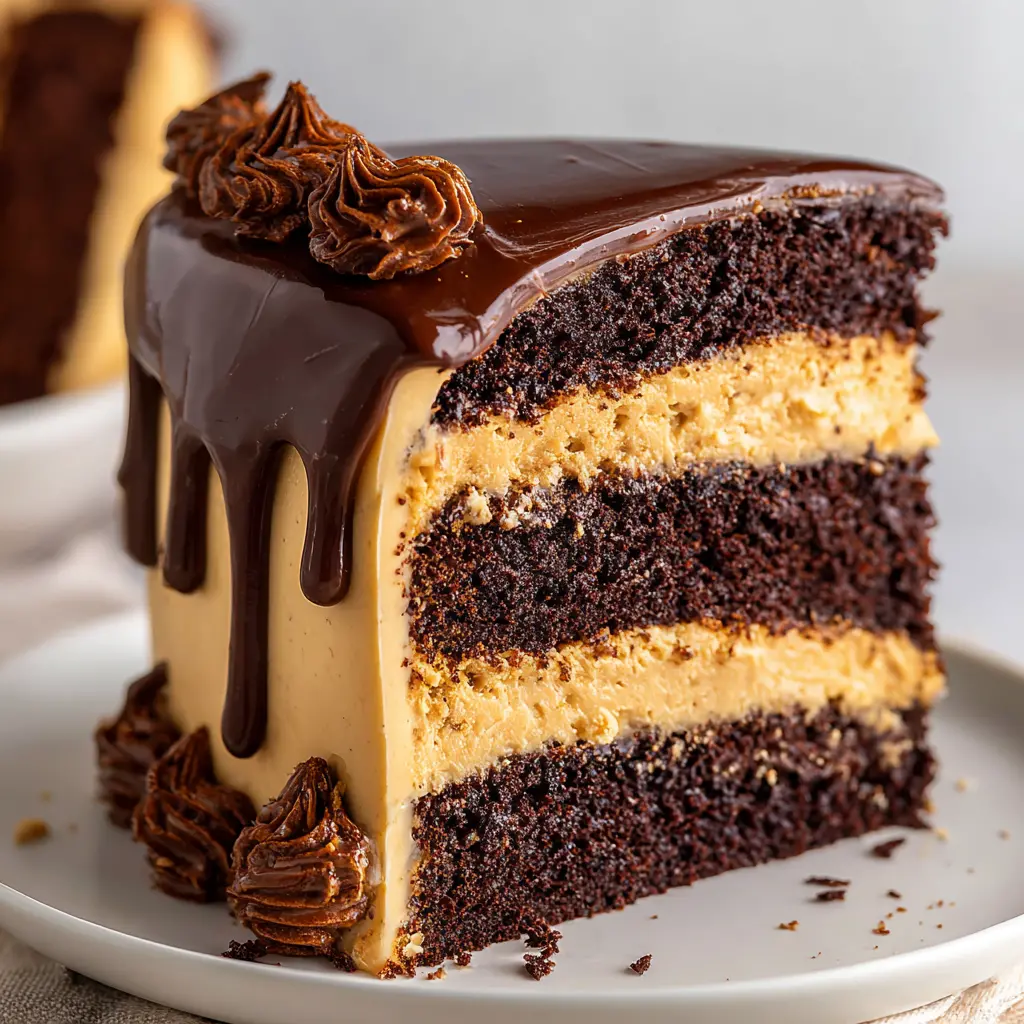
Dark Espresso Chocolate Layer Cake
Ingredients
Method
- To make chocolate cake, preheat oven to 350°F. Butter three, 8-inch round cake pans and line bottom with a round piece of parchment paper cut to fit bottom of your cake pans. (This ensures your cake does not stick.) Set aside.
- In a medium bowl, whisk together flour, cocoa powder, instant espresso powder, baking powder, baking soda, and salt.
- In a medium saucepan over medium high heat, combine water and sugar. Bring to a boil and stir until sugar dissolves, about 1 minute. Remove from heat and add chocolate and butter, stirring occasionally, until melted.
- Whisk in vegetable oil and vanilla extract. Quickly beat in eggs (do this quickly so they don’t cook) into chocolate mixture until combined. Whisk in dry ingredients, until smooth.
- Divide batter evenly between prepared pans and bake for 20 to 23 minutes, or until a toothpick inserted in center comes out clean.
- Let cakes cool in pans until cool to touch – then frost as desired.
- For espresso buttercream, in a small bowl, whisk together espresso powder and water. Set aside.
- Beat butter on medium high, for 3 minutes. Slowly add in powdered sugar, about a half a cup at a time, until you have added 5 cups of powdered sugar.
- Carefully add vanilla extract, pinch of salt, and espresso powder/water mixture, beating till well combined.
- At this point check consistency of buttercream. You should be able to lift beaters and have buttercream hold its shape. If it is too loose, add more powdered sugar, again 1/2 cup at a time.
- Assemble three cake layers with a thick layer of frosting in between layers. Then apply a thin crumb coat on top and sides. Pop cake in freezer to harden crumb coat for about 10 minutes.
- Apply one final thick and even layer around outside of cake and decorate as desired.
Nutrition
Notes
Tried this recipe?
Let us know how it was!Why You’ll Love This Chocolate Espresso Cake!
You know that feeling when you want a cake that tastes like your favorite coffee shop? That rich, bold flavor that makes you feel like you’re treating yourself to something special? This Chocolate Espresso Layer Cake is exactly that. I mean, honestly, I’ve tested so many versions over the years, and this one finally nails it. The deep chocolate flavor with that subtle espresso kick? It’s pure magic. And trust me, if you’ve had a few layer cake disasters before, I get it. I’ve been there. But this recipe is different. It’s forgiving, it’s reliable, and it delivers every single time. Imagine a cake so moist it melts in your mouth with every bite of chocolate and a hint of espresso. That’s what we’re going for here.
I still remember the first time I had a slice of chocolate espresso cake at a little cafe in Santa Monica. The layers were perfect, the frosting was silky, and that coffee flavor was just right. I knew I had to recreate it at home. After a few failed attempts (some too dry, some where the espresso overpowered everything), I finally cracked the code. And this is it. This is the recipe I save for Mother’s Day brunch or when I want to impress my friends at a dinner party. It looks like it came from a fancy bakery, but it’s totally doable in your own kitchen.
Ingredient Notes: What Makes This Cake So Good
Let’s talk about what goes into this cake. The key players here are pretty standard, but how you use them makes all the difference. You’ll need all-purpose flour, cocoa powder, instant espresso powder, baking powder, baking soda, salt, water, granulated sugar, dark chocolate, unsalted butter, vegetable oil, vanilla extract, and eggs. That’s it. Nothing crazy, right?
The instant espresso powder is the star. Don’t skip it. It adds that deep, complex coffee flavor without making the batter too watery. I use it in both the cake and the frosting for a double hit. And the dark chocolate? That’s for the frosting. It gives it a richness that milk chocolate just can’t match. I usually grab a good quality bar from Trader Joe’s or Whole Foods. It’s worth the extra couple bucks.
Dutch-Processed vs. Natural Cocoa
Okay, real talk. The type of cocoa you use matters. Dutch-processed cocoa is treated with an alkali to neutralize its acidity. It gives a darker color and a smoother, more mellow chocolate flavor. Natural cocoa is more acidic and has a sharper, more intense chocolate taste. For this recipe, I prefer Dutch-processed because it pairs so well with the espresso. But if you only have natural cocoa on hand, you can still make it work. Just swap out the baking powder and baking soda amounts. The recipe card has the details. Honestly, either will give you a delicious cake, so don’t stress too much about it.
How to Get Perfect Cake Layers
This is where the magic happens. Getting those even, tender layers is easier than you think. First, make sure all your ingredients are at room temperature. I know, I know, it’s annoying. But it really does make a difference. Cold eggs and cold butter don’t emulsify well, and you’ll end up with a dense cake. So take them out of the fridge about an hour before you start.
When you’re mixing the batter, don’t overdo it. Mix just until everything comes together. Overmixing develops the gluten and makes the cake tough. You want it to be tender and light. The batter will be thin, which is totally normal. That’s what gives you that moist crumb. Pour it into your prepared pans and bake until a toothpick inserted in the center comes out with a few moist crumbs. Not clean, but with a few little bits clinging to it. That’s your visual cue.
And about those domed tops? Totally normal. Let the cakes cool completely, then use a serrated knife to level them off. I promise, it’s easy. Just saw gently back and forth. You can even freeze the layers for about 20 minutes before leveling. It makes them firmer and easier to cut. This is a tip I learned from a pastry chef friend, and it’s a game changer.
Cake Decorating Tips
Now for the fun part. You’ve got your beautiful, level cake layers. Now you need to make them look as good as they taste. Start with a crumb coat. That’s a thin layer of frosting that traps all the loose crumbs. Don’t worry if it looks messy. You’re going to cover it up anyway. Pop the cake in the fridge for 15 minutes to let the crumb coat set.
Then, go in with the rest of your frosting. Use an offset spatula to spread it evenly. If you want those smooth sides, a bench scraper is your best friend. Just hold it against the side of the cake and rotate your turntable. It takes a little practice, but you’ll get the hang of it. For the top, you can leave it smooth or create some swirls with the back of a spoon. I like to add a few chocolate shavings on top for a finishing touch. It makes it look extra special.
Tips for Success!
Here are a few things I’ve learned from making this Chocolate Espresso Layer Cake more times than I can count. First, measure your flour correctly. Spoon it into your measuring cup and level it off with a knife. Don’t scoop directly from the bag. You’ll end up with too much flour and a dry cake. Second, use an oven thermometer. Ovens lie. I’m serious. My oven runs about 25 degrees hot, so I always set it a bit lower. An oven thermometer is cheap and takes the guesswork out of it.
And check your baking powder. If it’s old, it won’t work as well. To test it, just put a little bit in hot water. If it fizzes, it’s good to go. If not, toss it and buy new. These little things might seem fussy, but they’re the difference between a good cake and a great one. Trust me on this.
Common Mistakes & Fixes
Mistake: The cake layers are too domed.
Solution: Your oven might be too hot. Try reducing the temperature by 25°F next time. Using cake strips around the pans also helps them bake more evenly.
Mistake: The cake is dry.
Solution: You probably overbaked it or used too much flour. Check your oven temperature and measure your flour correctly. Also, make sure you’re using the right amount of oil. It adds moisture.
Mistake: The frosting is too runny.
Solution: Your butter might have been too soft. Make sure it’s softened but still cool to the touch. If it’s already runny, pop it in the fridge for 10 minutes and then re-whip it.
Storage & Leftovers
If you have any leftovers (which is rare in my house), you can store this cake in the fridge for up to 4 days. Just make sure it’s in an airtight container. The cake actually gets even more moist after a day or two as the flavors meld together. Before serving, let it sit at room temperature for about 30 minutes. That brings out the best flavor and texture.
You can also freeze the cake layers individually. Just wrap them tightly in plastic wrap and then again in foil. They’ll keep for up to 3 months. When you’re ready to use them, thaw them in the fridge overnight. Then you can frost and assemble as usual. It’s a great way to get ahead for a special occasion.
Frequently Asked Questions
Make-Ahead Timeline
Planning ahead makes everything easier. Here’s a simple timeline. Up to 3 days before: bake the cake layers, let them cool, and wrap them tightly. Store them at room temperature or in the fridge. The day before: make the frosting and store it in the fridge. Let it come to room temperature before using. The day of: level, fill, and frost the cake. This way, you’re not doing everything at once, and you’ll feel much less stressed.
Reheating Instructions
If you have a slice that’s been in the fridge, you can warm it up slightly. Just pop it in the microwave for about 10-15 seconds. It’ll soften the cake and make the frosting a little gooey. Or you can let it sit at room temperature for 30 minutes. Both work great. I personally love that slightly warm cake with the cool frosting. It’s a little taste of heaven.
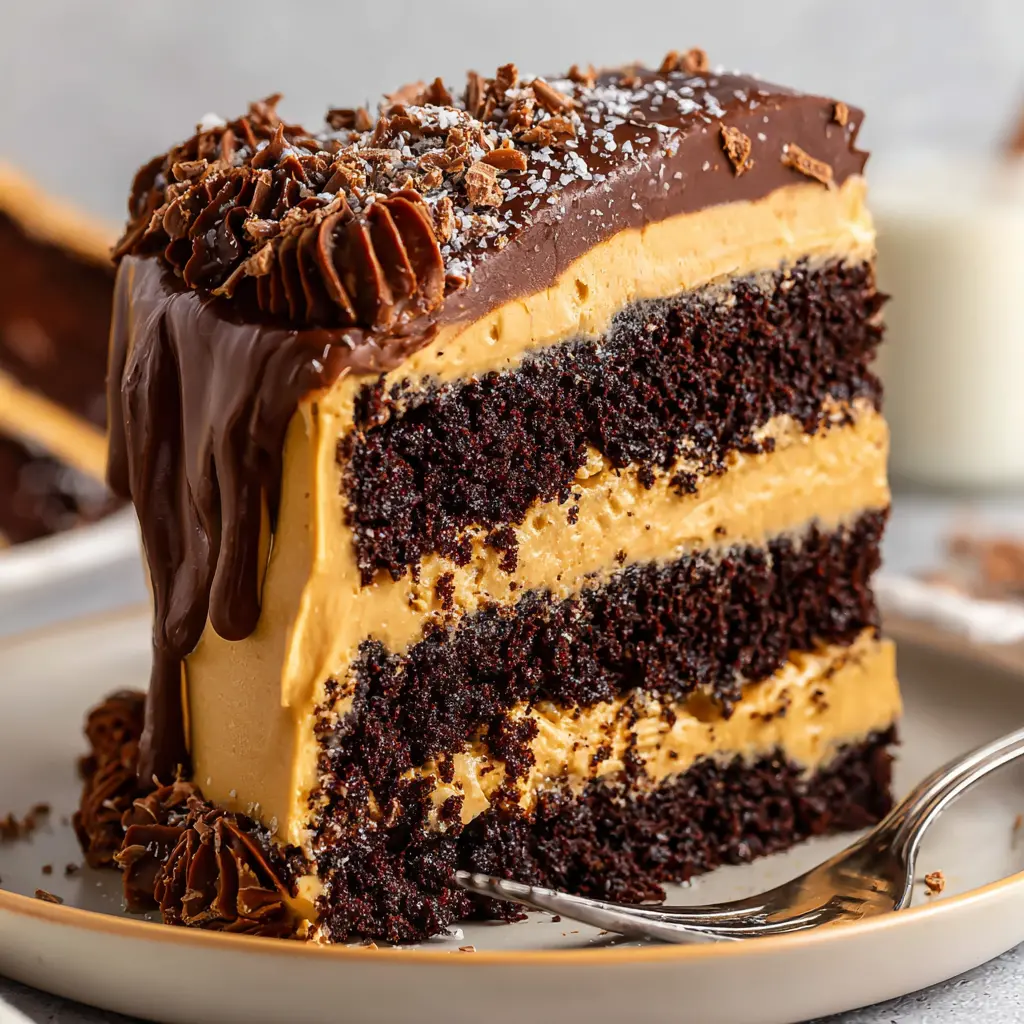
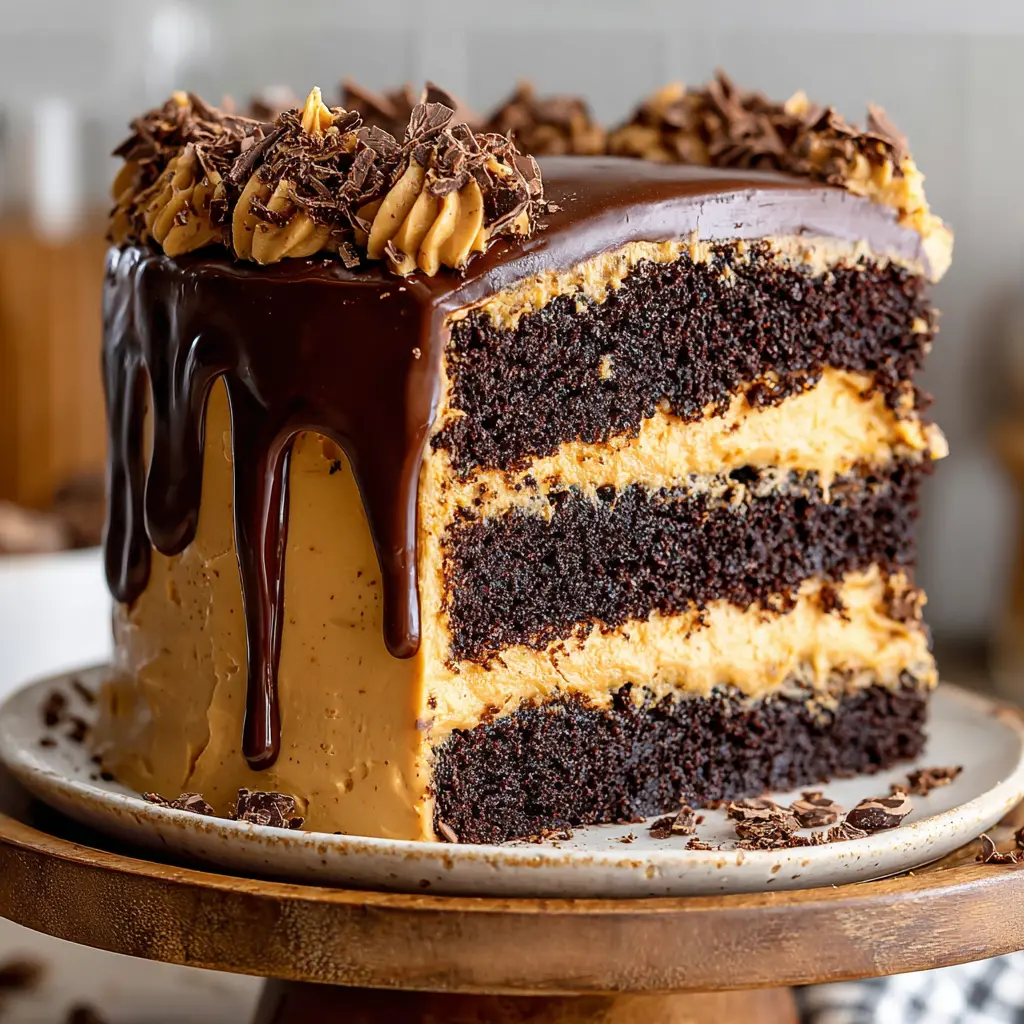
When you slice into this Chocolate Espresso Layer Cake at your next gathering, you’ll be so proud. The smell of chocolate and espresso will fill your kitchen, and the first bite will reveal that perfectly tender crumb. Your family and friends are going to be so impressed. Take a photo and tag me on Pinterest. I want to see your masterpiece! You’ve got this. Go make that cake!
Source: Nutritional Information
How long does this Chocolate Espresso Layer Cake last?
It will keep in the fridge for up to 4 days. For the best flavor, let it sit at room temperature for about 30 minutes before serving.
Can I use different size cake pans?
Yes, you can. If you use 9-inch pans, the layers will be a bit thinner and may bake faster. Adjust the baking time accordingly and check for doneness a few minutes early.
Can I use instant coffee instead of espresso powder?
Technically yes, but I don’t recommend it. Instant coffee has a harsher, more acidic flavor that can throw off the balance. Espresso powder is much smoother and more intense.
Can I make the chocolate cake layers in advance?
Absolutely. You can bake the layers up to 3 days ahead. Just wrap them tightly in plastic wrap and store them at room temperature. Or freeze them for up to 3 months.
Can I freeze this mocha layer cake?
Yes! You can freeze the whole frosted cake or individual slices. Wrap it well in plastic wrap and then foil. It will keep for up to 3 months. Thaw in the fridge overnight.
How do you make chocolate shavings?
Use a vegetable peeler on a block of dark chocolate. Run it along the side to create curls. It’s that simple. You can also use a grater for finer shavings.
What coffee should you use?
Instant espresso powder is the best choice. It’s concentrated and dissolves easily. Look for it near the coffee aisle at your grocery store or online.
What’s the best chocolate to use?
Use a good quality dark chocolate with around 60-70% cocoa content. I like the bars from Trader Joe’s or Ghirardelli. Avoid chocolate chips as they have stabilizers.
Can you use one type of chocolate for the frosting?
Yes, the recipe uses dark chocolate. You could use milk chocolate, but it will be sweeter and less rich. Stick with dark for the best espresso pairing.
Can you substitute the dark brown sugar in this cake?
This recipe uses granulated sugar, not brown sugar. So no substitution needed. The moisture comes from the oil and the hot water.
How do you serve Chocolate Espresso Layer Cake?
Serve it at room temperature for the best flavor. It’s perfect on its own or with a dollop of whipped cream and some fresh berries on the side.
How do you store mocha cake?
Store it in an airtight container in the fridge for up to 4 days. Let it sit at room temperature for 30 minutes before serving to bring back its soft texture.