Matcha White Chocolate Cake with Pistachios
Ingredients
Method
- For the matcha cake:
- Preheat your oven to 180°C / 160°C fan / 350°F / gas mark 4.
- Grease two 15cm (6 in) cake tins thoroughly, and line their bases with some greaseproof or parchment paper.
- Measure your butter/margarine and sugar into a large bowl.
- Beat well with a freestanding mixer, electric whisk, or wooden spoon, until light and fluffy. This should take 1-2 minutes.
- Add the eggs one at a time, mixing well between each addition.
- Add the flour and matcha powder and stir gently until just smooth and combined into a thick green batter.
- Pour the mixture evenly between the 2 tins and bake in the preheated oven for 25-30 minutes or until risen, and a skewer inserted into the centre can be cleanly removed.
- Allow the cakes to cool in their tins for about 15 minutes before removing them and allowing them to cool completely on a wire rack.
- For the white chocolate frosting:
- In a large bowl, beat together all the frosting ingredients, except the matcha powder (if using), until you have a fluffy white frosting. This can take up to 5 minutes.
- If you would like to have a pale green marble to the frosting, halve the frosting and mix the matcha powder with one half. This way you can play around with the white and pastel green shades!
- To assemble:
- Set a small frying pan over a medium heat.
- Tip your pistachios into the pan, rolling them around in the dry heat for up to 8 minutes. By this point you should smell their delicious savouriness, but not burnt bitterness!
- Allow the nuts to cool for 5 minutes before chopping into small pieces.
- Once all components have been prepared, place one cake onto your serving plate and slather the top with some of your frosting.
- Scatter over half of your chopped pistachios.
- Top this with the second cake layer.
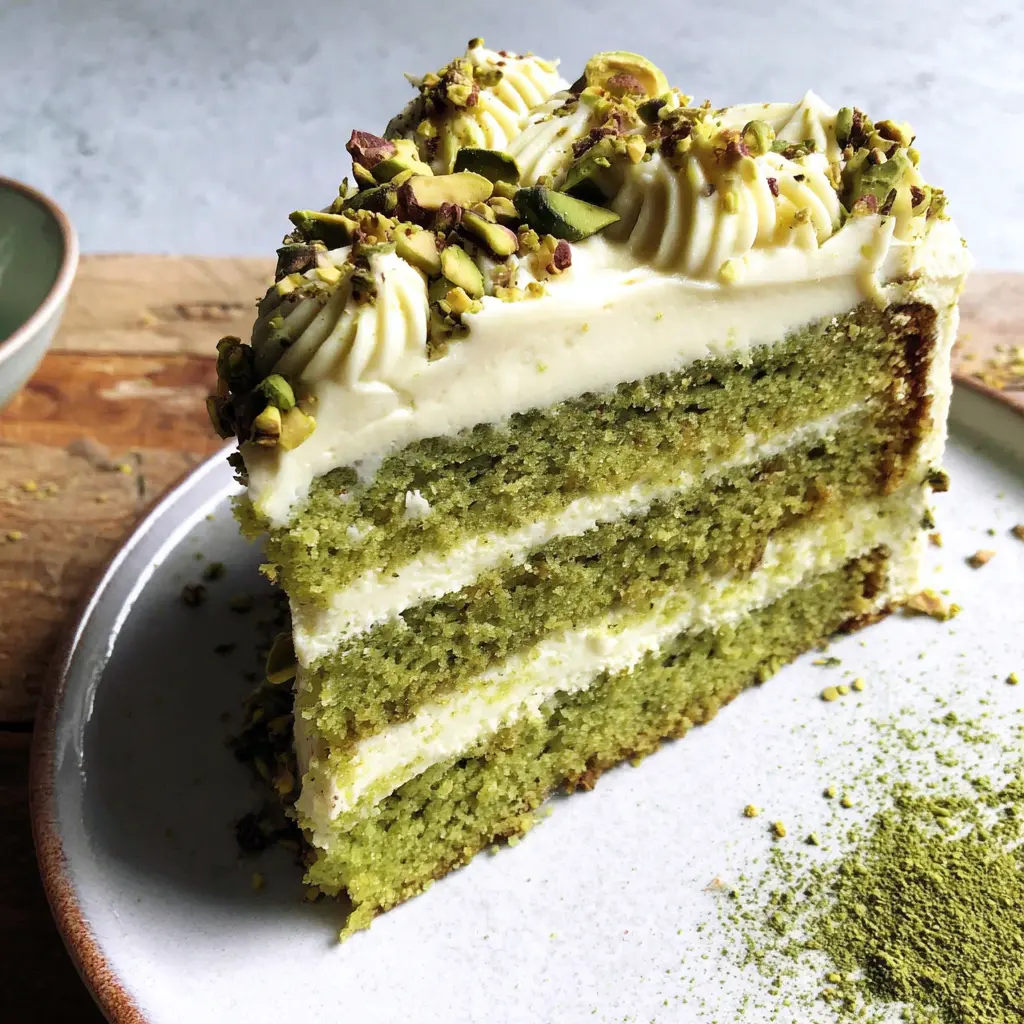
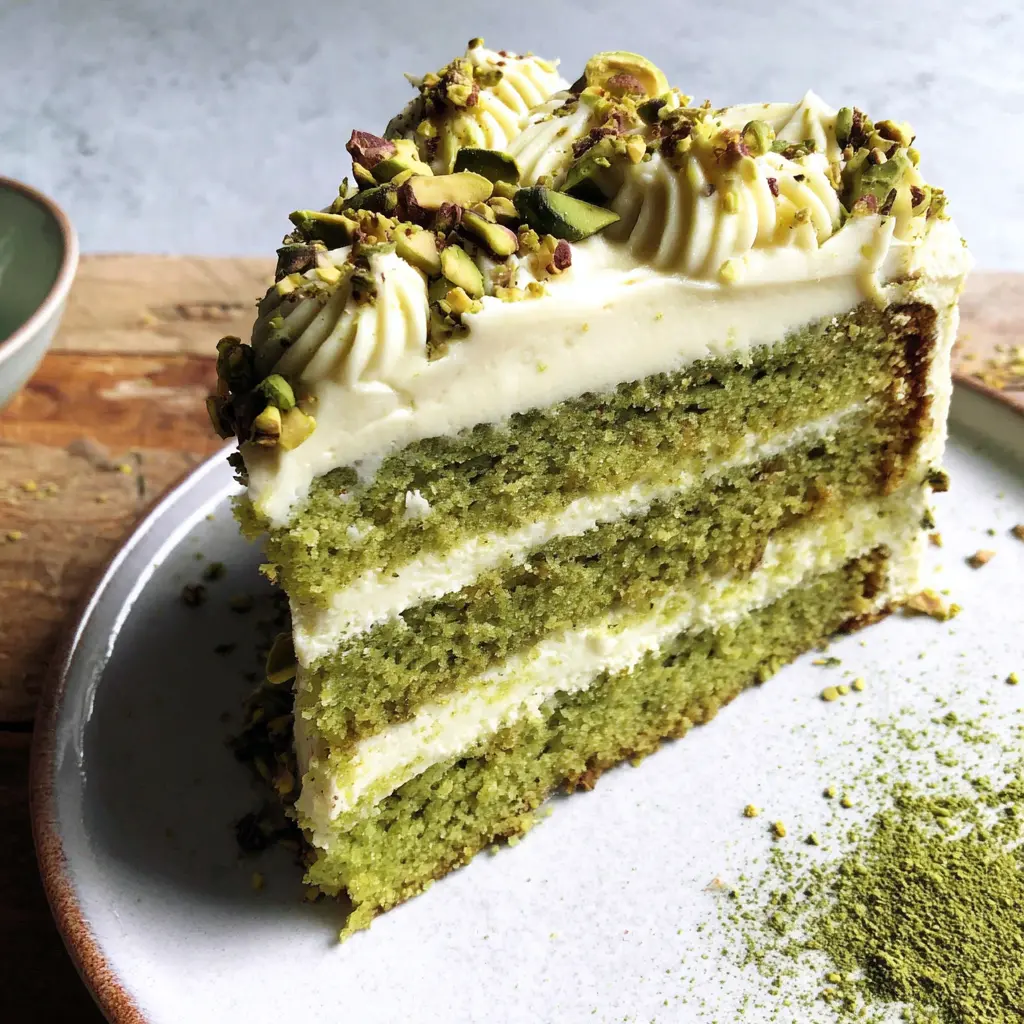
- Spread or pipe your remaining frosting all over the top and sides of the cake, decorating however you like with the remaining pistachios.
- Slice up and enjoy!
Notes
Tried this recipe?
Let us know how it was!Why This Matcha White Chocolate Cake Works
I’ve ruined more matcha cakes than I care to admit. You know the ones I’m talking about… they come out of the oven looking like a sad, brownish-green mess that tastes more like lawn clippings than anything you’d actually want to eat. It’s frustrating, especially when you’ve spent good money on that little tin of matcha powder. But here’s the thing: when you get it right, when that vibrant green meets sweet white chocolate, it’s absolutely magical. Like, stop-you-in-your-tracks magical.
This Matcha White Chocolate Cake is the result of many, many Sundays spent testing. I wanted a cake that actually tastes like green tea, not just looks like it. One that stays moist for days, doesn’t turn that weird khaki color, and has just enough sweetness from the white chocolate to balance matcha’s natural earthiness. Oh, and it had to look good enough for a Mother’s Day table or a spring birthday party. No pressure, right?
The secret? It’s all about how you handle the matcha and the white chocolate separately before bringing them together. Most people just dump matcha powder into the batter and hope for the best. That’s a recipe for bitterness, I’ve learned. You need to treat matcha with a little respect, like you would a good spice. And white chocolate? That stuff is temperamental. But once you understand how they work, this cake basically makes itself. I could eat this every night for a month and not get tired of it.
Key Ingredients
Let’s talk about what actually goes into this cake. Not the full list, that’s in the recipe card below. But I want to explain why certain choices matter here. Because I think if you understand the “why,” you’re way more likely to nail the “how.”
Matcha Powder
This is the star of the show, so don’t skimp. You want culinary grade matcha, not ceremonial. I know, ceremonial sounds fancier, but it’s actually designed for drinking straight, not baking. Culinary grade has a stronger flavor that holds up against sugar and flour, and it’s way more affordable. I’ve been using a brand from my local Japanese market, but any good culinary grade works. Stay away from the cheap stuff that’s already turned brownish, it’ll ruin your cake.
White Chocolate
Quality matters here. I use a good white chocolate bar, not chips. Chips have stabilizers that make them harder to melt smoothly. For the frosting, you’re melting it with mascarpone, which keeps things creamy and not too sweet. The white chocolate adds this subtle vanilla sweetness that plays off the matcha beautifully. It’s not about making the cake taste like white chocolate, it’s about rounding out those earthy edges.
Mascarpone
This is my little trick. Instead of a heavy buttercream, I use mascarpone mixed with melted white chocolate. It gives you this incredibly smooth, creamy frosting that’s not too sweet and has a slight tang. It’s perfect against the matcha. Plus, it’s way easier to work with than a traditional buttercream, which I appreciate on a busy Sunday.
Step-by-Step Instructions
Alright, let’s walk through this together. I’ll give you the highlights here, but the full details are in the recipe card. Think of this as my running commentary.
First things first, get your ingredients to room temperature. This matters more than you think. Cold eggs and butter can cause the batter to seize up, especially when you’re adding melted white chocolate later. I usually pull everything out an hour before I start baking. Then I make myself a cup of tea and prep my pans.
Speaking of pans, grease them well and line the bottoms with parchment. I use pre-cut circles because I’m lazy, but you can trace and cut your own. It takes two minutes and saves you from a stuck cake disaster. Trust me on this.
For the cake batter, you’re going to cream the butter and sugar until it’s light and fluffy. This takes a good 3-4 minutes with a stand mixer. Don’t rush it. Then you add the eggs one at a time. Here’s the trick: mix the matcha powder with a splash of hot water to make a paste before adding it to the batter. This ensures it distributes evenly and prevents those bitter green streaks. I learned this after my third failed attempt, and it changed everything.
Fold in the flour gently. Overmixing will give you a tough cake. You want to see just a few streaks of flour remaining, then stop. Pour the batter into your prepared pans and bake. The cake won’t brown much because of the matcha, so use the toothpick test. When it comes out with a few moist crumbs, you’re done.
Tips for the Best Matcha White Chocolate Cake
I’ve collected these tips over many batches. Some I learned from my grandmother Rosa, who never wrote anything down but knew everything. Others I learned the hard way, by scraping burnt cake off the bottom of a pan.
Use cake strips for flat layers. If you don’t have them, you may need to cut off any peaked tops with a knife or cake leveler. I use cake strips, and they make a huge difference. Your layers come out perfectly flat, which makes stacking so much easier.
Leave your baked cakes in the tin to cool for 20 minutes before removing them onto a wire rack. This speeds up the cooling process and stops your cake from baking further trapped in the hot tin. I know it’s tempting to flip them out right away, but patience pays off here.
For a smooth professional finish, assemble and decorate your cake using a cake turntable, offset spatula, and cake scraper. Cover your cake in a crumb coat first, refrigerate for 15 minutes, then smooth on another layer of frosting. This is the difference between a cake that looks homey and one that looks like it came from a bakery. Not that homey is bad, but sometimes you want to impress.
I usually decorate this matcha cake simply with a dusting of matcha powder. You can also pipe swirls of any spare white chocolate frosting, drizzle melted white chocolate over the top, or sprinkle with white chocolate shavings. Keep it simple or go all out, both work.
Be a maverick: try adding some lemon zest to the frosting for an even fresher flavor. It sounds weird, but the citrus really brightens everything up. I did this on a whim one Sunday, and Elena said it was the best version yet.
Variations & Substitutions
This recipe is pretty flexible, which I love. Here are some ways to change it up.
Whip the frosting for a lighter and fluffier texture. Just beat it with a hand mixer for a minute or two before frosting the cake. It makes a big difference in texture.
Swap the white chocolate frosting for a matcha buttercream. Just add a tablespoon of matcha powder to your favorite buttercream recipe. It’ll be greener and have a more intense matcha flavor.
Use vanilla cream cheese frosting instead of the white chocolate mascarpone. It’ll be tangier and less sweet, which is also lovely. I’ve done this when I ran out of white chocolate, and it was a happy accident.
Substitute plain flour with self-raising flour and reduce the baking powder to 1/2 teaspoon. This is a good trick if you only have self-raising on hand. Just adjust the leavening.
Use any neutral-flavored oil like canola or sunflower instead of butter. The cake will be a bit moister but less rich. I’ve done this for a dairy-free version, and it worked well.
Storage & Leftovers
This cake keeps surprisingly well, which is great for making ahead. Here’s what I do.
Keep your Matcha White Chocolate Cake in an airtight container in the fridge. It should keep for up to 4 days. The texture firms up a bit in the fridge, making it almost brownie-like in the center. If you prefer it softer, let it sit at room temperature for 15 to 20 minutes before serving.
To freeze, wrap the whole cake or individual slices in plastic wrap and then a layer of foil. Store in an airtight freezer-safe bag or container for up to 3 months. Thaw in the fridge overnight or at room temperature before enjoying. I’ve done this for parties, and no one can tell it was frozen.
Serve at room temperature for a soft, delicate bite, or cold for a denser, brownie-like texture. A few fresh berries on the side add a nice tart contrast. Or a dollop of whipped cream if you’re feeling extra.
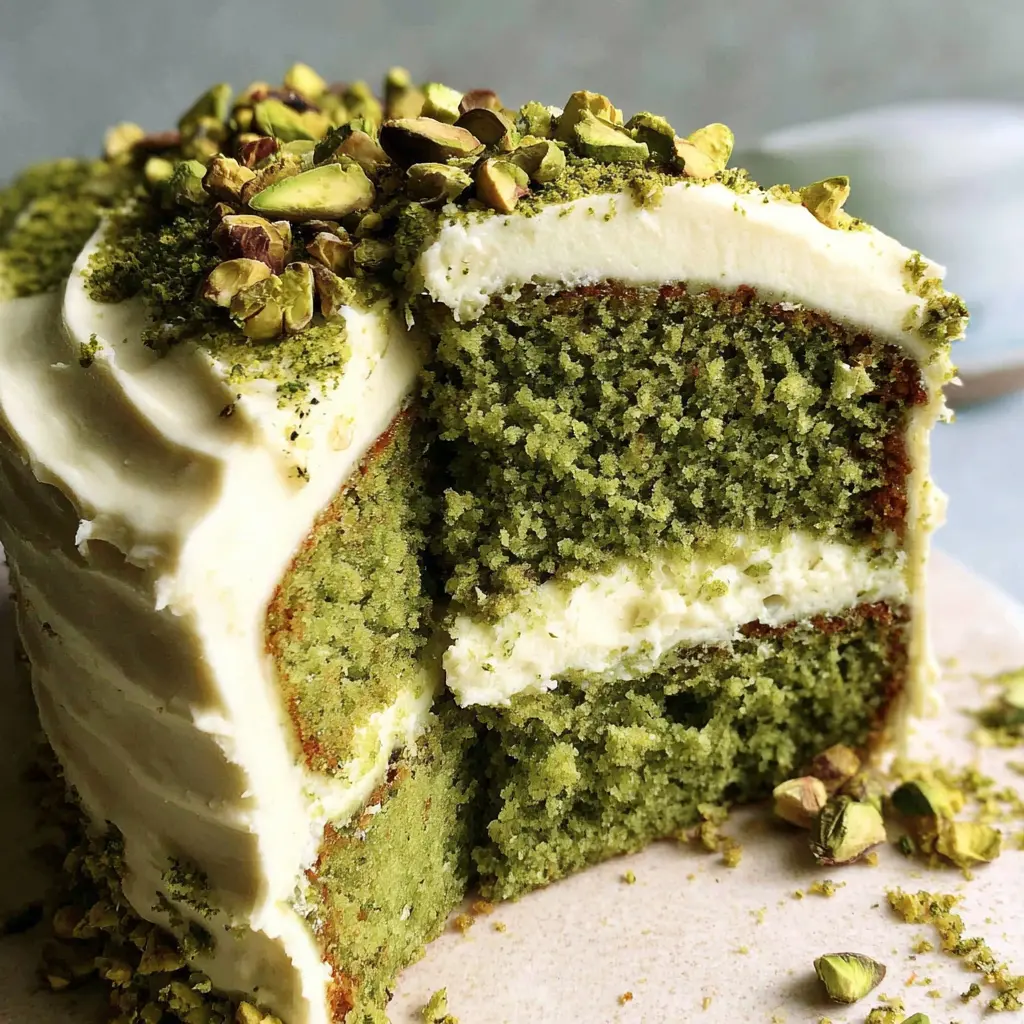
Common Mistakes to Avoid
Common Mistakes & Fixes
Mistake: The cake turned out brown instead of green.
Solution: This usually happens if your matcha is old or low quality. Also, overbaking can cause the color to dull. Use fresh culinary grade matcha and pull the cake out as soon as the toothpick test shows moist crumbs.
Mistake: The white chocolate frosting is grainy.
Solution: You likely overheated the white chocolate. Melt it slowly in a double boiler or in short bursts in the microwave, stirring every 15 seconds. If it seizes, a splash of heavy cream can sometimes save it.
Mistake: The cake layers domed or cracked.
Solution: Your oven might be too hot, or you overmixed the batter. Use an oven thermometer to check the temp, and fold the flour in gently until just combined. Cake strips also help prevent doming.
Mistake: The cake is dry.
Solution: Matcha absorbs moisture, so you might need a bit more fat. Make sure your butter and eggs are at room temperature, and don’t overbake. The toothpick should come out with moist crumbs, not clean.
Frequently Asked Questions
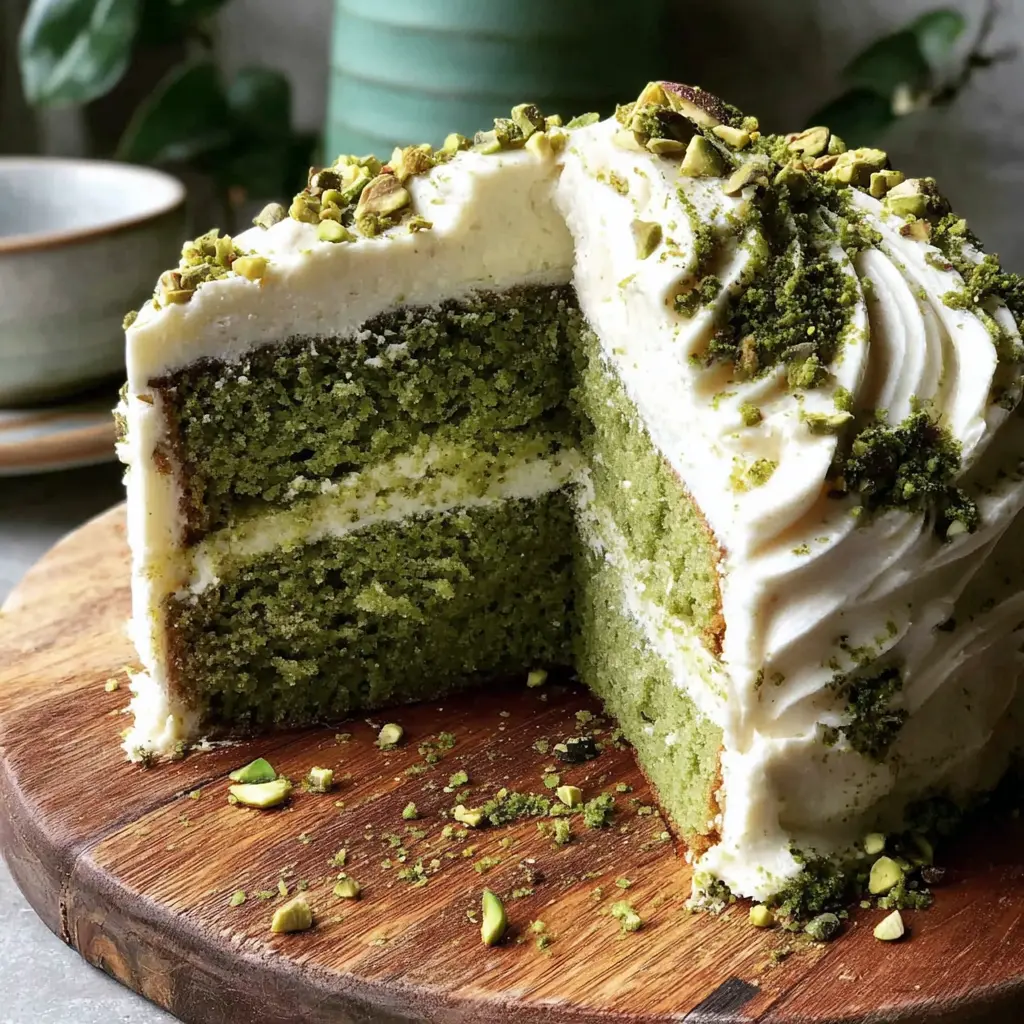
When you slice into this cake, you’ll be amazed at the color contrast. That vibrant green against the creamy white frosting, it’s just stunning. And the first bite? That’s everything. The earthy matcha, the sweet white chocolate, the tender crumb. It’s the kind of cake that makes people close their eyes and say “wow.”
I hope you give this Matcha White Chocolate Cake a try. Whether it’s for Mother’s Day, a spring birthday, or just because you want something beautiful and delicious, I think you’ll love it. Tag me in your photos, I’d love to see your masterpiece. And if you have questions, drop them in the comments. I’m here to help.
Now go wow your family. You’ve got this.
For more inspiration, check out my Pinterest boards for more cake ideas and variations.
Source: Nutritional Information
Can I make Matcha White Chocolate Cake ahead of time?
Absolutely. You can bake the cake layers a day ahead, wrap them tightly in plastic, and store them at room temperature. The frosting can also be made ahead and refrigerated. Just let it come to room temperature and rewhip before using. This actually helps the flavors meld.
How do I store leftover Matcha White Chocolate Cake?
Store it in an airtight container in the fridge for up to 4 days. The texture firms up when cold, so let it sit at room temperature for 15 minutes before serving if you prefer a softer crumb. You can also freeze slices for up to 3 months.
Can I use regular flour instead of self-raising flour for this Matcha White Chocolate Cake?
Yes, you can. If using all-purpose flour, add 1 1/2 teaspoons of baking powder and 1/4 teaspoon of salt per cup of flour. Self-raising flour already has leavening and salt, so adjust accordingly. I’ve done both, and they work fine.
What is the best way to toast pistachios for this Matcha White Chocolate Cake?
Spread shelled pistachios on a baking sheet and toast at 350°F for 5 to 7 minutes, shaking the pan halfway through. Keep an eye on them, they burn fast. Let them cool completely before chopping. Toasted pistachios add a lovely crunch and nutty flavor.
Can I make this Matcha White Chocolate Cake without eggs?
I haven’t tested this without eggs, so I can’t guarantee results. Eggs provide structure and moisture. You could try a flax egg or applesauce substitute, but the texture will likely be denser. If you try it, let me know how it goes.