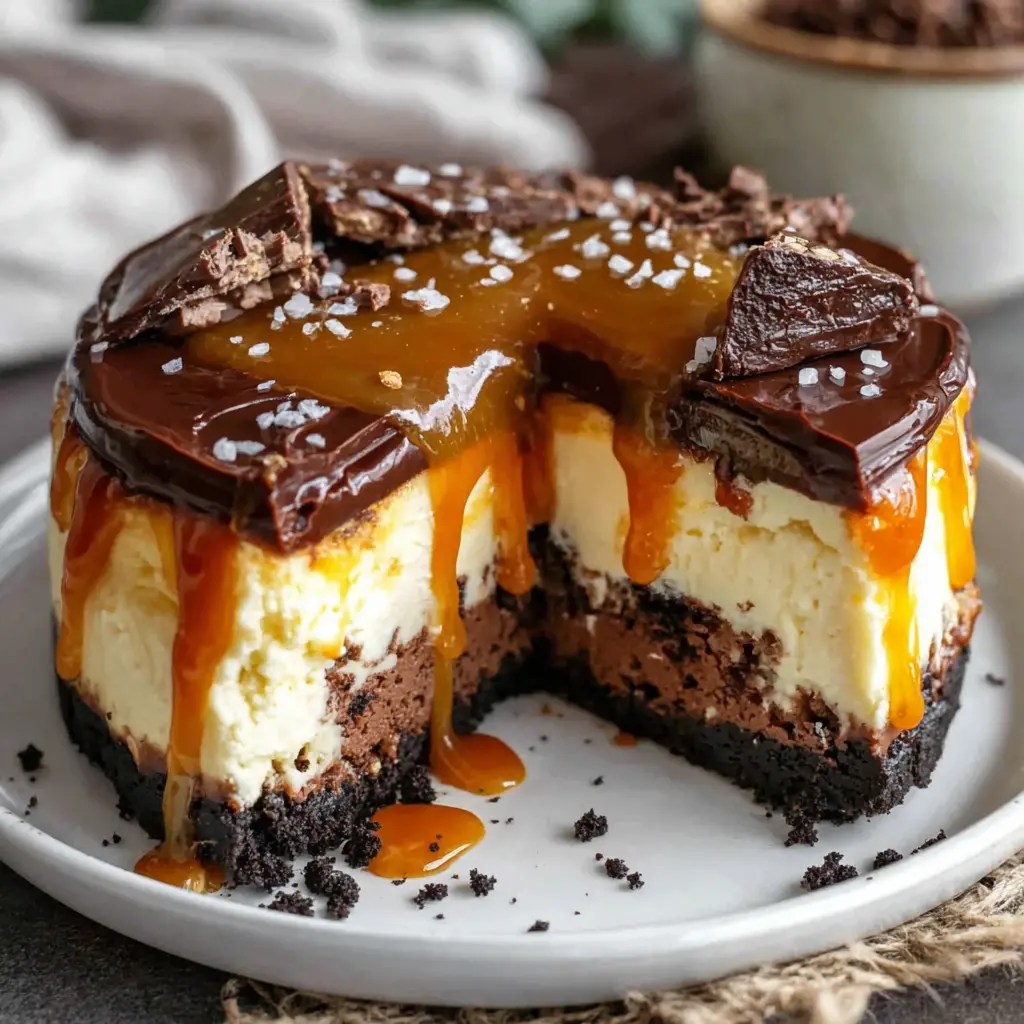
Ultimate Caramel Chocolate Cheesecake Cake
Ingredients
Method
- Creating Chocolate Caramel Cheesecake involves several steps, all of which contribute to its outstanding flavors and texture. Follow these steps for successful results:
- Preheat your oven to 325°F (160°C).
- p id=”instruction-step-3″>2. Make the Crust: In a bowl, combine the chocolate cookie crumbs, granulated sugar, and melted butter. Mix until combined. Press the mixture into the bottom of a 9-inch springform pan to create an even crust.
- p id=”instruction-step-4″>3. Prepare the Cheesecake Filling: In a large mixing bowl, beat the softened cream cheese until smooth. Add the granulated sugar and vanilla extract, mixing until well combined.
- p id=”instruction-step-5″>4. Add the Eggs: Gradually add the eggs, one at a time, mixing well after each addition. Ensure everything is combined but avoid over-mixing.
- p id=”instruction-step-6″>5. Incorporate Sour Cream: Fold in the sour cream until just blended. Pour the cheesecake filling over the prepared crust in the springform pan.
- p id=”instruction-step-7″>6. Bake: Bake in the preheated oven for 50-55 minutes or until the edges are set but the center still has a slight jiggle.
- p id=”instruction-step-8″>7. Cool: Remove from the oven and allow it to cool at room temperature for about 1 hour.
- p id=”instruction-step-9″>8. Prepare Chocolate Layer: In a small saucepan, heat the heavy cream until it just begins to simmer. Remove from heat, and add the chocolate chips. Stir until the chocolate is melted and the mixture is smooth.
- p id=”instruction-step-10″>9. Layer the Chocolate: Pour the chocolate mixture over the cooled cheesecake, spreading it evenly.
- p id=”instruction-step-11″>10. Chill: Refrigerate the cheesecake for at least 1 hour to set completely.
- p id=”instruction-step-12″>11. Add Caramel Topping: Before serving, drizzle the top with caramel sauce and sprinkle with sea salt if desired. Through these steps, you will successfully create a Chocolate Caramel Cheesecake that is bound to become a favorite dessert in your home.
Nutrition
Notes
Tried this recipe?
Let us know how it was!Why This Caramel Chocolate Cheesecake Cake Is Worth Every Minute
I’ll be honest with you. The first time I tried to make a layered caramel chocolate cheesecake cake, I nearly threw in the towel. My cheesecake cracked like a dry riverbed. The chocolate cake layers came out lopsided. And the caramel? Let’s just say it turned into a sugary rock that I had to chip out of the pan with a butter knife. My wife Claire still brings it up at dinner parties. “Remember the caramel incident?” she’ll say, and everyone laughs. I laugh too, but inside I’m still a little salty about it.
But here’s the thing. I kept at it. I tested this recipe maybe a dozen times over three months. I learned what makes the cheesecake stay smooth and creamy without cracking. I figured out the exact moisture balance so the chocolate cake layers hold up to the weight of the cheesecake without getting soggy. And I finally nailed a simple caramel sauce that stays pourable and silky, even after a day in the fridge. This caramel chocolate cheesecake cake is the result of all that trial and error. It’s the cake I now make for birthdays, for holidays, for any occasion that calls for something truly special. And I promise you, if I can get it right after that first disaster, you absolutely can too.
Ingredient Notes
Let’s talk about what goes into this thing. I’m not going to list every single ingredient here, because the recipe card handles that. But I do want to walk you through a few key players and why they matter. Trust your gut on this one, but also trust the science.
For the cheesecake layer, use full-fat cream cheese. I know, I know, everyone says that. But there’s a reason. The fat content gives you that dense, velvety texture that makes cheesecake, well, cheesecake. Low-fat cream cheese has more water, and water is the enemy of a smooth, crack-free surface. Also, make sure your cream cheese is truly at room temperature. Not microwaved for 15 seconds. Not still cold in the center. Leave it on the counter for a good hour. I learned this the hard way when I rushed it and ended up with lumpy batter. Not great.
The sour cream in the cheesecake batter is there for a reason too. It adds a little tang, sure, but more importantly, it loosens the batter just enough to help it bake evenly. And the eggs? Add them one at a time, mixing on low. You don’t want to whip air into the batter. Air bubbles expand in the oven and cause cracks. We want dense and creamy, not light and fluffy. This isn’t a soufflé.
For the chocolate cake layers, I use hot coffee in the batter. Don’t worry, you won’t taste it. The coffee just deepens the chocolate flavor, makes it richer and more complex. If you’re not a coffee drinker, hot water works fine. But I’m telling you, the coffee makes a difference. It’s like the secret handshake of good chocolate cake.
How to Make a No-Crack Cheesecake Layer
This is the part that scares most people. I get it. I’ve been there. But once you understand a few basic principles, it’s actually pretty straightforward. Let’s break it down.
First, the water bath. I know it sounds fussy, but it’s the single best way to ensure even, gentle heat around your cheesecake. Wrap the bottom of your springform pan in a double layer of heavy-duty foil. Make sure there are no tears. Then place the pan in a larger roasting pan and pour in hot water until it comes about halfway up the sides of the springform pan. The steam from the water bath keeps the oven environment humid, which prevents the top from drying out and cracking. It’s not being fussy, it’s the difference between a smooth surface and a cracked one.
Second, don’t overbake. This is huge. The cheesecake is done when the edges are set but the center still jiggles like set Jell-O when you gently shake the pan. If you wait until the center is completely firm, you’ve already overbaked it. The residual heat will continue to cook it as it cools. Take it out while it still has that slight wobble. I mean it.
Third, cool it slowly. After baking, turn off the oven, crack the door open, and let the cheesecake sit in there for an hour. Then take it out, run a knife around the edge (this prevents cracking as it shrinks), and let it cool completely on the counter. Then refrigerate for at least four hours, preferably overnight. Patience here is everything. I know you want to rush, but don’t.
Building the Chocolate Cake Layers
The chocolate cake recipe I use here is a one-bowl wonder. It’s moist, tender, and has that deep cocoa flavor that stands up to the rich cheesecake and sweet caramel. You’ll bake it in two 8-inch rounds. Make sure to line the bottoms with parchment paper and grease the sides well. There’s nothing worse than a cake layer that sticks and crumbles when you try to remove it.
Let the layers cool completely in the pans for about 10 minutes, then turn them out onto a wire rack. And I mean completely cool. If you try to stack them while they’re still warm, they’ll compress and get gummy. Give them at least an hour. I usually make the cake layers a day ahead, wrap them tightly in plastic wrap, and keep them at room temperature. They actually get more moist overnight. It’s a little trick I picked up from a pastry chef in Charleston.
Assembling the Caramel Chocolate Cheesecake Cake
Alright, this is where it all comes together. And I’m not gonna lie, it takes a steady hand and a little patience. But you’ve got this.
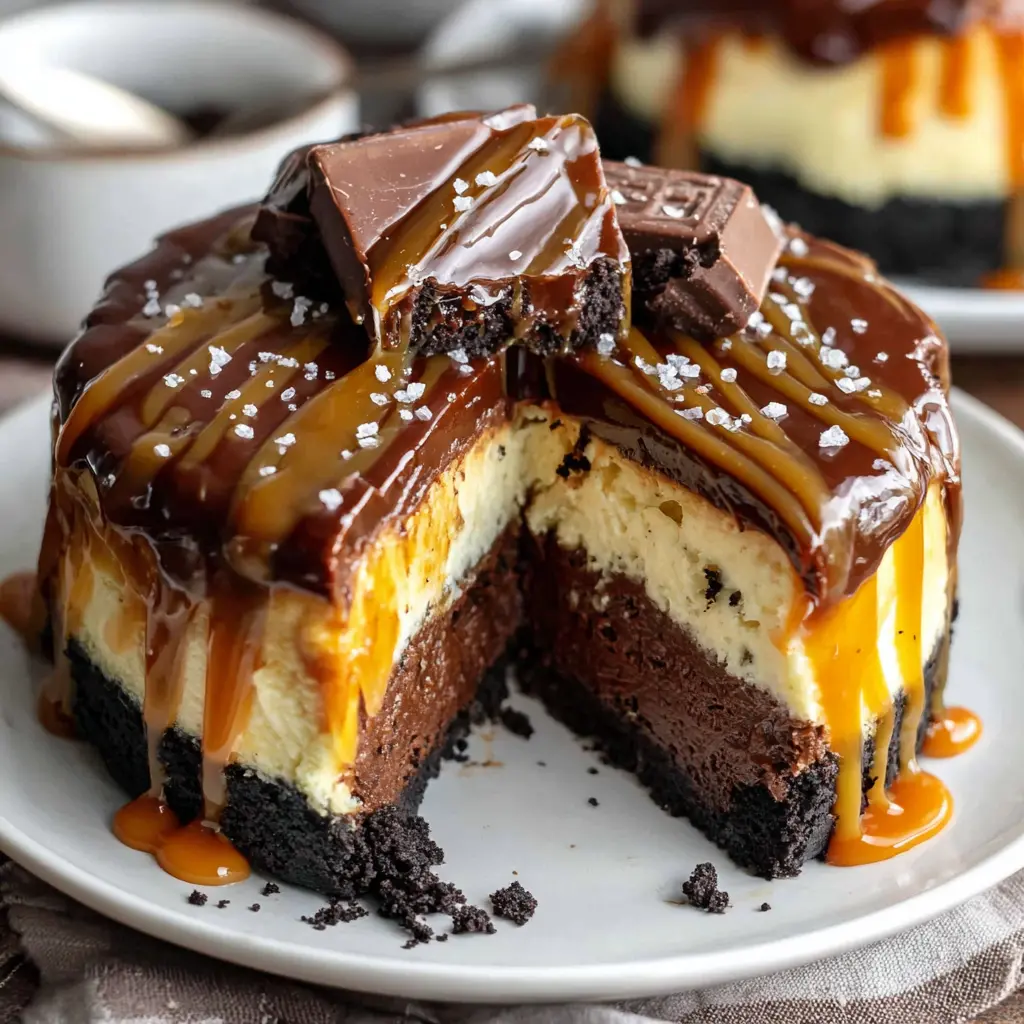
Start with a cake board or a flat plate. Place one chocolate cake layer down. Spread a thin layer of your frosting or ganache on top. This acts as glue to keep the cheesecake from sliding around. Then carefully place your chilled cheesecake layer on top. Center it as best you can. Then add the second chocolate cake layer on top of the cheesecake. Now you have a three-layer tower: cake, cheesecake, cake.
At this point, I like to chill the whole thing for about 30 minutes. It helps everything firm up before you add the final coat of frosting. Then apply a crumb coat, chill again for 15 minutes, and then do the final layer of frosting. Smooth it out as best you can. It doesn’t need to be perfect. The caramel drizzle will cover a multitude of sins.
Now for the fun part. Warm your caramel sauce just until it’s pourable. Not hot, just loose. Let it cool for a minute or two, then slowly pour it over the top of the cake. Let it drip down the sides naturally. You can guide it a little with an offset spatula, but don’t overwork it. The imperfections are part of the charm. Sprinkle a little flaky sea salt on top. That’s the move.
Recipe Tips for Success
I’ve made this cake more times than I can count, and I’ve picked up a few things along the way. Here are the tips that make the biggest difference.
Plan ahead. I cannot stress this enough. Plan to make this caramel chocolate cheesecake cake a day in advance. I made the cheesecake one night, then the next morning I baked the cake layers. In the afternoon I whipped up the frosting and assembled the cake. I then refrigerated the cake and made the ganache the following morning. We enjoyed the cake that afternoon. Spreading it out over two days makes it feel totally manageable.
Freeze the cheesecake layer. You can make the cheesecake layer further in advance by wrapping it tightly and storing it in the freezer until you’re ready to use it. Just thaw it in the fridge overnight before assembly. This is a game-changer if you’re planning for a big event.
Keep the cake cold. Refrigerate the cake once it’s frosted. The cold frosting stands up to the warm ganache. Speaking of ganache, allow it to cool slightly before adding it to the cake. Otherwise it would be a disaster. I learned that one the hard way. Hot ganache on cold frosting creates a mess of melting and sliding. Let it cool to room temperature, just until it’s thick enough to coat the back of a spoon.
Work fast with the ganache. If you don’t work fast enough and the ganache thickens too much, just reheat it until warm again. Alternatively you can keep the bowl on a heating pad while assembling. I’ve done both, and both work fine.
Slice yourself the first piece. This cake will go fast, and you earned it. Don’t be shy. Cut yourself a nice slice before you bring it to the table. Trust me, you’ll want to taste your work before the feeding frenzy begins.
Common Mistakes to Avoid
Common Mistakes & Fixes
Mistake: The cheesecake layer cracks.
Solution: This usually happens from overbaking or cooling too quickly. Use a water bath, take the cheesecake out while the center still jiggles, and cool it slowly in the oven with the door cracked. Also, run a knife around the edge immediately after baking to release tension.
Mistake: The cake layers slide apart during assembly.
Solution: Your cheesecake layer wasn’t cold enough. Make sure it’s been in the fridge for at least four hours, preferably overnight. Also, use a thin layer of frosting as glue between each layer. It really helps.
Mistake: The caramel sauce is too thick to pour.
Solution: Gently reheat it with a splash of heavy cream. Stir until it’s smooth and pourable. Don’t boil it, just warm it through. And remember, it will thicken as it cools, so pour it while it’s still warm but not hot.
Mistake: The ganache drips are uneven or messy.
Solution: Let the ganache cool to the right consistency before pouring. It should be thick enough to coat the back of a spoon but still pourable. If it’s too thin, it will run right off the cake. If it’s too thick, it won’t drip at all. Practice on a plate first if you’re nervous.
Storage and Leftovers
This cake is best enjoyed within a day or two of assembly. But if you have leftovers, here’s how to handle them. Cover the cake loosely with plastic wrap or place it in a cake carrier and keep it in the refrigerator. It will last up to 3 to 4 days. The flavors actually meld together a bit more overnight, so day two is often even better than day one.
To serve leftovers, let the cake sit at room temperature for about 20 minutes before slicing. This takes the chill off the cheesecake and lets the chocolate flavors come through. Don’t microwave it. Trust me, the texture gets weird. Just let it sit out for a bit.
Can you freeze this cake? Yes, but with a caveat. I recommend freezing the individual components before assembly. Freeze the cheesecake layer wrapped tightly in plastic and foil for up to a month. Freeze the cake layers wrapped well for up to two months. Then thaw everything in the fridge and assemble fresh. The texture is much better this way. If you freeze the fully assembled cake, the caramel can get grainy and the cheesecake can become watery when thawed. It’s not a disaster, but it’s not ideal.
Frequently Asked Questions
Dietary Adaptations
I know not everyone can eat the same things, so here are a few ways to adapt this caramel chocolate cheesecake cake for different needs. For a gluten-free version, use a gluten-free flour blend in the chocolate cake layers. I’ve had good luck with Bob’s Red Mill 1-to-1 Baking Flour. The texture is slightly different, a bit more tender, but it works. For the crust, use gluten-free chocolate cookie crumbs.
For a dairy-free adaptation, it gets a little trickier. Use a high-quality dairy-free cream cheese alternative, like the one from Miyoko’s or Kite Hill. Use a dairy-free sour cream alternative, and substitute the butter in the crust with a vegan butter stick. The chocolate cake can be made with almond milk and a neutral oil instead of butter. The caramel sauce can be made with coconut cream instead of heavy cream. The texture won’t be exactly the same, but it will still be delicious. I’ve tested this with a few friends who are dairy-free, and they were very happy.
For a lower-sugar version, you can reduce the sugar in the cheesecake by about a quarter cup, and use a sugar substitute in the chocolate cake. But I’ll be honest, this is an indulgent dessert. It’s meant to be a celebration. Maybe just enjoy it as is and save the health kicks for another day. That’s what I do.
Nutritional Information
Alright, let’s talk numbers. A single slice of this caramel chocolate cheesecake cake, assuming you cut it into 12 to 14 slices, contains roughly 550 to 650 calories. It has about 35 to 40 grams of fat, 55 to 65 grams of carbohydrates, and 8 to 10 grams of protein. The exact numbers depend on your specific ingredients and how generous you are with the caramel drizzle. Look, this is not a diet food. It’s a once-in-a-while, special occasion, blow-your-mind dessert. And that’s okay. Not everything you eat has to be a health food. Sometimes you just need a slice of something incredible.
If you’re concerned about the sugar content, you can use a sugar substitute in the cheesecake and cake layers, but I haven’t tested that extensively. I’d recommend looking for a recipe specifically designed for sugar substitutes if that’s a priority for you.
Final Thoughts
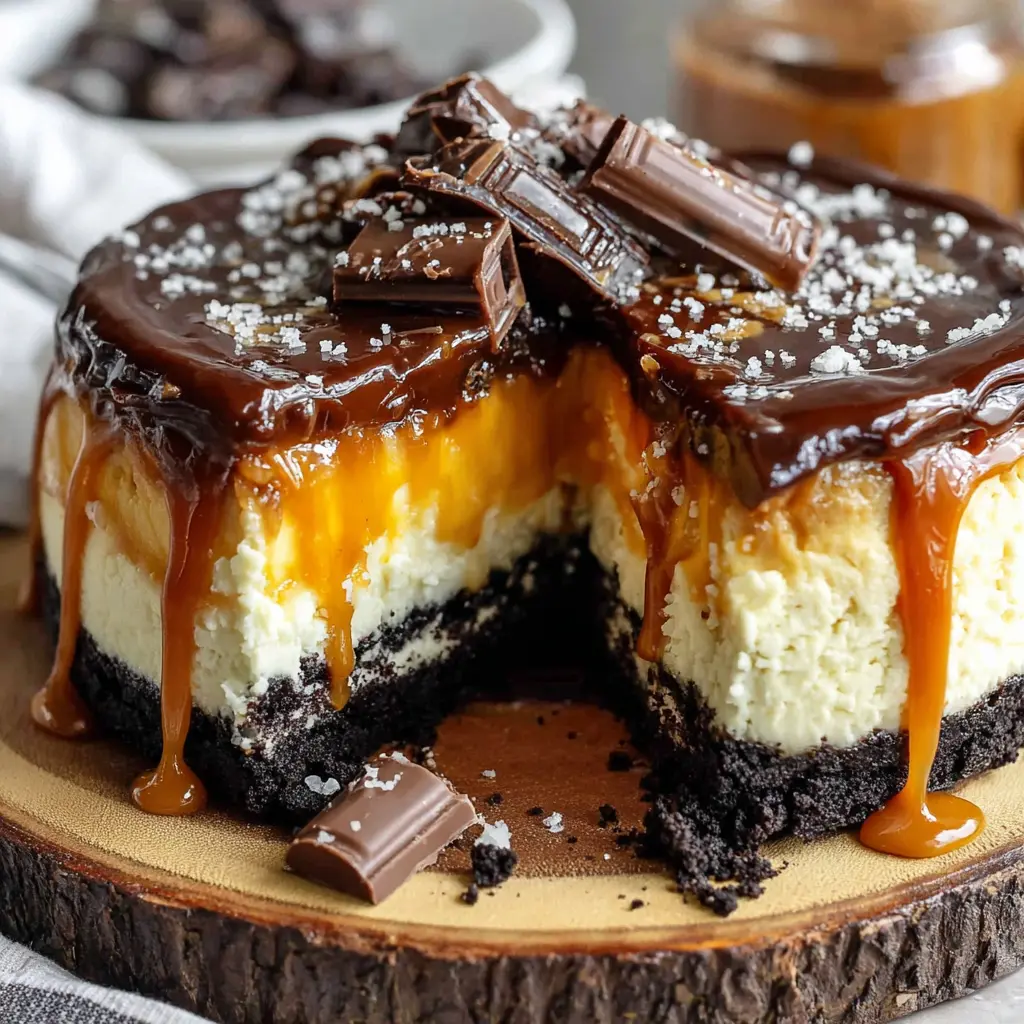
When you bring this caramel chocolate cheesecake cake to the table, people will gasp. I’ve seen it happen. The glossy caramel dripping down the sides, the layers of dark chocolate and creamy cheesecake, the sprinkle of sea salt catching the light. It’s a showstopper. And the first bite? That combination of fudgy chocolate, smooth cheesecake, and buttery caramel is something special. It’s the kind of dessert that makes people close their eyes and go quiet for a second. That’s the reaction you’re after.
I’ve been wrong before, but I don’t think I am on this one. This cake is absolutely killer. I could eat it every single day and die happy. But you don’t have to take my word for it. Try it and see what you think. And when you make it, tag me with your results. I want to see your masterpiece. Go ahead, you deserve this delicious triumph.
For more inspiration, check out my Pinterest boards where I share tons of variations and ideas.
Source: Health & Nutrition Research
Can I make Caramel Chocolate Cheesecake Cake ahead of time?
Absolutely. I actually recommend it. Make the cheesecake layer up to two days ahead and keep it in the fridge. Bake the cake layers a day ahead and store them wrapped at room temperature. Then assemble the day you plan to serve it. The caramel sauce can be made up to a week ahead and stored in the fridge. Just reheat it gently before pouring.
How do I store leftover Caramel Chocolate Cheesecake Cake?
Cover the cake loosely with plastic wrap or store it in an airtight cake carrier in the refrigerator. It will keep for 3 to 4 days. Let it sit at room temperature for about 20 minutes before serving to take the chill off. Don’t microwave it, the texture will suffer.
Can I use a different type of chocolate instead of semi-sweet chocolate chips?
You can, but it will change the flavor and texture. Semi-sweet is my go-to because it’s not too sweet and not too bitter. Dark chocolate will give a more intense, less sweet result. Milk chocolate will be sweeter and softer. If you use chocolate bars instead of chips, chop them finely so they melt evenly.
How can I prevent the cheesecake layer from cracking?
Use a water bath, don’t overbake, and cool it slowly. The cheesecake is done when the edges are set but the center still jiggles. Turn off the oven and let it sit with the door cracked for an hour. Then run a knife around the edge to release tension. These three steps are your insurance policy against cracks.
Can I substitute the sour cream with something else?
Plain full-fat Greek yogurt is your best bet. It has a similar thickness and tang. You could also use crème fraîche if you have it. Don’t use low-fat or nonfat options, they have too much water and will mess with the texture. The sour cream is there for moisture and acidity, so whatever you use should mimic that.