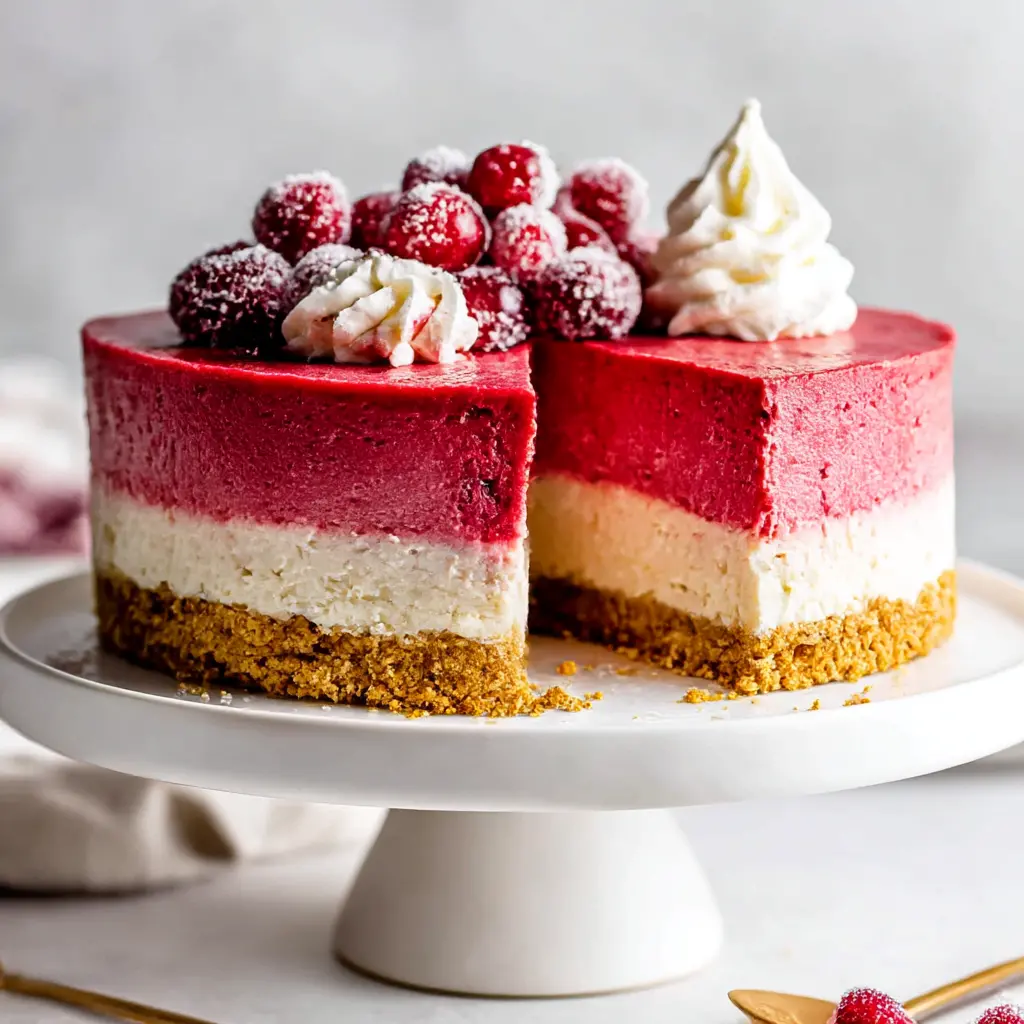
Why This No-Bake Cranberry Mousse Cheesecake Works
Fall is sneaking up fast. The mornings are crisper, the evenings shorter, and I can already feel the pull toward holiday baking. But it’s also still 95 degrees outside, so turning on the oven feels like a punishment. This cranberry mousse cheesecake is my compromise. It’s chilled, it’s creamy, and it tastes like autumn in a way that somehow works in August.
The first time I made this, my mousse was soup. Pink soup. I skipped the gelatin bloom, folded the cream too fast, and poured a disaster on top of a perfectly good cheesecake. I’ve made it many times since. Now, whenever I tell people this cranberry mousse cheesecake is no-bake, they never quite believe me.
Cranberries aren’t just for Thanksgiving. Late August is the bridge between seasons, one last gathering, one first taste of fall. This dessert lives right in that sweet spot.
Here’s why this no-bake cranberry mousse cheesecake works:
- No oven needed. You skip the heat while everyone else is sweating over a roast.
- Make-ahead friendly. Assemble it a day in advance, chill overnight, and your party-day stress disappears.
- Silky texture that holds its shape. The gelatin stabilizes the mousse so it sets clean.
- Tart and sweet balance. The cranberry layer cuts through the rich cream cheese mousse like nothing else.
- Freezer-friendly. Wrap the fully set cake and it keeps for up to 3 months.
Key Ingredients & Easy Swaps
This cranberry mousse cheesecake comes together in three mini recipes. The spiced cookie crust, the fluffy no-bake cheesecake filling, and that gorgeous ruby cranberry mousse on top. Each one is simple. Together, they look like you worked all day.
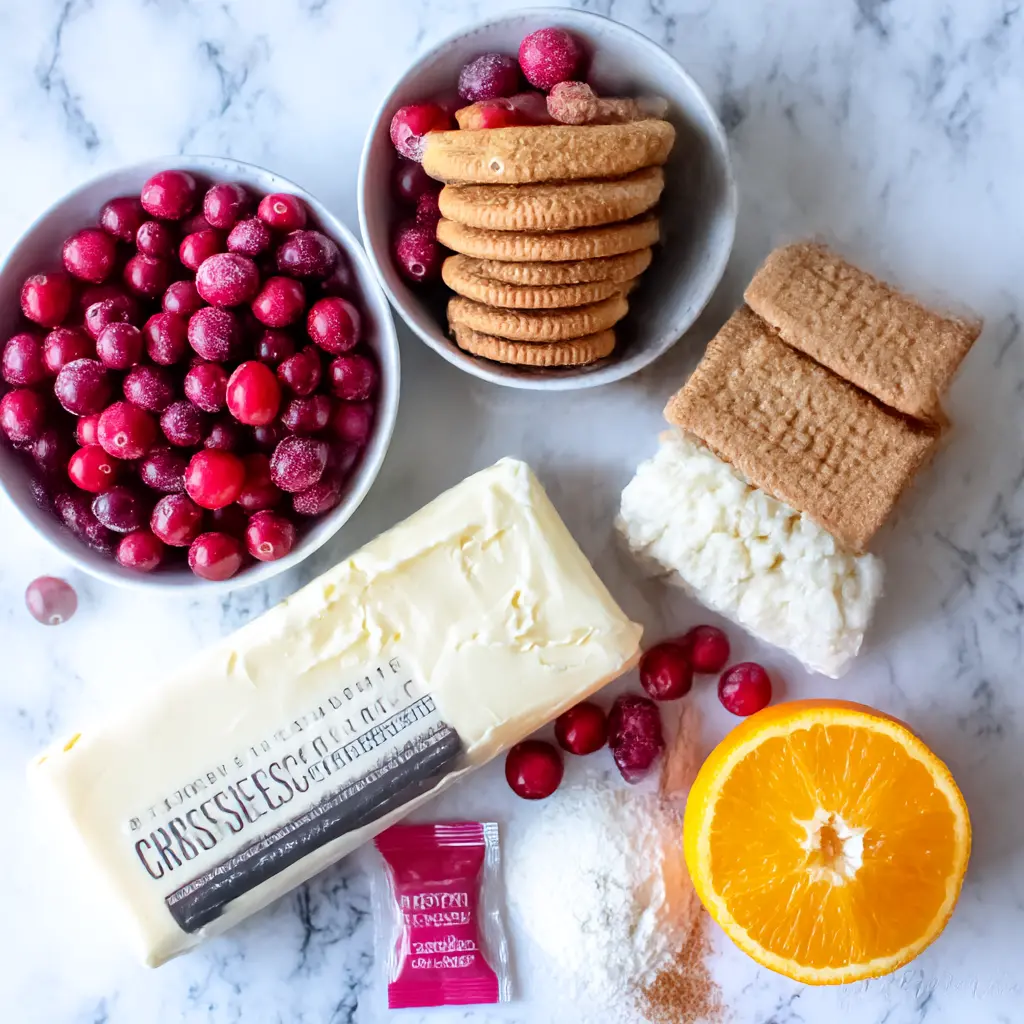
The cranberry layer is the star. You cook fresh or frozen cranberries with maple syrup, orange juice, cinnamon, and fresh ginger until they burst and release their juices. The smell alone is worth the effort. That deep ruby jammy swirl, the pop of tartness that cuts through all that cream, it’s unreal.
Every cranberry mousse cheesecake needs a solid foundation. Here are the key players:
- Biscoff cookie crumbs. They add a caramelized spice flavor that a graham cracker crust just can’t match. Swap in graham crackers or gingersnaps if that’s what you have.
- Cream cheese. Use full-fat, softened to room temperature. Reduced-fat versions add water and turn the filling soft and unstable.
- Unflavored gelatin powder. This is the mousse’s backbone. You bloom it in lemon juice, let it sit like a wet sponge for 5 minutes, then stir it into the warm cranberry mixture until fully dissolved.
- Heavy whipping cream. Needs at least 40% fat so it whips to stiff peaks. This is what keeps the filling cloud-like.
- Pure maple syrup. Swap for honey, agave, or granulated sugar dissolved in the orange juice. Any of them work.
- Fresh or frozen cranberries. Both work beautifully. If using frozen, no need to thaw, just cook a few extra minutes.
How to Make Cranberry Mousse Cheesecake, Step by Step
Make the Biscoff Cookie Crust
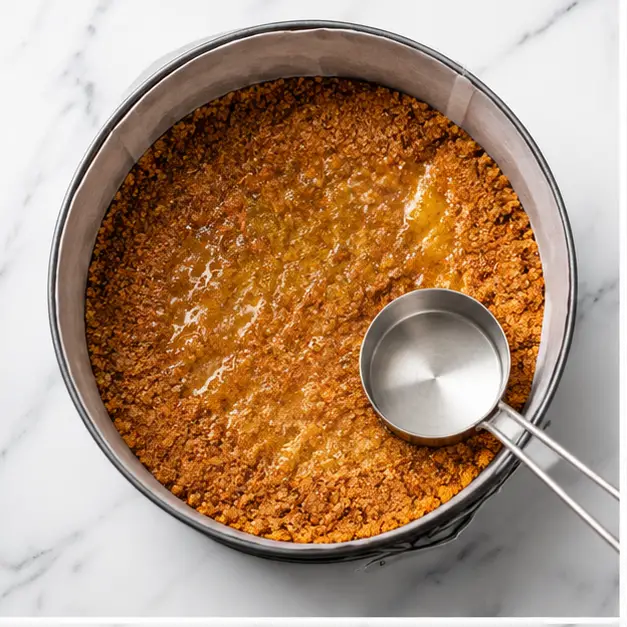
Line your springform pan with a round of parchment paper, then lock the ring back in place. This little step saves you from the crust-sticking nightmare later. If your pan is not nonstick, press a strip of parchment around the inside wall too, it makes the finished cake slip out effortlessly.
Pulse the Biscoff cookies in a food processor until they form coarse crumbs. Add the melted butter while pulsing, and keep going until the mixture looks like damp sand. Press it into the pan with the flat bottom of a measuring cup. Firm, even pressure. The crust is the unsung hero of this cranberry mousse cheesecake, so give it a good foundation. Pop it in the freezer while you build the other layers.
Make the Cranberry Mousse
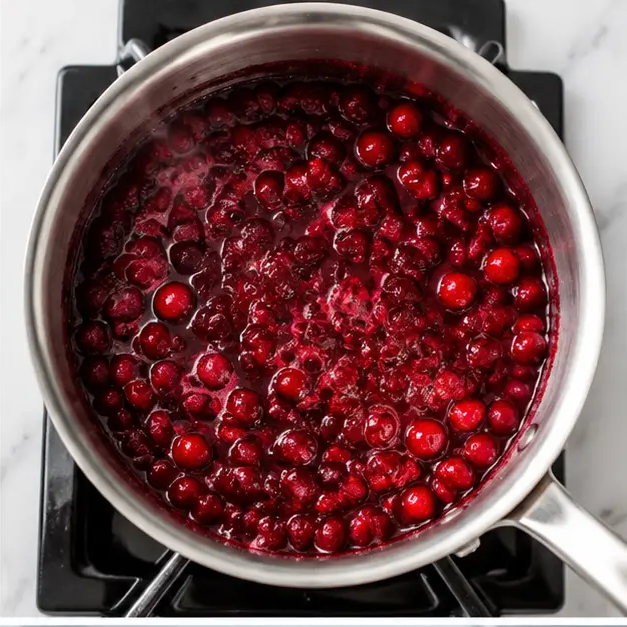
This is where the magic happens. Combine the cranberries, maple syrup, orange juice, cinnamon, and grated ginger in a saucepan over medium heat. Cook for 8 to 10 minutes, stirring occasionally, until the berries burst and the kitchen smells like a holiday candle. The color turns from deep red to almost burgundy, and the liquid thickens into something glorious.
While that bubbles, bloom the gelatin. Sprinkle it over the lemon juice in a small bowl and let it stand for 5 minutes until thick and spongy. Then stir the bloomed gelatin into the hot cranberry mixture until it completely dissolves.
Set a fine-mesh strainer over a mixing bowl and press the mixture through. You want every drop of that silky puree, so scrape the underside of the sieve too. This is what separates the smooth mousse from a chunky berry compote. Let it cool to room temperature before going further. Warm cranberry sauce will melt your mousse, and nobody wants that.
Make the No-Bake Cheesecake Filling
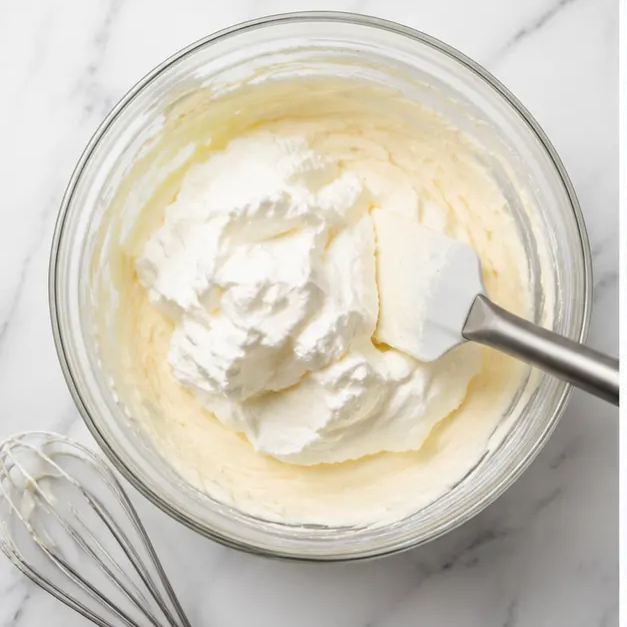
Beat the room-temperature cream cheese with powdered sugar, vanilla extract, and a touch of lemon juice until completely smooth. No lumps, no shortcuts. In a separate bowl, whip the heavy cream to stiff peaks. Then fold it into the cream cheese mixture with slow, deliberate strokes. Gently. You’re protecting the air that makes this filling fluffy instead of dense.
Take the crust out of the freezer, spoon the cheesecake filling over it, and smooth the top with an offset spatula. Return the pan to the refrigerator while you finish the cranberry mousse layer.
Assemble & Chill the Cheesecake
Whip another 1/4 cup of heavy cream to stiff peaks, then fold it into the cooled cranberry sauce with slow circular motions until no white streaks remain. You’re building the mousse now, and the key is patience. Fold, don’t stir.
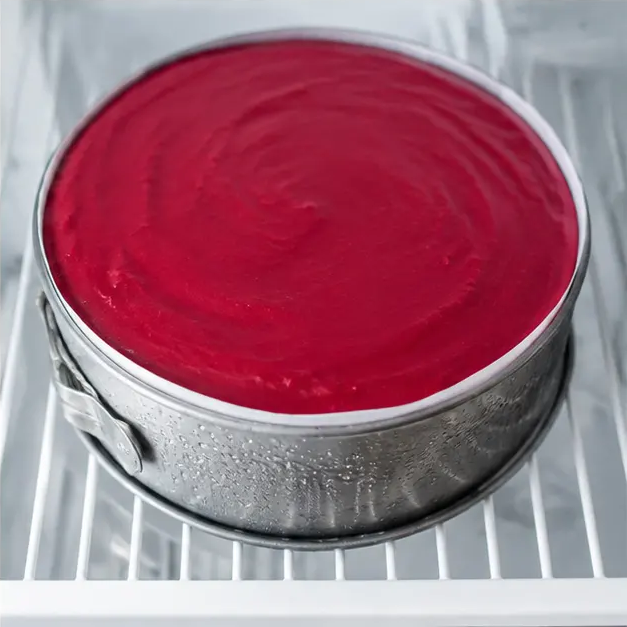
Pour the cranberry mousse over the cheesecake layer and spread it evenly. It doesn’t need to be perfect, soften the edges with the back of a spoon and nobody will know. Cover the pan with plastic wrap and refrigerate for at least 8 hours, or overnight. Yes, you really do need that much time. No, it’s not overkill. The chill is what lets both layers set into clean, sliceable perfection.
Choosing the Right Springform Pan Size
This recipe is built for a 6-inch springform pan. The 6-inch cake yields 4 to 6 slices, which is perfect for a small gathering or a week of fancy desserts all to yourself.
Hosting a bigger crowd? Double all of the ingredients and use a 9-inch springform pan. Expect a taller cake with the same clean layers. Want individual treats? Skip the springform pan entirely and layer the crust, filling, and mousse in small jars or glasses. Mini cheesecakes in jars are always a hit at parties, and there’s zero slicing required.
Tips for Success
This cranberry mousse cheesecake is forgiving, but it does have rules. I’ve broken every one of them at some point, so learn from my mistakes:
- Don’t skip the gelatin bloom. Those 5 minutes in lemon juice are non-negotiable. Skipping it is how you get runny mousse.
- Cool the cranberry sauce completely. Warm sauce deflates the whipped cream and turns the mousse into soup.
- Use full-fat cream cheese. The low-fat versions introduce water, and the filling won’t set properly.
- Chill for the full 8 hours. Overnight is even better. This is where patience pays off, I promise.
- Cut with a hot knife. Dip a sharp knife in hot water, wipe it dry, then slice. Repeat between cuts for those clean, beautiful pieces.
- Add garnishes close to serving. Whipped cream and sugared cranberries go on right before the cake hits the table, otherwise they turn liquidy.
Make-Ahead Timeline
Day 1: Make the Biscoff crust and the cranberry puree. Cool the puree in the fridge overnight.
Day 2: Whip up the cheesecake filling, assemble all three layers, and let it chill overnight.
Day 3 (party day): Unmold, garnish, and serve. You did the work ahead of time. Take the credit.
Storage, Serving & Make-Ahead
The beauty of a cranberry mousse cheesecake is how well it plays by your schedule. The cranberry puree can be made 2 to 3 days in advance and kept chilled. The fully assembled dessert needs at least 8 hours to set, so plan for an overnight rest. Leftovers keep covered in the refrigerator for up to 5 days.
To freeze, wrap the fully set, unserved cake in plastic wrap and a freezer bag. It keeps for up to 3 months. Thaw it in the fridge overnight, no rushing. Freeze it without any toppings, and it’ll look just as good as the day you made it.
When it’s time to serve, unclip the springform ring, peel away the parchment collar, and lift the cake onto a serving plate. Garnish each slice with sugared cranberries and a dollop of whipped cream if you’re feeling fancy. That first bite, creamy, then a tangy burst of cranberry, then the buttery spiced crust, is your reward.
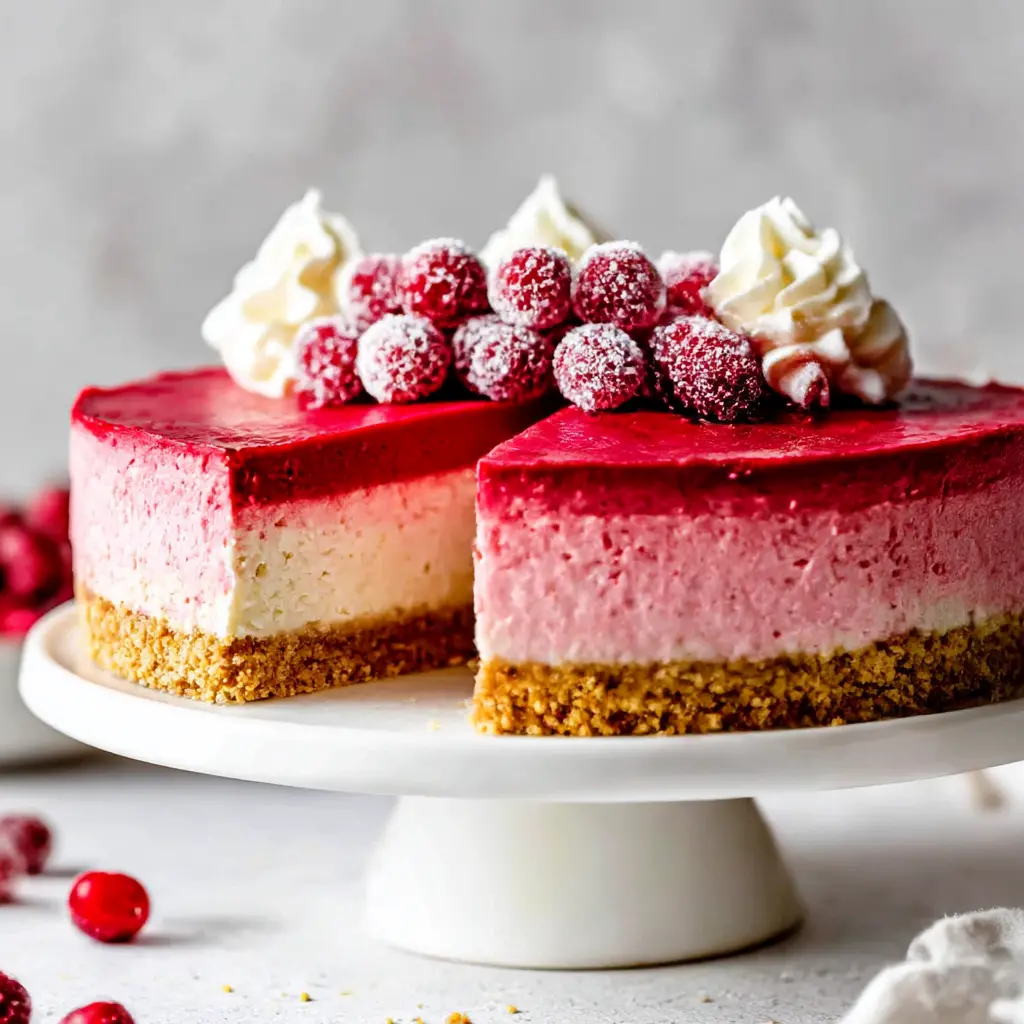
Fall has a way of making us want to impress. This cranberry mousse cheesecake is the dessert that turns a good host into a legendary one. When you bring it to the table, people will ask where you bought it. You can tell them the truth, or you can just smile. I won’t tell.
When you make it, come find me on Pinterest, I’d love to see that first clean slice. Trust me on this one, it’s a game changer.
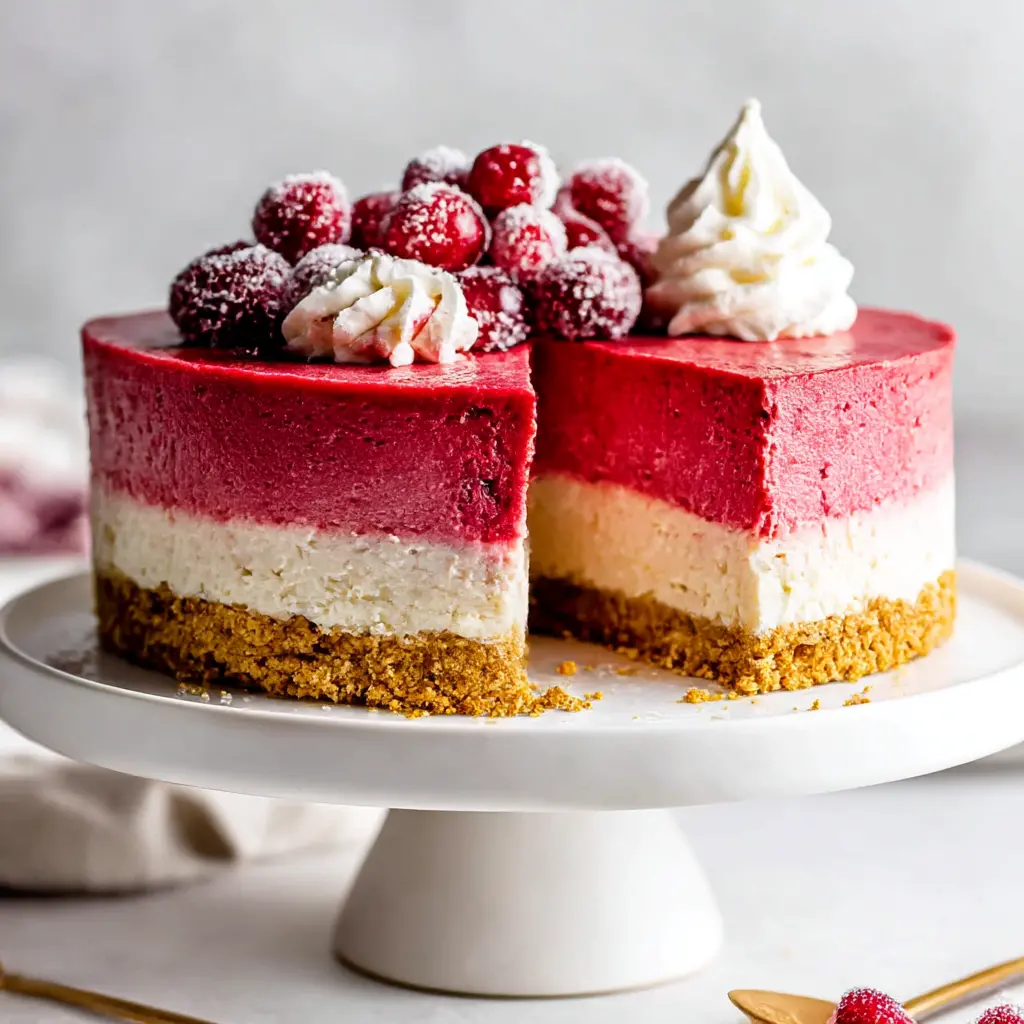
No-Bake Cranberry Mousse Cheesecake
Ingredients
Method
- Set the springform pan on a work surface, unclip the ring, and lay a round of parchment paper over the removable base. Lock the ring back in place. If you would like, press a strip of parchment around the inside wall so the finished cake slips out easily, especially if your pan is not nonstick.
- Place the Biscoff cookies in a food processor and pulse until they form coarse crumbs. While pulsing, add the melted butter and continue until the mixture looks like damp sand and every crumb is coated.
- Transfer the crumb mixture to the prepared pan. Use the flat bottom of a measuring cup or your fingers to press it down firmly and evenly. Pop the pan in the freezer so the crust can firm up while you make the mousse and cheesecake layers.
- In a medium saucepan over medium heat, combine the cranberries, maple syrup, orange juice, cinnamon, and grated ginger. Cook, stirring occasionally, until the berries burst and release their juices, 8 to 10 minutes.
- While the cranberries are bubbling, prepare the gelatin: put the lemon juice in a small bowl and sprinkle the gelatin powder over it. Let stand for 5 minutes until thick and spongy. Stir the bloomed gelatin into the hot cranberry mixture until completely dissolved.
- Set a fine-mesh strainer over a mixing bowl and pour in the cranberry mixture. Using a spatula or the back of a spoon, press the mixture through the sieve to extract every bit of liquid and smooth puree; scrape the underside of the sieve too. Discard the solids left behind. Let the cranberry sauce cool to room temperature.
- In a medium bowl, beat the room-temperature cream cheese, powdered sugar, vanilla, and lemon juice with a hand mixer on medium speed until smooth and no lumps remain. Set aside.
- In a separate small bowl, whip the heavy cream with the hand mixer on high speed until stiff peaks hold their shape.
- With a rubber spatula, gently fold the whipped cream into the cream cheese mixture. Use slow, deliberate strokes so the air stays in the filling. Tip: save the whipped cream bowl for the mousse step later, so you have one less bowl to wash.
- Take the crust out of the freezer. Spoon the cheesecake filling over it and smooth the top with an offset spatula. Return the pan to the refrigerator while you finish the cranberry mousse.
- To make the mousse topping, use the bowl you just reserved or another medium bowl, and whip the heavy cream on high speed until stiff peaks form.
- Very gently fold that whipped cream into the cooled cranberry sauce, using a spatula and slow circular motions, until no white streaks remain. Be careful not to deflate the cream.
- Remove the cheesecake from the fridge. Pour the cranberry mousse over the cheesecake layer and spread it evenly with a spatula. Cover the pan with plastic wrap (if a parchment collar sticks up, fold it over first so the wrap fits snugly). Refrigerate for at least 8 hours, or overnight.
- When you are ready to serve, unclip the springform ring. If you used a parchment collar, peel it away; if not, run a thin knife around the inside edge to release the cake. Lift the cake off the removable base with the help of the parchment, then slide it onto a serving plate and gently pull the parchment out from underneath.
- For clean slices, dip a sharp knife in hot water, wipe it dry, and cut through the cake. Garnish each slice with sugared cranberries and a dollop of whipped cream if you like. Enjoy!
Nutrition
Notes
Tried this recipe?
Let us know how it was!Frequently Asked Questions
Source: Learn More About This Dish
Can I use fresh whipped cream instead of Cool Whip?
Yes! This recipe actually uses freshly whipped cream in both the cheesecake filling and the cranberry mousse. Whip the heavy cream to stiff peaks, then fold it gently so you keep all that air. No store-bought topping needed here.
Can I make this cranberry mousse cheesecake into bars?
Absolutely. Skip the springform pan and press the crust into a lined square baking dish instead. Layer the filling and mousse the same way, then chill overnight. Slice into squares and serve straight from the dish. Great for parties.
Can I use other berries instead of cranberries?
Raspberries, mixed berries, or cherries all work beautifully in the mousse. Just keep in mind they’re sweeter than cranberries, so you may want to reduce the maple syrup slightly. Taste as you go and adjust, the tartness is part of the magic.
Can frozen cranberries be used instead of fresh?
Yes, and you don’t even need to thaw them first. Just toss them straight into the saucepan and cook a few extra minutes, covered, until they burst and release their juices. Frozen cranberries work perfectly in this no-bake cheesecake.
How many days in advance can I make this cheesecake?
The cranberry puree can be made 2 to 3 days ahead and chilled. The fully assembled cranberry mousse cheesecake needs an overnight chill, so aim for 1 day in advance. Leftovers stay fresh in the fridge for up to 5 days.
Can this cheesecake be frozen?
Yes. Freeze the fully set, unserved cake wrapped tightly in plastic wrap and a freezer bag for up to 3 months. Thaw it overnight in the fridge. Skip freezing if the cake is already topped with whipped cream and sugared cranberries.
Why is cranberry a Christmas thing?
Fresh cranberries peak in October through December, which made them a natural fit for holiday tables. Their bright tartness also cuts through the rich, heavy dishes we associate with winter feasts. It’s a flavor pairing that just made sense, and it stuck.
What are common cheesecake mistakes to avoid?
The big ones: skipping the gelatin bloom, using cold or low-fat cream cheese, folding the whipped cream too aggressively, and not chilling long enough. Give this recipe the full 8 hours in the fridge and you’ll be fine.
What are some variations of Christmas cheesecake?
Swap the Biscoff crust for gingersnaps, top with sugared cranberries, or add a swirl of cranberry sauce through the filling. You can also make this cheesecake in mini jars or as bars for a festive dessert table that’s easy to serve.