
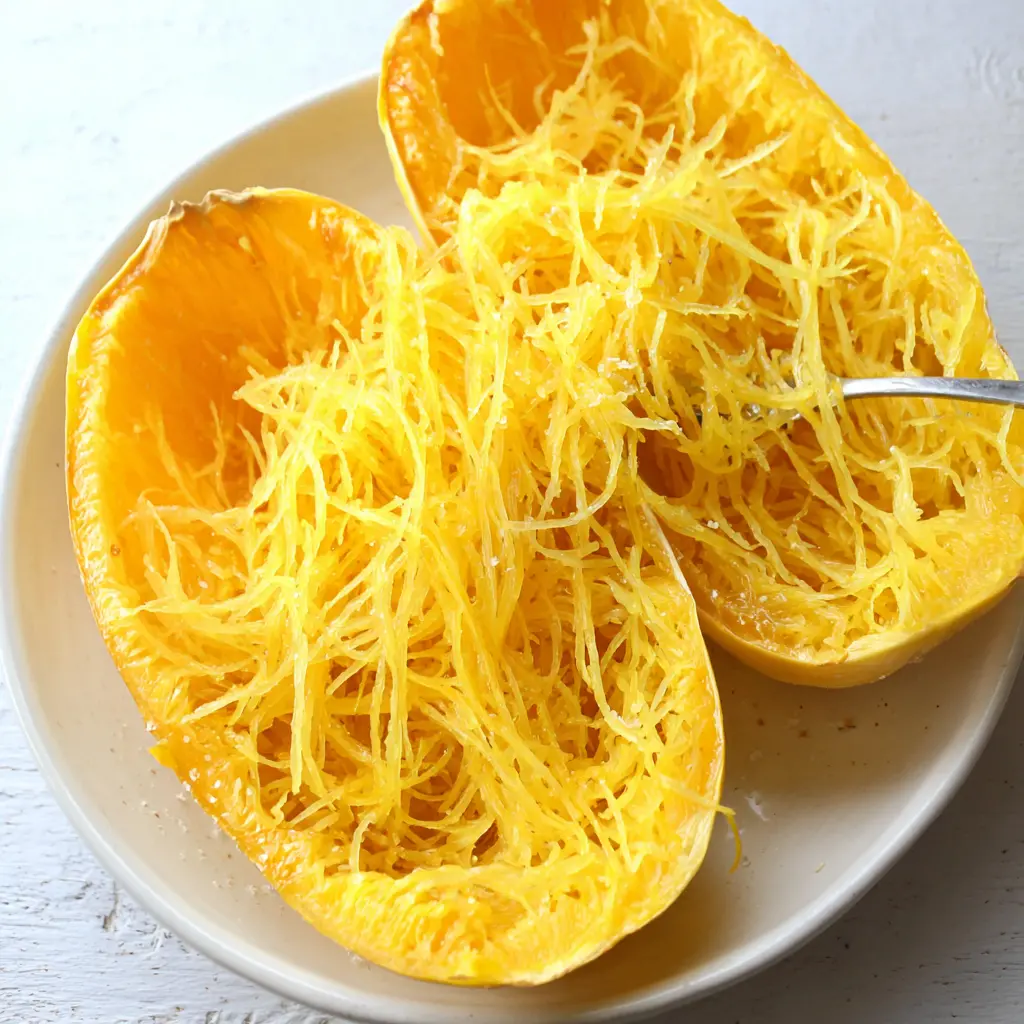
Why This Ring Method Works Best
I remember my first spaghetti squash adventure. I cut it in half lengthwise, roasted it for what felt like forever, and ended up with a watery, mushy mess. The strands were short, broken, and honestly? Kinda sad. I almost gave up on the whole low-carb pasta idea.
Then I discovered the ring method. And everything changed.
Cutting the squash crosswise into rings instead of lengthwise is the secret to getting those long, beautiful, pasta-like strands. It’s not just about looks either. The rings cook more evenly, they don’t trap as much moisture, and you get way less of that watery texture. Trust me, once you try cooking spaghetti squash this way, you’ll never go back.
Think of it like this: you’re basically making little squash donuts. Each ring roasts flat on the baking sheet, so the heat hits it from both sides. That means better caramelization, more flavor, and strands that actually hold up to sauce. It’s a game changer for anyone who wants a low carb pasta substitute that actually satisfies.
And for a healthy summer dinner? This is it. The oven does most of the work, you don’t have to stand over a boiling pot, and the result feels like a treat. Let’s get into it.
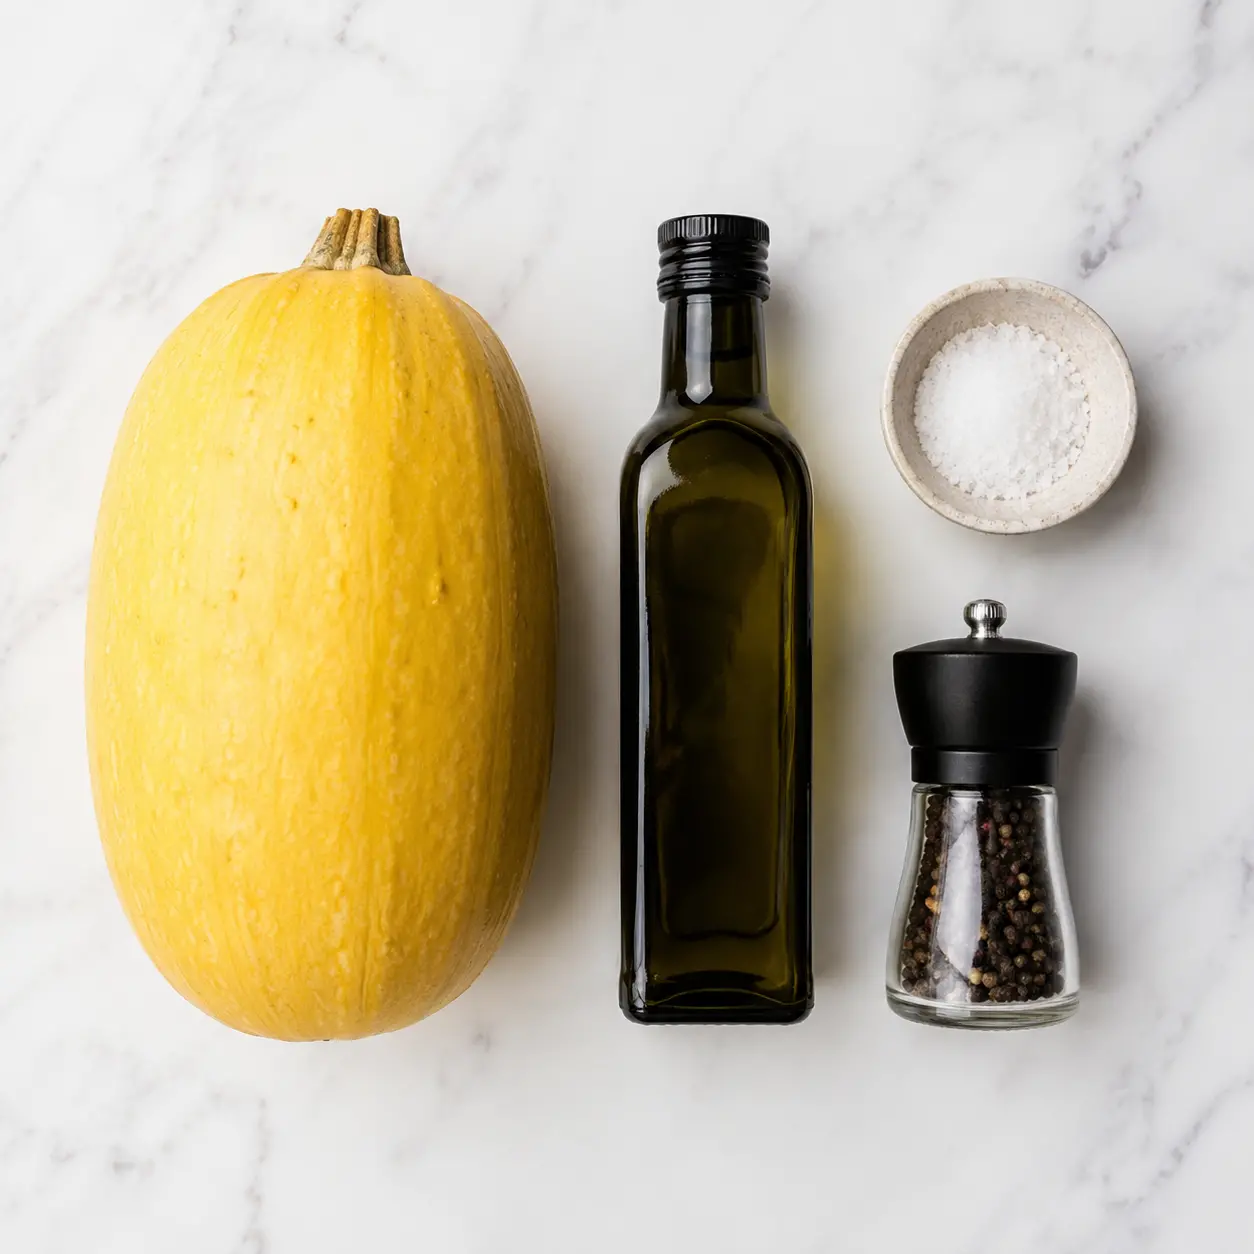
Ingredients You’ll Need
Here’s the thing about cooking spaghetti squash the right way. You don’t need a pantry full of fancy stuff. The beauty of this recipe is its simplicity. The squash itself is the star. You just need to treat it right.
- 1 large spaghetti squash Look for one that’s firm, heavy for its size, and has a nice even yellow color. No soft spots or cracks.
- 1-2 teaspoons California olive oil A good quality oil makes a difference. You want something with a clean, fruity flavor.
- Sea salt, to taste Flaky sea salt is my go-to. It adds that little crunch.
- Freshly ground black pepper, to taste Please grind it fresh. The pre-ground stuff just doesn’t compare.
That’s it. Four ingredients. But don’t let the short list fool you. The technique is what makes this easy spaghetti squash recipe sing. You can absolutely dress it up later with sauces and toppings, but the base? Pure and simple.
One thing I always say: if you can find a California olive oil, go for it. The flavor is often a bit more delicate and grassy, which pairs perfectly with the sweet, nutty taste of roasted squash. It’s a small detail that makes a big difference.
Step-by-Step Instructions
Alright, let’s walk through this. I’ll break it down into four stages. Each one is important, but none of them are hard. You’ve got this.
Stage 1: Cutting the Squash into Rings
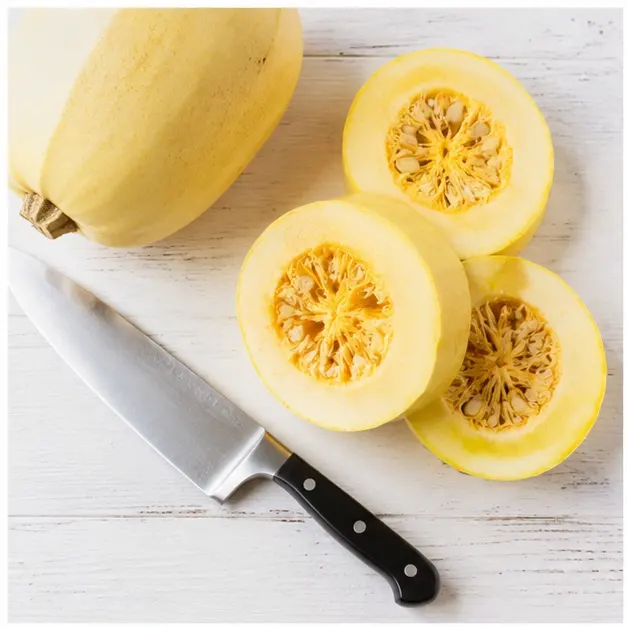
First things first, heat your oven to 400°F. While that’s warming up, grab your squash and a sharp chef’s knife. This is the part that makes people nervous, but I promise it’s easier than it looks.
Trim the very ends off the squash. Then, stand it up on one of the flat ends. Slice it crosswise into rings about 1 ½ inches thick. Try to keep them uniform this ensures even cooking. You’ll get about 4-5 rings from a large squash, plus the two end pieces.
If the squash is really hard to cut, you can soften it first. Prick it all over with a fork and microwave it for 2-3 minutes. That’ll make the knife glide right through. Just be careful, the squash will be hot.
Stage 2: Removing the Seeds
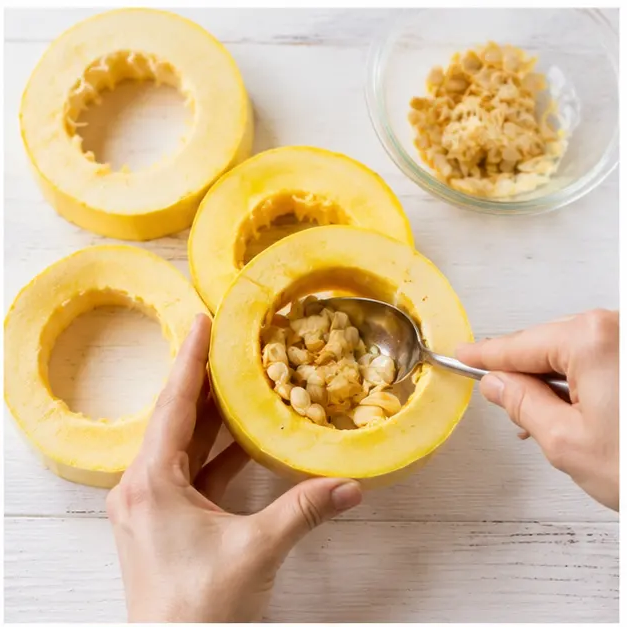
Now you’ve got your rings. Next up, scoop out the seeds from the center of each ring. A regular spoon works fine, but a grapefruit spoon with its serrated edge is honestly perfect for this job. It just scoops everything out cleanly.
Don’t worry about getting every single seed. Just remove the bulk of them and any stringy bits. The goal is to have a clean, open center in each ring. This is where the magic happens later.
Stage 3: Seasoning and Roasting
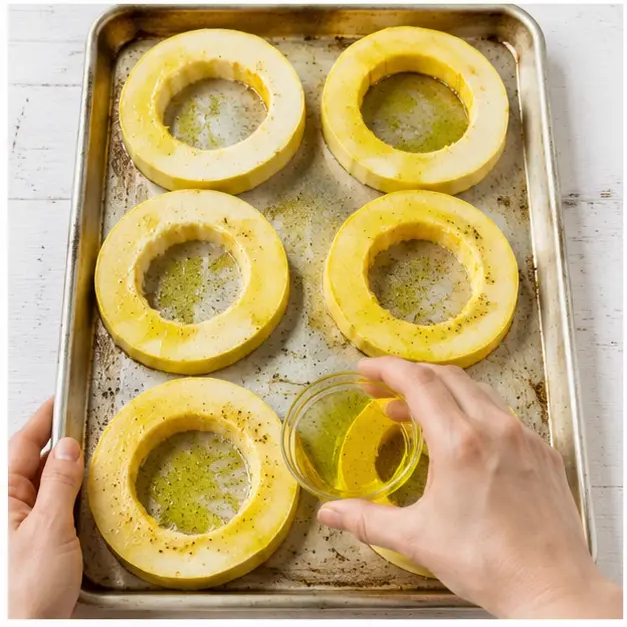
Arrange the rings on a rimmed baking sheet. No need to line it with parchment unless you want to the rings don’t stick much. Drizzle them with the olive oil and season with salt and pepper.
Here’s a trick: use your hands to rub the oil and seasoning all over each ring. Make sure every surface is coated. This isn’t just about flavor. The oil helps the rings caramelize and develop that beautiful golden color.
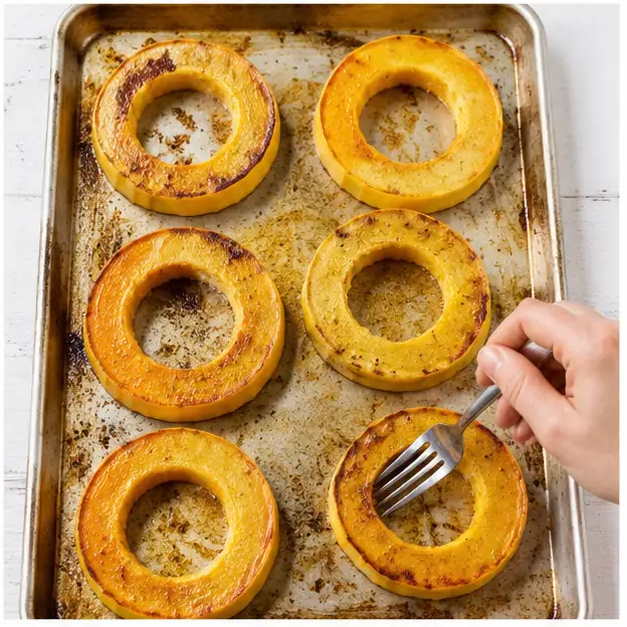
Roast for 30 to 40 minutes. Flip the rings once halfway through, around the 15-minute mark. You’ll know they’re done when a fork slides into the flesh like soft butter. The edges should be lightly browned and caramelized.
Stage 4: Shredding into Strands
Let the rings cool for about 15 minutes. This is important. If you try to shred them while they’re piping hot, you’ll burn your fingers. Patience, my friend.
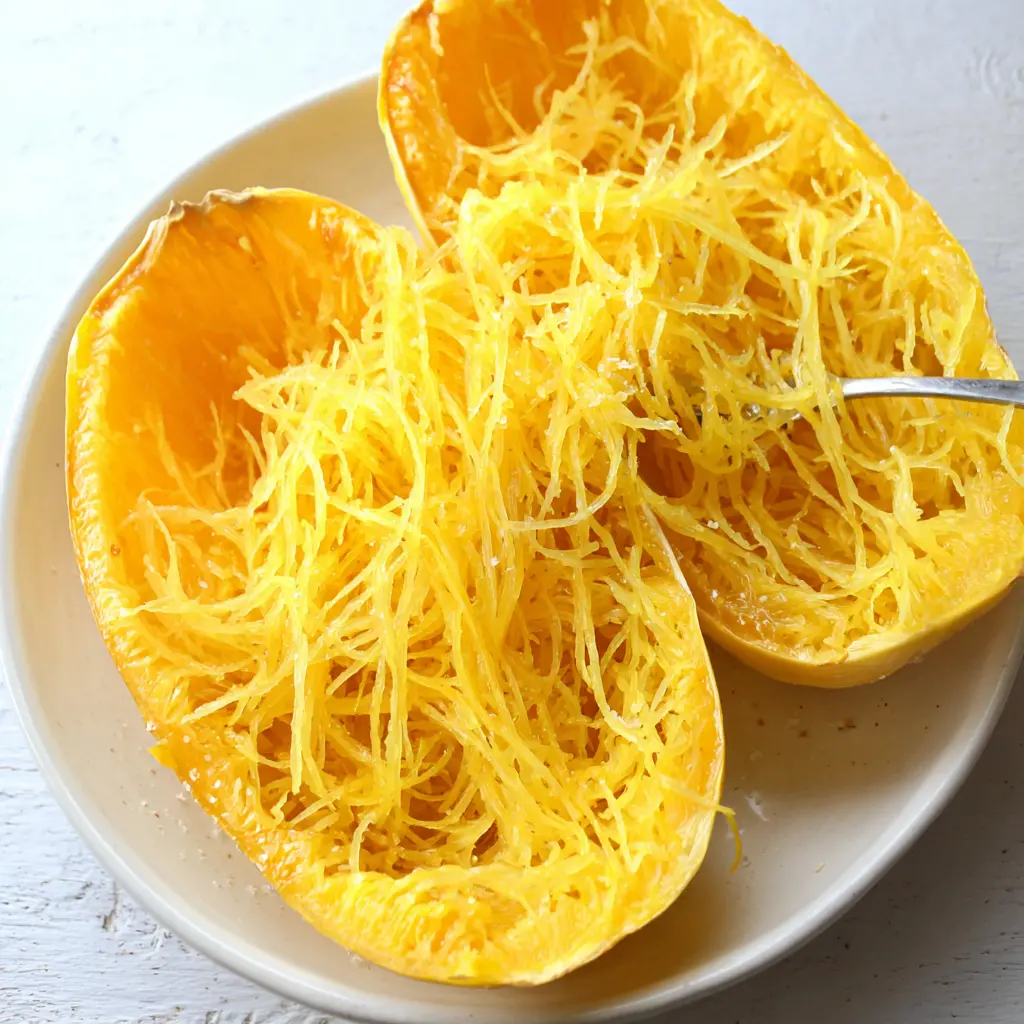
Once they’re cool enough to handle, peel off the skin. It should come off easily. Then, use a fork to separate the flesh into long, spaghetti-like strands. Just run the fork through the flesh, and it will naturally fall apart into beautiful ribbons.
And there you have it. Perfect, al dente strands. No sogginess. No broken bits. Just pure spaghetti squash strands ready for whatever sauce you throw at them.
Tips for Perfect Results
I’ve made plenty of mistakes with how to cook spaghetti squash, so you don’t have to. Here are the things I’ve learned the hard way.
Common Mistakes and How to Fix Them
❌ Overcooking the squash: This makes it mushy and watery. The strands lose their structure. ✅ Solution: Start checking for doneness at the 30-minute mark. A fork should slide in easily, but the squash shouldn’t be falling apart.
❌ Adding too much oil: It seems like a good idea, but excess oil can make the squash greasy and prevent proper caramelization. ✅ Solution: Stick to 1-2 teaspoons. You can always add more after roasting.
❌ Not cutting the rings evenly: Thick and thin rings cook at different rates. You’ll end up with some that are perfect and others that are either raw or mush. ✅ Solution: Take your time cutting. Use a ruler if you need to. Uniformity is key.
❌ Skipping the flip: If you don’t flip the rings halfway through, the bottom gets soggy while the top dries out. ✅ Solution: Set a timer for 15 minutes. Flip them. It’s that simple.
Another thing I always do? Let the roasted rings cool completely before shredding. I know it’s tempting to dive right in, but that cooling time lets the strands firm up. You’ll get a much better texture.
And if you’re wondering about how to avoid soggy spaghetti squash, the ring method is your answer. Because the rings sit flat on the baking sheet, steam can escape from both sides. No trapped moisture. No watery mess.
How to Store and Reheat Leftovers
This recipe is perfect for spaghetti squash meal prep. You can cook a big batch on Sunday and use it all week. Here’s how to handle leftovers.
Store the shredded strands in an airtight container in the fridge. They’ll keep for up to 4 days. Don’t add any sauce yet keep the strands plain until you’re ready to eat. That prevents them from getting soggy.
If you want to freeze them, go for it. Just make sure the strands are completely cool first. Transfer them to a freezer-safe bag, squeeze out as much air as possible, and lay the bag flat in the freezer. They’ll keep for up to 6 months.
When you’re ready to reheat, here are your options:
- Skillet: My favorite method. Heat a little olive oil in a skillet over medium heat. Add the strands and cook for 3-4 minutes, stirring occasionally, until warmed through. This gives them a nice, slightly crispy edge.
- Microwave: Quick and easy. Put the strands in a microwave-safe bowl, cover with a damp paper towel, and heat in 30-second bursts until hot. Be careful not to overdo it.
- Oven: Spread the strands on a baking sheet, drizzle with a little oil, and warm at 350°F for about 10 minutes.
One thing to watch out for: if your spaghetti squash seems watery after chilling, don’t panic. Just heat it in a dry skillet over medium-high heat for a minute or two. The excess moisture will evaporate. You can also lay the strands on a paper towel-lined plate for a minute to soak up any liquid.
Delicious Ways to Serve Spaghetti Squash
Now for the fun part. Once you’ve mastered cooking spaghetti squash, the possibilities are endless. Here are some of my favorite ways to serve it.
Classic Marinara: You can’t go wrong with a simple marinara sauce and a sprinkle of Parmesan cheese. It’s the most obvious choice, and for good reason. The strands mimic spaghetti so well that you’ll barely miss the real thing.
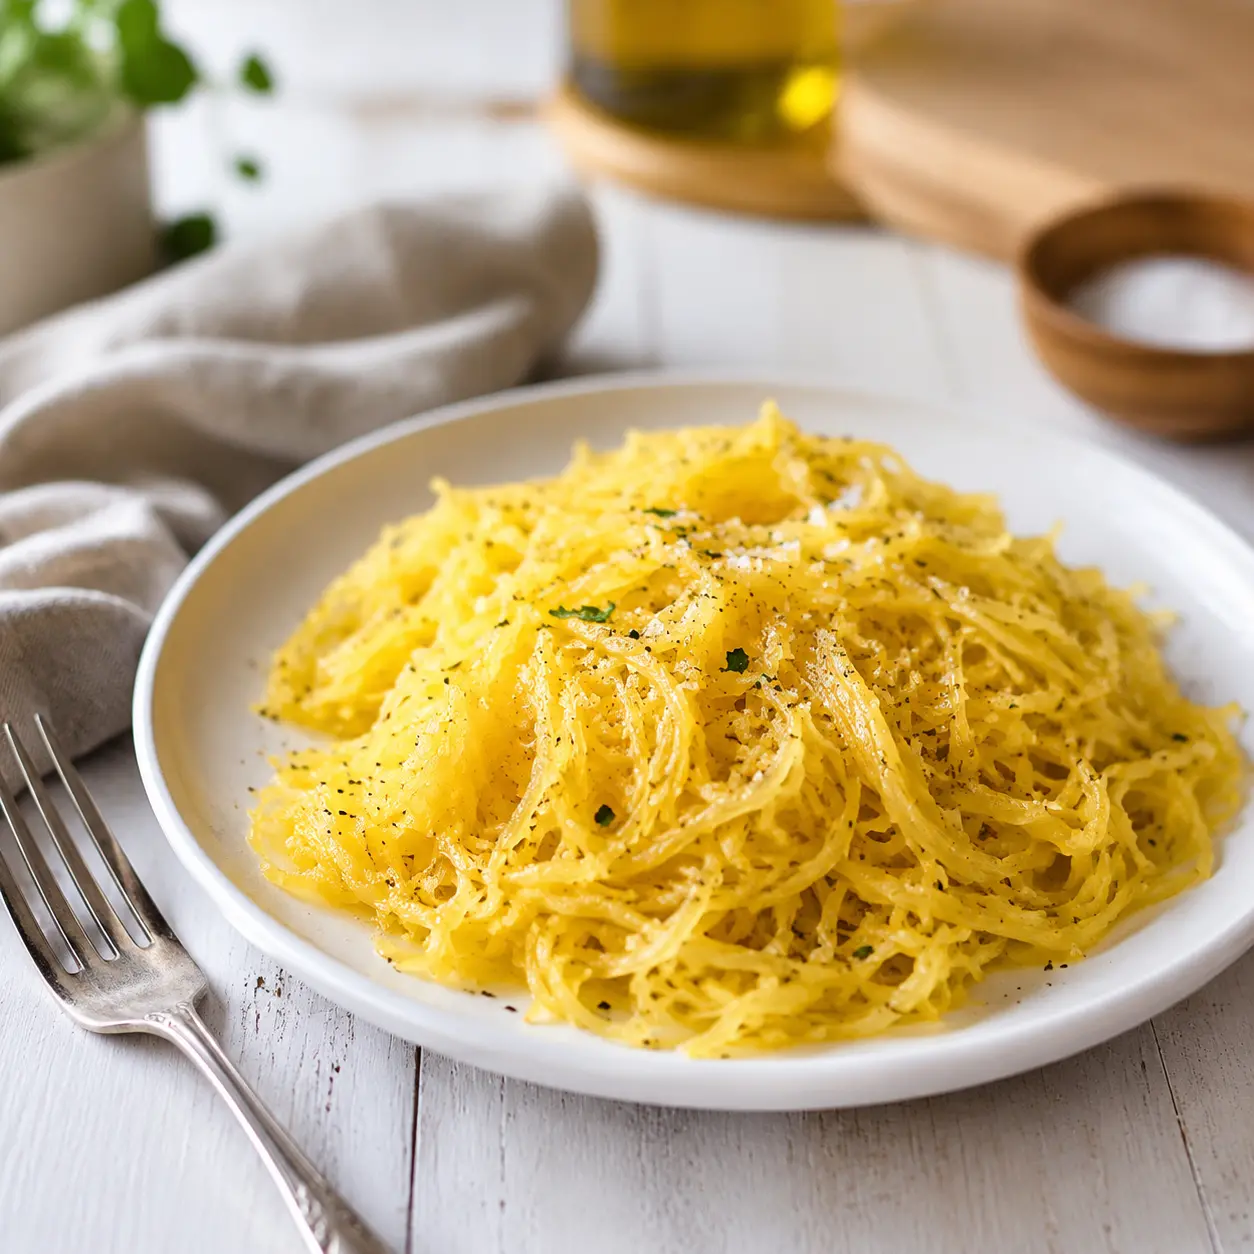
Butter and Garlic: Keep it simple. Melt a little butter, add some minced garlic, and toss it with the warm strands. Season with salt and pepper. It’s quick, it’s comforting, and it lets the squash flavor shine.
Pesto Perfection: A dollop of basil pesto stirred into the hot strands is a weeknight hero. Add some cherry tomatoes and pine nuts for extra texture.
As a Side Dish: Serve the strands alongside grilled chicken, fish, or steak. They’re a fantastic gluten free spaghetti squash option that everyone at the table can enjoy.
And for a vegetarian spaghetti squash dishes idea, try tossing the strands with roasted vegetables, chickpeas, and a squeeze of lemon. It’s a complete meal in a bowl.
The key is to treat the strands like you would any pasta. They’re a blank canvas. So go ahead, get creative.
Frequently Asked Questions
Final Thoughts on Cooking Spaghetti Squash
So there you have it. The ring method for cooking spaghetti squash that gives you long, beautiful, non-soggy strands every single time. It’s not complicated. It just takes a little know-how and the right technique.
I remember that first failed attempt so clearly. The disappointment of pulling a watery, sad squash out of the oven. But now? I look forward to it. It’s become a staple in my summer dinner rotation. It’s light, it’s healthy, and it feels like comfort food.
When you twirl those golden strands around your fork for the first time, you’ll feel it. That little sense of accomplishment. The relief of finally mastering a tricky vegetable. And the joy of a guilt-free pasta dinner that actually delivers.
Give it a try this week. You’ve got nothing to lose and a whole lot of delicious, healthy dinners to gain. And if you need more inspiration, come find me over on Pinterest. I’m always pinning new ways to enjoy this amazing squash.
how to cook spaghetti squash the ring method
Ingredients
Method
- Heat your oven to 400°F. Trim the ends off the squash, then slice it crosswise into rings about 1 1/2 inches thick, aiming for uniform thickness.
- Scoop out the seeds from each ring using a spoon; a grapefruit spoon works great for this.
- Arrange the rings on a rimmed baking sheet. Drizzle with olive oil and season with salt and pepper, using your hands to coat each ring evenly.
- Roast for 30 to 40 minutes, flipping the rings once halfway through, around the 15-minute mark.
- Let the rings cool for about 15 minutes, then peel off the skin and use a fork to separate the flesh into long spaghetti-like strands.
Nutrition
Notes
Tried this recipe?
Let us know how it was!Source: Health & Nutrition Research
How do I store cooked spaghetti squash?
Store the cooled, shredded strands in an airtight container in the fridge for up to 4 days. Don’t add sauce until you’re ready to eat. For longer storage, freeze the strands in a freezer-safe bag for up to 6 months. Just squeeze out the air before sealing.
What temperature do you roast spaghetti squash?
This recipe calls for roasting at 400°F. That temperature is hot enough to caramelize the edges and cook the squash through without drying it out. It takes about 30-40 minutes for the rings to become fork-tender, depending on their thickness.
My spaghetti squash is watery after chilling, how do I fix that?
Don’t worry, it happens. The best fix is to reheat the strands in a dry skillet over medium-high heat for 1-2 minutes. The excess moisture will steam off. You can also lay the strands on a paper towel-lined plate for a minute to soak up the liquid before reheating.
How do you know when Spaghetti squash is done in the oven?
The best test is the fork test. A fork should slide into the flesh easily, like it’s going through soft butter. The edges should be lightly browned and caramelized. For rings, start checking at the 30-minute mark. They should be tender but not falling apart.













3 Responses
I’ve always hated watery spaghetti squash, so this ring method sounds like a game changer! Do you roast them at the same temperature as the halved version, or does it need adjustments?
Great question! I roast the rings at 400°F, same as halved, but they cook faster—usually 25-30 minutes depending on thickness. Keep an eye on them for that golden caramelization!
Tried this last night and was blown away. The strands were actually long and not mushy at all. Paired it with a simple garlic butter sauce and it was perfect. Finally a low-carb pasta that feels like the real thing!