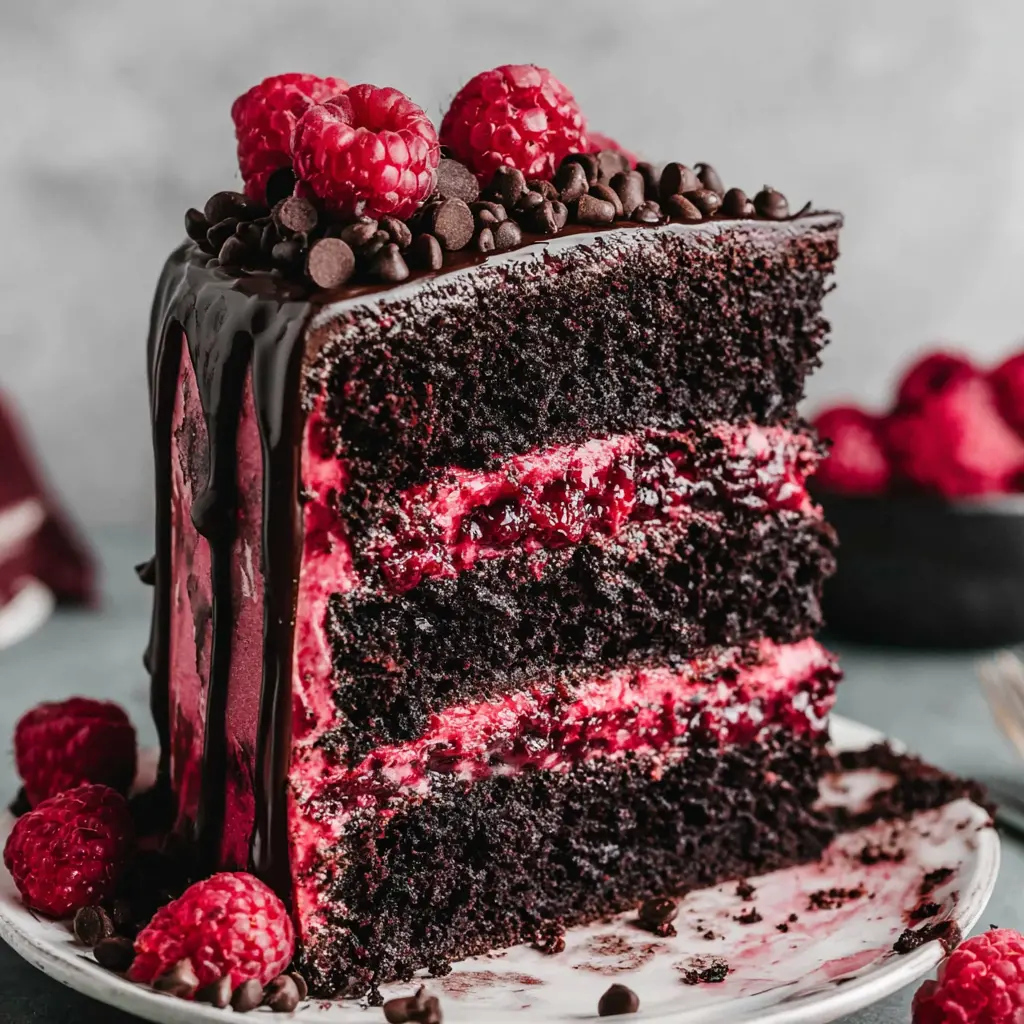
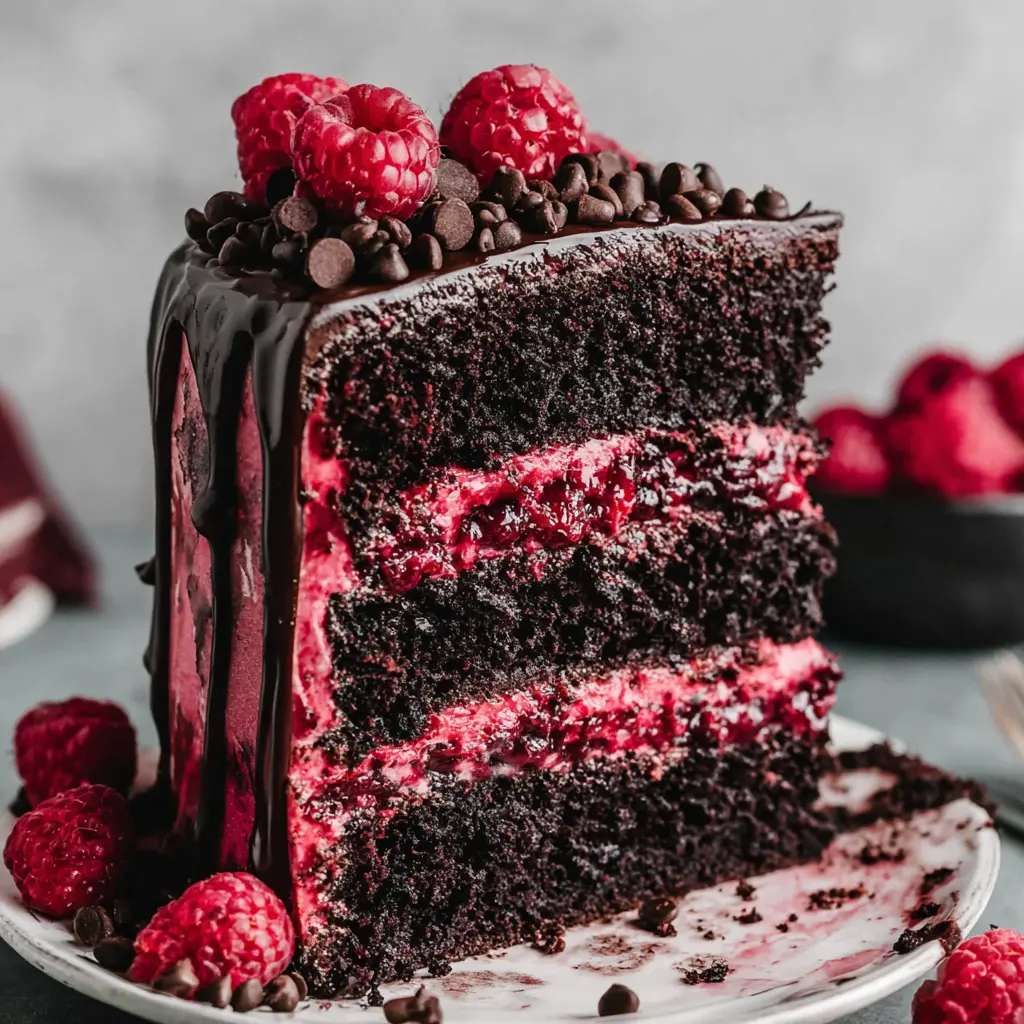
Rich Raspberry Chocolate Layer Cake
Ingredients
Method
- Prep: Preheat your oven to 350 ℉. Grease three 9-inch cake pans with shortening. Place a parchment circle in the bottom of each, then grease over that. Dust the inside of each pan well with flour, knocking out any excess.
- Make the Cake Batter: Measure the hot water into a 4-cup glass measuring cup or large bowl, then whisk in the cocoa until completely dissolved. Set aside to let come down to room temp. In a large mixing bowl, whisk together all the dry ingredients (including the sugars). Next, add the wet ingredients, including the room temp (not steaming hot!) cocoa and water mixture, and whisk until combined. There may be a few small lumps – that's fine.
- Bake the Cakes: Divide the cake batter evenly between the three pans (use a kitchen scale to weigh the full amount of batter, then divide by 3 to get it perfect!). Bake for 23 to 27 minutes, or until a toothpick inserted into the center pulls out moist crumbs. Let cakes cool in the pans on wire racks for 10 minutes before running a butter knife around the edge and inverting onto a cooling rack. Let cool completely.Tip: I recommend rotating cake pans halfway through since every oven will have hot spots and this ensures an even bake.
- Make the Raspberry Frosting: Beat butter in a large bowl until creamy, about 30 seconds. Mix in the powdered sugar in three additions, mixing between each until combined. Add the milk as needed to help things come together. Add the vanilla and salt and mix. Beat in the freeze dried raspberry powder & raspberry preserves. Beat in the cream cheese last, until well combined.
- Assemble the Cake: Place the first cake layer on a cake stand on top of a turntable. Spread 1 and 1/4 cups of frosting over the layer, going past the edge a smidge. Pipe a border around the cake layer, and pour 1/3 cup of raspberry preserves into the center. Spread evenly with an offset spatula, going to the edges of the border. Place the second cake layer on top and Spread any frosting "overhang" between the two layers to seal them together. Chill for 5-10 minutes to set things so the layers don't slide around. Repeat with the second layer. Add the final layer upside down for a flat top, and give the cake a thin layer of frosting on top and on the sides. Use a cake scraper to smooth out and remove excess. This is your crumb coat, so don't fret if it isn't perfect. Pop the cake in the fridge for 30 minutes or until the frosting is set. Then, frost the top and sides of the cake, smoothing things with the cake scraper or offset spatula. I left this cake semi-naked, which means I scraped off a more generous amount of frosting to let the cake peek through a bit. Chill the entire cake in the fridge for 30 minutes, or until set, before adding the chocolate drip.Tip: If your frosting is getting too soft at any point from sitting out, pop it back in the fridge for a bit to firm back up.
- Make the Chocolate Drip: Add finely chopped chocolate to a small bowl. Heat heavy cream in a small saucepan over medium heat until simmering. Pour over the chocolate, let sit for 4 minutes, then stir until completely smooth. Add 1-2 tsp vegetable oil to get a pourable consistency. Set cake on a turntable. Pour ganache into the center of the top of the cake, then spin the cake slowly while pushing ganache to the edges with an offset spatula to create drips. Let chill 20-30 minutes, until ganache is set.
- Serve + Store: Once ganache drip is set, pipe on swirls with remaining frosting and top with raspberries and chocolate chips. Slice and enjoy your life! Store leftovers in an airtight container in the fridge for 4-5 days.
- Make Ahead Tips: Cake layers can be made a day ahead. Bake them, let cool completely at room temperature, and then store them on dinner plates covered tightly with plastic wrap or foil. Store at room temp overnight.Raspberry frosting can be made a day ahead, covered tightly and stored in the fridge overnight. Beat it until creamy enough to spread before using.
Nutrition
Notes
Tried this recipe?
Let us know how it was!Why You’ll Love This Raspberry Chocolate Layer Cake
The first time I attempted a layer cake, the top layer slid off and landed frosting-side down on the floor. I’m not kidding. I stood there holding a spatula, staring at this beautiful disaster, and I almost gave up on layer cakes entirely. But this raspberry chocolate layer cake? It’s built to succeed. I designed it so that even your first attempt looks like it came from a bakery. Full disclosure, I messed this up twice before getting it right. But once I figured out the key steps, everything clicked.
This isn’t one of those finicky cakes that requires a pastry degree. The cake layers are incredibly moist thanks to buttermilk and oil, the raspberry filling stays put (no weeping here), and the cream cheese frosting pipes like a dream. Oh, and that smell? That’s what happiness smells like. Chocolate and fresh berries filling your kitchen. You’re going to want to make this for Mother’s Day, for spring birthdays, or honestly, just because it’s Tuesday.
I mean, it worked for me, but your mileage may vary. That said, I’ve tested this recipe six times, and it’s been consistent every single time. The key is understanding a few fundamental principles, which I’m going to walk you through step by step. No gatekeeping here.
Ingredients You’ll Need
Before we get into the nitty gritty, let’s talk about what goes into this raspberry chocolate layer cake. The ingredient list isn’t long, but each component plays a specific role. And I’m not mad about it.
For the cake layers themselves, we’re using cake flour (spooned and leveled, please), both light brown sugar and granulated sugar, baking soda and baking powder, salt, espresso powder, full fat sour cream at room temperature, milk, eggs at room temperature, vegetable oil, and vanilla extract. The hot water and unsweetened natural cocoa powder create that deep chocolate flavor. Coffee first, questions later. Well, hot coffee in this case. It doesn’t make the cake taste like coffee, it just makes the chocolate taste more like itself.
For the raspberry filling, you’ll need raspberry preserves, which are the backbone of that vibrant berry flavor. For the cream cheese frosting, we’ve got salted butter softened at room temperature, cream cheese, powdered sugar, milk, vanilla extract, salt, and freeze dried raspberries that get pulsed to a powder. That last bit is the real secret for getting that intense raspberry flavor into the frosting without making it watery.
The chocolate ganache is simple: semi sweet chocolate finely chopped, heavy cream, and a touch of vegetable oil for shine. And for decoration, fresh raspberries and mini chocolate chips. That’s it. Nothing crazy.
Substitutions & Variations
Alright, let’s get this show on the road with the substitutions. Because I know someone out there is already wondering if they can swap things around.
Don’t have cake flour? Use 2 tablespoons more all-purpose flour per cup. That’s a trick my dad taught me. He worked the line at a diner in Burlington for a few years before he became a teacher, and he knew all the shortcuts. If you don’t have buttermilk, you can make DIY buttermilk with milk and a splash of lemon juice or vinegar. Let it sit for five minutes and you’re good.
For the cocoa powder, you can use Dutch processed cocoa instead of natural cocoa. It’ll give you a deeper flavor, but the cake might not rise quite as tall. That’s the trade off. If you want to skip the espresso powder, just use hot water instead. The cake will still be delicious, just slightly less complex.
For a gluten free version, use a 1:1 gluten free flour blend. I’ve tested this with Bob’s Red Mill and it works great. For dairy free, swap the butter for a good vegan butter stick (not the spreadable kind), use dairy free cream cheese, and substitute the milk with oat milk or almond milk. The sour cream can be replaced with a dairy free yogurt. Look, I’m not a pastry chef, so take this with a grain of salt, but these swaps have worked for me in testing.
You can also swap the raspberry preserves for strawberry preserves or even cherry preserves. The freeze dried raspberries in the frosting can be swapped for freeze dried strawberries. The flavor changes, but it’s still gorgeous.
Recipe Science: Why This Works
I think understanding the science behind a recipe makes you a better baker. It’s like knowing why you shouldn’t rush the caramelization. Don’t rush the caramelization, buddy. Same idea here.
The hot water and cocoa powder create what’s called blooming. The heat helps the cocoa powder release its flavor compounds, making the chocolate taste richer and more intense. That’s why we dissolve the cocoa in hot water rather than just mixing it in dry. The espresso powder amplifies this effect without adding any coffee flavor. It’s like turning up the volume on the chocolate.
Buttermilk and sour cream add acidity, which reacts with the baking soda to create lift. That acidity also tenderizes the gluten, giving you a softer, more tender crumb. Oil instead of butter keeps the cake moist for days. Butter has water in it, which evaporates during baking. Oil doesn’t. So your cake stays moist longer. That’s the science.
For the raspberry filling, the cornstarch slurry is what thickens it. You dissolve cornstarch in cold water first, then add it to the hot preserves. If you add cornstarch directly to hot liquid, it clumps. I’ve made this mistake so you don’t have to. The lemon juice in the filling adds brightness and balances the sweetness. Don’t skip it.
The freeze dried raspberries in the frosting are a game changer. They add intense raspberry flavor without adding liquid, which would make the frosting runny. Pulse them into a powder in a food processor or blender. It’s like magic.
How to Make Raspberry Chocolate Layer Cake
Let’s walk through the process. I’ll give you the reasoning behind each step so you understand what’s happening and why.
Make the Raspberry Filling First
This is important. The raspberry filling needs time to cool and thicken before you assemble the cake. If you try to spread warm filling on cake layers, it’ll soak in and make everything soggy. So make the filling first, let it cool completely, and then move on to the cake layers.
In a small saucepan, combine the raspberry preserves with a little lemon juice and a cornstarch slurry. Cook over medium heat, stirring constantly, until it thickens. You’ll see it go from runny to jammy. That’s your cue. Remove from heat, stir in a splash of vanilla, and let it cool. Store it in the fridge while you make the cake.
Make the Cake Layers
Preheat your oven to 350°F. Grease and line three 8-inch cake pans with parchment paper. I’m not mad, I’m just disappointed in your seasoning if you skip this step. Trust me, you don’t want to fight with stuck cake layers.
In a large bowl, whisk together the dry ingredients: cake flour, both sugars, baking soda, baking powder, salt, and espresso powder. In a separate bowl or measuring cup, combine the hot water and cocoa powder. Whisk until smooth. This is your bloomed chocolate mixture.
In another bowl, whisk together the sour cream, milk, eggs, vegetable oil, and vanilla. Add the wet ingredients to the dry ingredients and mix until just combined. Then add the bloomed chocolate mixture and fold it in gently. Don’t over mix. Over mixing develops gluten, and that leads to a tough, dense cake. Scrape the sides of the bowl, too. You don’t want streaks of flour hiding at the bottom.
Divide the batter evenly among the three pans. For perfectly even layers, use a kitchen scale. It’s the only way to guarantee they bake at the same rate. Bake for 20 to 25 minutes, until a toothpick inserted in the center comes out with a few moist crumbs. Let the layers cool in the pans for 10 minutes, then turn them out onto a wire rack to cool completely.
Make the Cream Cheese Frosting
While the cake layers cool, make the frosting. In a stand mixer with the paddle attachment, beat the softened butter and cream cheese together until smooth and fluffy. This takes about 2 to 3 minutes. Scrape the sides of the bowl.
Add the powdered sugar one cup at a time, mixing on low speed to avoid a sugar cloud. Add the milk, vanilla, and salt. Then add the freeze dried raspberry powder. Mix until combined. If the frosting seems too stiff, add a little more milk. If it seems too soft, pop it in the fridge for 15 minutes.
Make the Ganache
Finely chop the semi sweet chocolate and place it in a heatproof bowl. Heat the heavy cream in a small saucepan until it just starts to simmer. Pour the hot cream over the chocolate and let it sit for 2 minutes. Then stir gently until smooth. Add the vegetable oil for shine. Let the ganache cool slightly before using. If it’s too runny, pop it in the fridge for 15 to 20 minutes to thicken.
Assemble the Cake
This is where the magic happens. Place one cake layer on your serving plate or cake stand. Spread half of the raspberry filling on top, leaving a small border around the edge. Add the second cake layer, spread the remaining filling, then add the third cake layer.
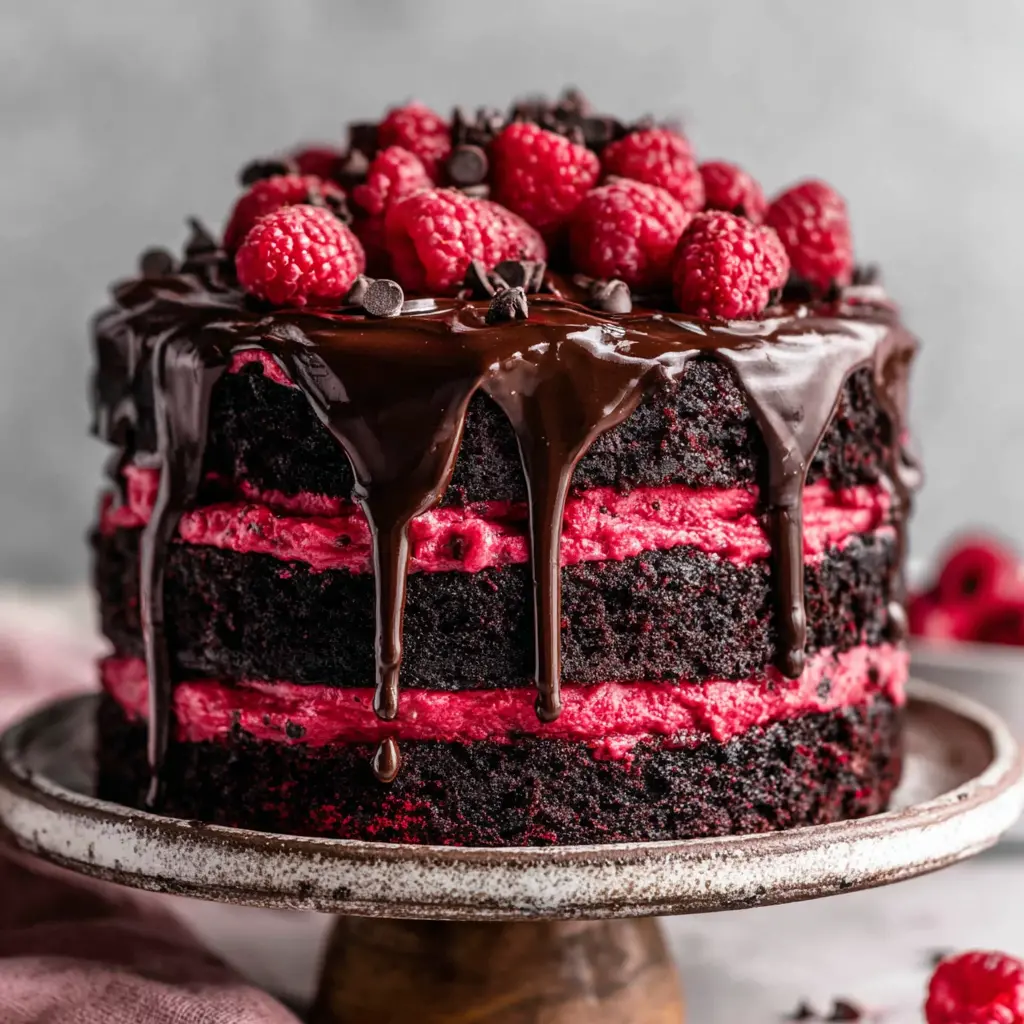
Apply a thin crumb coat of frosting all over the cake. This seals in the crumbs. Pop the cake in the fridge for 20 minutes to set the crumb coat. Then apply the final layer of frosting. Use an offset spatula for smooth sides, or leave it rustic with swirls. Pour the ganache over the top and let it drip down the sides. Decorate with fresh raspberries and mini chocolate chips.
Hot Tips for Success
I’ve compiled a list of tips that will save you from the same mistakes I made. Consider this your cheat sheet.
Room temperature ingredients are non negotiable. Cold eggs and cold sour cream will seize your batter and give you a dense cake. Take them out of the fridge an hour before you start baking. Same goes for the butter in the frosting. It needs to be soft enough that your finger leaves an indent without sinking in.
Don’t over mix the batter. Mix until just combined. A few streaks of flour are fine. Over mixing develops gluten and makes the cake tough. I’ve made this mistake so you don’t have to.
Let the cake layers cool completely before frosting. If they’re even slightly warm, the frosting will melt and slide off. Patience is a virtue, and in this case, it’s a necessity.
Chill the cake between steps. After the crumb coat, chill the cake for 20 minutes. After the final frosting, chill it for another 20 minutes before adding the ganache. This prevents everything from sliding around and gives you clean, sharp edges.
For the ganache, let it cool slightly before pouring. If it’s too hot, it’ll run right off the cake. Let it sit at room temperature for 10 to 15 minutes until it thickens to a pourable consistency.
If your buttercream becomes too stiff, melt a small portion and recombine it. This trick works like magic. Just take a spoonful of the frosting, microwave it for 10 seconds, and mix it back in. It’ll loosen everything up without making it too soft.
To remove air bubbles from buttercream, spread it on the inside of a bowl in a back and forth motion. This pushes the air out and gives you a smoother frosting. It’s a little extra work, but the result is worth it.
Common Mistakes & Fixes
Mistake: The cake layers domed in the center.
Solution: Your oven was too hot, or you overfilled the pans. Use a kitchen scale to divide the batter evenly, and check your oven temperature with an oven thermometer. You can also level the domes with a serrated knife once they’re cool.
Mistake: The raspberry filling is too runny.
Solution: You didn’t cook it long enough. Cook it for another minute or two until it thickens to a jammy consistency. It should coat the back of a spoon.
Mistake: The frosting is too soft and won’t hold its shape.
Solution: Your butter or cream cheese was too warm. Pop the frosting in the fridge for 15 to 20 minutes to firm up. If it’s still too soft, add a little more powdered sugar.
Mistake: The ganache dripped all the way off the cake.
Solution: The ganache was too warm. Let it cool for another 10 minutes until it’s thick enough to hold a ribbon when you lift the spoon.
Mistake: The cake layers are dry.
Solution: You likely over baked them. Check for doneness at 20 minutes. Also, make sure your buttermilk and sour cream are at room temperature. Cold ingredients can throw off the baking time.
Storage & Make Ahead Tips
This raspberry chocolate layer cake stores beautifully, which makes it perfect for planning ahead. Here’s what I recommend.
Storing the whole cake: Transfer the cake to an airtight cake carrier or wrap it in a double layer of plastic wrap. Store it in the refrigerator for up to 5 days. Before serving, let it sit at room temperature for about an hour. The cake needs to warm up a bit so the chocolate coating is soft and easily sliced.
Storing individual components: The cake layers can be made up to 2 days ahead. Wrap them tightly in plastic wrap and store at room temperature. The raspberry filling and cream cheese frosting can be made up to 4 days ahead and stored in the refrigerator. The ganache can be made a day ahead and stored in the fridge. Reheat it gently in the microwave in 10 second bursts to bring it back to a pourable consistency.
Freezing the cake: You can freeze the whole assembled cake or individual slices. Let the cake firm up in the fridge first, then wrap it in a double layer of plastic wrap and a layer of aluminum foil. Store it in the freezer for up to 3 months. To thaw, transfer it to the refrigerator overnight, then bring it to room temperature before serving.
Freezing cake layers: If you want to freeze just the cake layers, wrap them individually in plastic wrap and then in foil. They’ll keep for up to 3 months. Thaw at room temperature before assembling.
Serving tips: This cake is best served at room temperature. The chocolate coating softens, the filling becomes luscious, and the frosting pipes perfectly. Garnish with fresh raspberries right before serving for that pop of color.
Frequently Asked Questions
More Raspberry Desserts You’ll Love
If you’re as obsessed with the raspberry and chocolate combination as I am, you’ll want to check out my other berry forward desserts. There’s something about that sweet tart raspberry against rich chocolate that just works. I’ve got a raspberry chocolate tart that’s perfect for summer, a raspberry chocolate mousse that’s light and airy, and a raspberry chocolate cheesecake that’s absolutely decadent.
For more inspiration, check out my Pinterest boards where I share tons of variations and decorating ideas. I’m always adding new recipes there.
Conclusion
When you pull out this raspberry chocolate layer cake, take a moment to admire your work. Look at those even layers, that glossy ganache, those vibrant raspberries on top. You did that. And it’s gorgeous.
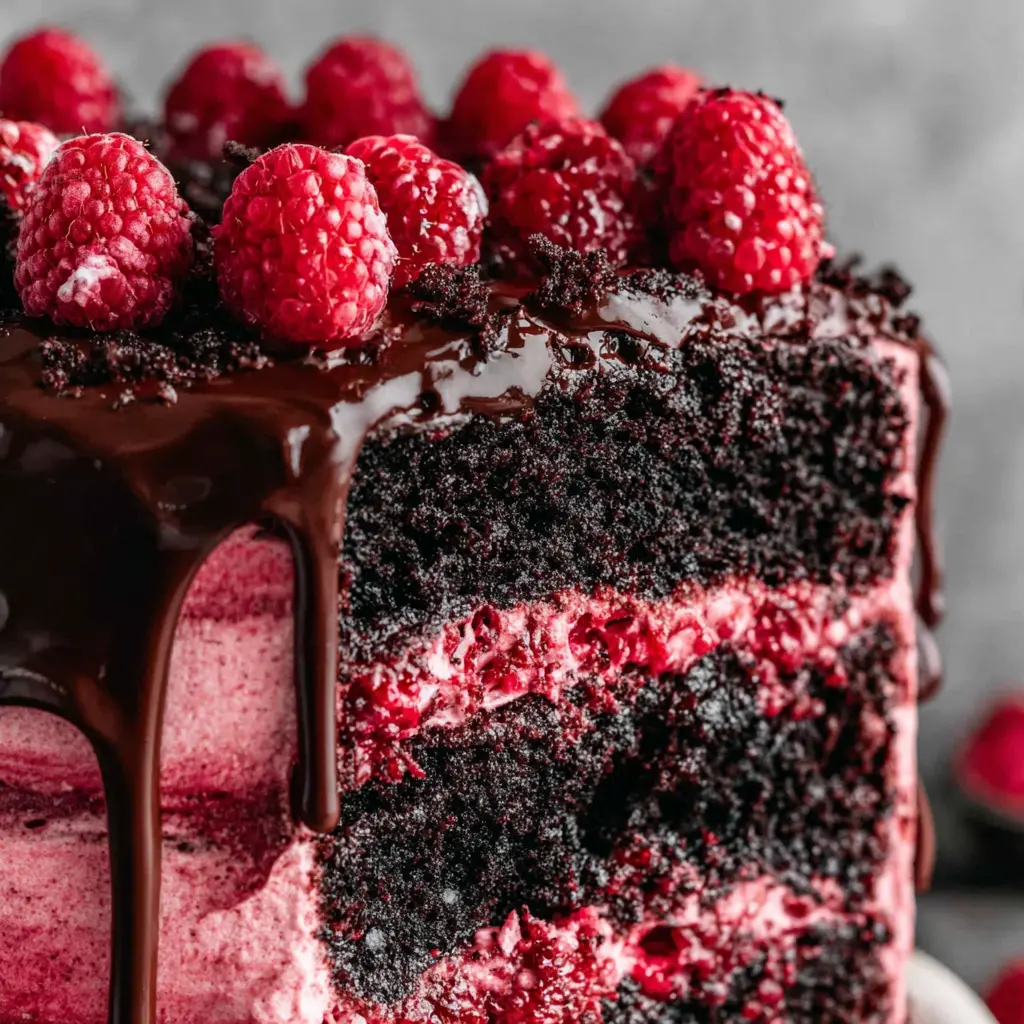
Imagine slicing into the cake the vivid red raspberry jam against the dark chocolate crumb, the glossy frosting that holds its shape. The smell of chocolate and berries will fill your kitchen. That’s the payoff. That’s why we bake.
Go ahead, slice into that masterpiece. You earned it. And when you do, tag me in your photos. I love seeing your creations. Happy baking, friends.
Source: Nutritional Information
Can I make Raspberry Chocolate Layer Cake ahead of time?
Absolutely. You can make the cake layers up to 2 days ahead, the filling and frosting up to 4 days ahead, or assemble the whole cake 1 to 2 days in advance. Just store it in the fridge and bring it to room temperature before serving.
How do I store leftover Raspberry Chocolate Layer Cake?
Store leftover cake in an airtight container in the refrigerator for up to 5 days. Let it sit at room temperature for about an hour before serving for the best flavor and texture. You can also freeze slices for up to 3 months.
Can I use cake flour instead of all purpose flour?
Yes, this recipe uses cake flour for a tender crumb. If you only have all purpose flour, use 2 tablespoons more per cup of all purpose flour. The cake will still be delicious, just slightly less tender.
Can I use regular or natural cocoa powder instead of Dutch processed?
You can use natural cocoa powder, but the cake may not rise as tall. Dutch processed cocoa gives a deeper, more intense chocolate flavor. If you use natural cocoa, make sure it’s unsweetened and adjust the baking soda slightly if needed.
Can I use frozen raspberries instead of fresh for the filling?
Yes, you can use frozen raspberries for the filling. Just don’t thaw them first. Add them directly to the saucepan and cook until they break down and the mixture thickens. You may need to cook it a minute or two longer.
How do you prevent the chocolate ganache drip from running off the cake?
Let the ganache cool until it’s thick enough to hold a ribbon when you lift the spoon. If it runs off the cake, it’s too warm. Pop it in the fridge for 10 to 15 minutes to thicken. Also, make sure your cake is chilled before pouring.
How long does a moist chocolate raspberry slice stay fresh?
Stored properly in the refrigerator, individual slices stay fresh for up to 5 days. For best results, let them come to room temperature before serving. You can also freeze slices for up to 3 months.