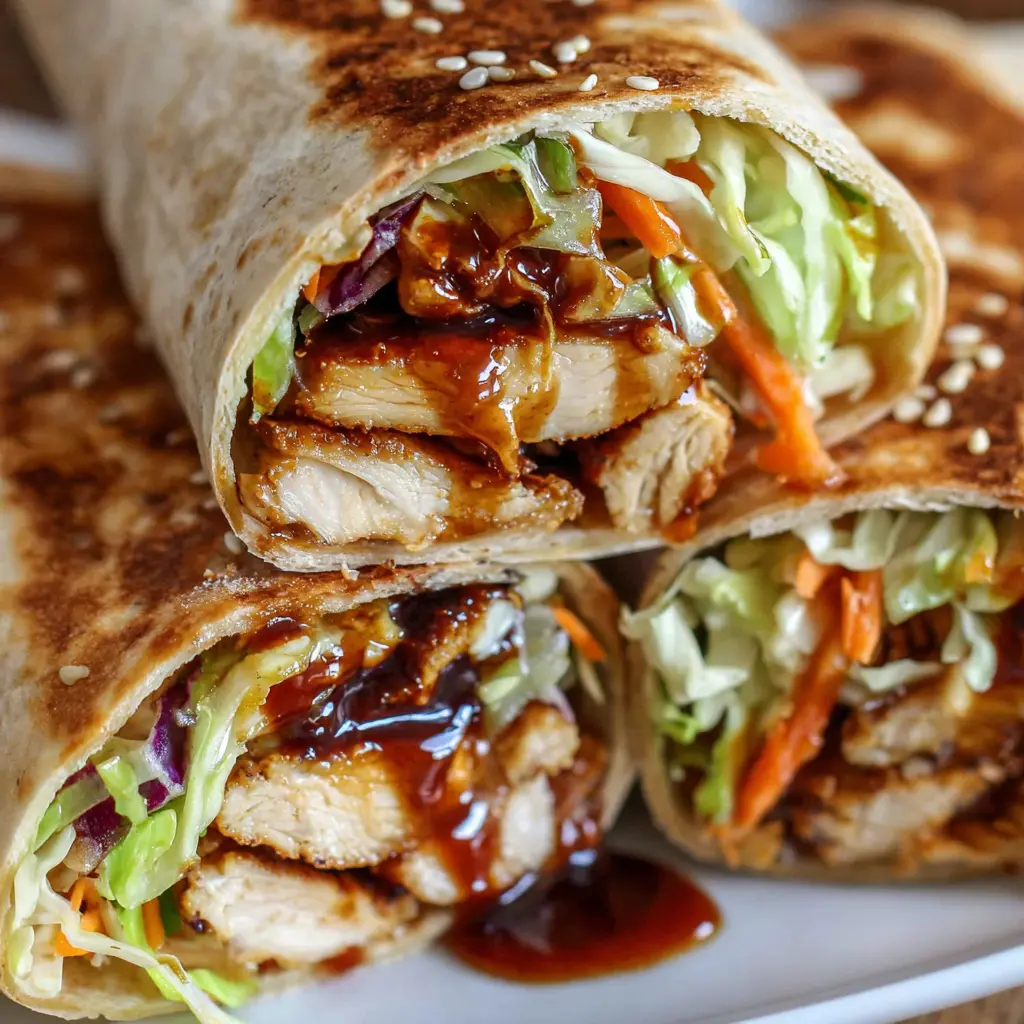
Air Fryer Teriyaki Chicken Wrap
Ingredients
Method
- In a small bowl, whisk together soy sauce, mirin, brown sugar, rice vinegar, grated ginger, and minced garlic. Set aside.
- Heat vegetable oil in a large skillet over medium-high heat. Add chicken strips and sauté for 3 to 4 minutes until golden and nearly cooked through.
- Pour teriyaki sauce over chicken. Continue cooking and stirring for 3 to 4 minutes until sauce thickens and coats chicken evenly. Remove from heat.
- Heat flour tortillas briefly in a dry pan or microwave until pliable and warm.
- Lay each tortilla flat. Layer with one-quarter of the shredded cabbage, carrots, and spring onions. Top with glazed chicken strips.
- Sprinkle with toasted sesame seeds and fresh cilantro leaves if desired.
- Fold the sides of the tortilla inward, then roll up tightly from the bottom to form a secure wrap.
- Serve immediately or wrap in parchment paper for convenient transport.
Nutrition
Notes
Tried this recipe?
Let us know how it was!Why This Air Fryer Teriyaki Chicken Wrap Works
You know those nights when you stare into the fridge and pray for a miracle? It’s 5:45, you’re tired, and everyone is hungry. This wrap is that miracle. Crispy, saucy, and ready in 15 minutes yes, it’s real. I honestly burned my first batch so here’s how to avoid that. The secret isn’t complicated. It’s about timing, temperature, and not drowning the filling in sauce before it hits the basket.
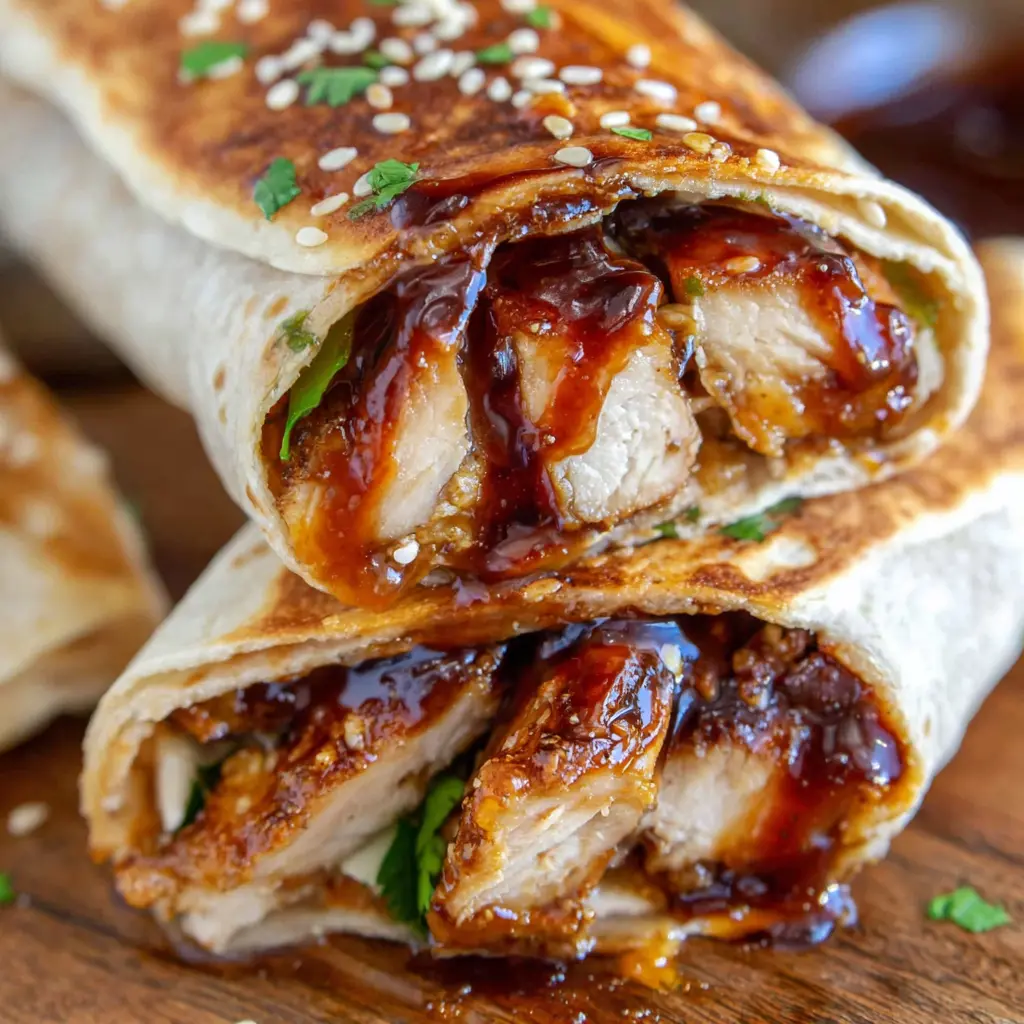
This Air Fryer Teriyaki Chicken Wrap solves the weeknight dinner chaos. No more soggy tortillas or dry chicken. You get a golden, crackly shell with warm, sticky teriyaki chicken inside. It’s a quick weeknight dinner that feels like takeout. And honestly, it’s easier than ordering. You probably have most of the ingredients already. Soy sauce, mirin, brown sugar, ginger, garlic these are pantry staples for a reason. The air fryer does the heavy lifting, giving you that crispy wrap air fryer texture without deep frying.
I mean, who wants to heat up the whole kitchen with the oven? Not me. Especially during spring when the weather in LA is finally nice enough to leave the windows open. This Air Fryer Teriyaki Chicken Wrap comes together in under 30 minutes. Total. Prep included. That’s faster than delivery and way more satisfying. Plus, it’s a kid friendly dinner idea that adults actually crave too. My kids gobble these up. They don’t even notice the shredded cabbage and carrots hiding inside. It’s a win-win.
Ingredients You’ll Need
Let’s talk about what goes into this. The ingredients are simple, but each one has a job. The chicken breasts are the protein base. You want boneless, skinless for quick cooking. Vegetable oil helps everything brown. Soy sauce and mirin bring that classic savory-sweet flavor. Brown sugar adds depth and that sticky glaze we all love. Rice vinegar cuts through the sweetness with a little tang. Fresh ginger and garlic are non-negotiable here. They give the sauce its signature punch.
For the wrap itself, you’ll need shredded green cabbage, shredded carrots, and spring onions. These add crunch and freshness. Large flour tortillas are the vessel. Toasted sesame seeds and fresh cilantro leaves finish it off. That’s it. No weird ingredients. No expensive specialty items. You can find all of this at your local Ralphs or Trader Joe’s. Maybe even in your pantry right now.
The beauty of this recipe is how adaptable it is. You can use chicken thighs instead of breast for extra juiciness just add a couple minutes of cook time. For a gluten free air fryer wrap, swap the soy sauce for tamari and use gluten-free tortillas. Want it spicier? Add some chili flakes to the sauce. The base recipe is forgiving. It’s okay if yours isn’t perfect the first time. You’ll still end up with something delicious.
How to Make Teriyaki Sauce from Scratch
Store-bought teriyaki sauce is fine in a pinch. But homemade is so much better. And it’s embarrassingly easy. You combine soy sauce, mirin, brown sugar, rice vinegar, grated ginger, and minced garlic in a small saucepan. Bring it to a simmer. Let it cook for about 5 minutes until it thickens slightly. That’s it. You just made homemade teriyaki sauce.
The trick is using fresh ginger and garlic. The jarred stuff works, but fresh gives you that bright, zingy flavor that makes the sauce pop. If the sauce isn’t thickening enough, mix a teaspoon of cornstarch with a tablespoon of cold water and stir it in. This is called a slurry. It prevents clumping. I learned this the hard way after adding cornstarch directly to hot sauce and ending up with a lumpy mess. Don’t be me.
You can make the sauce ahead of time. Store it in the fridge for up to a week. It’s great on salmon, veggies, or even as a dipping sauce for potstickers. If you’re short on time, use a store-bought teriyaki sauce. Just look for one made without refined sugar for a healthier option. The goal is a sweet soy chicken wrap that satisfies without being overly processed.
Step-by-Step Assembly and Cooking
First, cut your chicken breasts into bite-sized cubes. Make sure they’re equal sizes for uniform cooking. Toss them with a little vegetable oil and a pinch of salt. Don’t marinate the chicken with the teriyaki sauce. The high sugar content can cause it to burn in the air fryer. Trust me on this. I’ve made that mistake. Instead, we’ll cook the chicken plain and add the sauce later.
Preheat your air fryer to 375°F. Place the chicken in the basket in a single layer. Don’t overcrowd. If you have a smaller air fryer, cook in two batches. Overcrowding leads to soggy, steamed chicken instead of crispy, golden pieces. Cook for 8-10 minutes, shaking the basket halfway through. The internal temperature should reach 165°F. Use a meat thermometer. It’s the only way to guarantee juicy chicken.
While the chicken cooks, prep your wraps. Lay a tortilla flat. Add a handful of shredded cabbage, some carrots, and a sprinkle of spring onions. Once the chicken is done, toss it in a bowl with a few tablespoons of teriyaki sauce. Coat it evenly. Then pile the saucy chicken onto the tortilla. Add sesame seeds and cilantro. Fold the sides in, then roll it up tightly like a burrito. Brush the outside with a little vegetable oil. This is the secret to a crispy wrap air fryer texture.
Place the wrapped roll seam-side down in the air fryer basket. Cook at 375°F for 3-4 minutes per side, until golden brown and crispy. The total air fryer wrap time is about 6-8 minutes. Watch it closely. Every air fryer runs a little different. You’re looking for that perfect golden brown color. Not pale, not burnt. Just right.
Common Mistakes & Fixes
Mistake: The wrap is soggy.
Solution: You likely added too much sauce to the chicken before wrapping. Use just enough to coat. Also, don’t skip brushing the outside with oil. That’s what creates the crispy shell.
Mistake: The chicken is dry.
Solution: You overcooked it. Check the internal temp at 8 minutes. Chicken breast dries out fast. Use a thermometer and pull it at 165°F.
Mistake: The tortilla burns before the inside is hot.
Solution: Your air fryer runs hot. Lower the temperature to 350°F and cook a little longer. Or tent the wrap with foil for the first few minutes.
Mistake: The wrap falls apart when you eat it.
Solution: You didn’t roll it tight enough. Fold the sides in first, then roll firmly. Think of it like a burrito. Practice makes perfect.
Tips for the Best Wraps
Here’s what I wish someone had told me. First, always use a meat thermometer. Chicken is perfectly cooked at 165°F. This keeps it juicy, never dry. Second, toss the chicken in teriyaki sauce right before serving. This keeps it crispy and glossy. If you add the sauce too early, the sugar will burn in the air fryer. Third, don’t overcrowd the basket. Give each piece space so it cooks evenly. If you have a smaller air fryer, cook in two batches for the best texture.
Another tip: use moderate temperature. 375°F is the sweet spot. High heat can burn the glaze before the chicken is cooked through. Low heat won’t give you that crispy exterior. Also, choose the right soy sauce. Use low-sodium or regular Japanese soy sauce thinned with water to avoid an overly salty and unbalanced sauce. And if you’re using an artificial sweetener, make sure it’s suitable for high-heat cooking.
For the wraps themselves, use large tortillas. Burrito-sized works best. Warm them slightly before rolling so they’re pliable and less likely to tear. If you’re meal prepping, store the chicken and sauce separately. Assemble and air fry fresh for the best texture. Reheated wraps can get soggy. But if you have leftovers, I’ll show you how to reheat them properly in the storage section.
Variations to Try
This recipe is a starting point. Change the protein if you want. Use chicken thighs, wings, drumsticks, salmon, or even tofu for a vegetarian version. For tofu, press it first to remove moisture, then follow the same cooking method. It works beautifully. Add vegetables like bell peppers, snow peas, or broccoli to the wrap for extra color and crunch. You can even air fry the veggies alongside the chicken for a complete meal.
Make it spicy by stirring in sriracha, chili flakes, or hot honey. No honey? Use maple syrup or a touch of brown sugar. For a tropical twist, swap the rice vinegar for pineapple juice. No fresh ginger? Use half a teaspoon of ground ginger instead. It won’t be quite as bright, but it works in a pinch. For a gluten-free version, use tamari in place of soy sauce and ensure your tortillas are gluten-free. The recipe is naturally dairy-free, so no changes needed there.
You can also play with the wrap itself. Serve the teriyaki chicken in lettuce wraps for a low-carb option. Or use it as a filling for rice bowls with extra veggies and avocado. The possibilities are endless. That’s what I love about this recipe. It’s a template, not a rulebook. Make it your own.
Troubleshooting Common Issues
Let’s address the problems you might face. If the sauce is too thin, simmer it longer. The sugars need time to caramelize and thicken. It should coat the back of a spoon. If the sauce is too thick, add a splash of water or rice vinegar to thin it out. If the chicken isn’t crispy enough, you probably didn’t give it enough space in the basket. Air needs to circulate. Cook in smaller batches next time.
If the tortilla is browning too fast, tent it with foil. This lets the inside heat through without burning the outside. If the wrap is still cold in the center after air frying, you overstuffed it. Use less filling next time. Or cook the wrap a bit longer at a lower temperature. If the chicken is rubbery, you overcooked it. Chicken breast is lean and dries out fast. Use thighs for more forgiveness.
If you’re worried about soggy wrap prevention, the key is moisture control. Pat the chicken dry before cooking. Don’t overload the wrap with wet ingredients. And always brush the outside with oil before air frying. That creates a barrier that keeps the inside steamy and the outside crispy. It’s basic science. And it works every time.
Storage and Reheating Tips
Store leftover Air Fryer Teriyaki Chicken Wrap components separately. Keep the chicken and sauce in an airtight container in the fridge for up to 3-4 days. Store the tortillas and veggies separately. This prevents sogginess. When you’re ready to eat, assemble fresh and air fry. It takes about 5 minutes and tastes just as good as the first time.
If you have fully assembled leftovers, you can reheat them. But the texture won’t be the same. For the best results, reheat in the air fryer at 350°F for 3-5 minutes. This crisps the tortilla back up. The microwave works in a pinch (60-90 seconds), but the tortilla will be soft, not crispy. The stovetop with a splash of water to loosen the sauce is another option. Just heat in a pan over medium heat until warmed through.
You can freeze the cooked chicken and sauce in a freezer-safe bag for up to 3 months. Thaw in the refrigerator overnight before reheating. Then assemble fresh wraps. This makes for an incredibly easy meal prep chicken wrap strategy. Cook once, eat twice. Or three times. That’s a win in my book.
Frequently Asked Questions
Serving Suggestions
This Air Fryer Teriyaki Chicken Wrap is a complete meal on its own. But if you want to round it out, serve it with a side of steamed rice. White, brown, or cauliflower rice all work. Add some air-fried vegetables like broccoli, bell peppers, or snap peas. You can cook them in the air fryer alongside the chicken for a full meal in one basket.
For a lighter option, serve the teriyaki chicken in a lettuce wrap instead of a tortilla. Or turn it into a salad bowl with mixed greens, avocado, and extra sauce. Garnish with more toasted sesame seeds and chopped spring onions. A side of kimchi adds a spicy kick that pairs beautifully with the sweet teriyaki.
This is perfect for spring dinners when you want something satisfying but not heavy. It’s also great for Memorial Day picnic food. Make a batch of wraps, wrap them in foil, and toss them in a cooler. They travel well and taste amazing at room temperature. Your friends will ask for the recipe. Trust me.
Conclusion
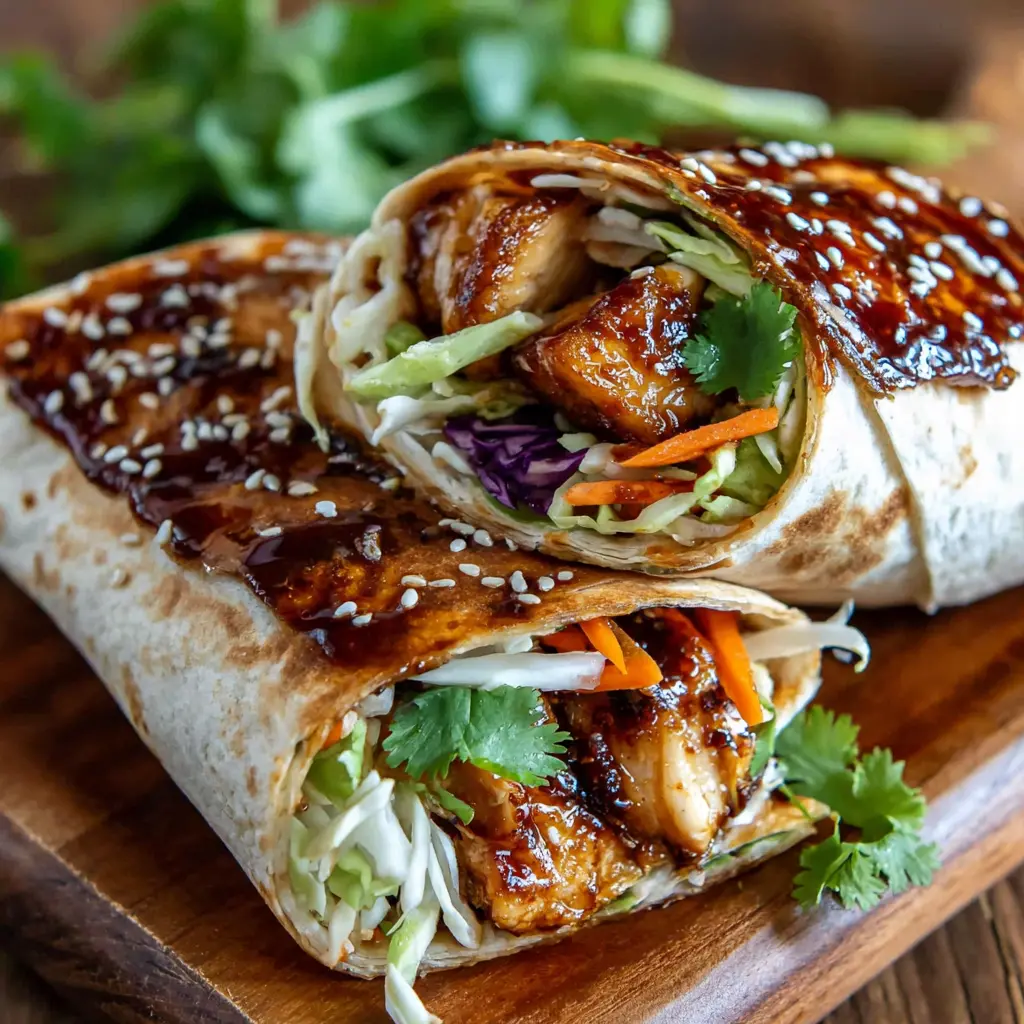
When you take that first bite of this Air Fryer Teriyaki Chicken Wrap, you’ll be so happy you didn’t order takeout. The crispy shell gives way to warm, saucy chicken. The crunch of cabbage and carrots. The pop of sesame seeds. It’s everything you want in a quick weeknight dinner. And it’s all done in under 30 minutes. You’re literally 12 minutes from this exact moment.
I honestly can’t recommend this recipe enough. It’s become a staple in my house. My kids request it. My husband asks for it in his lunch. It’s that good. And it’s so simple that anyone can make it. Beginner cooks, busy parents, college students this recipe is for you. Go make these. Your family will thank you!
For more inspiration, check out my Pinterest boards. I share tons of variations and related recipes there. Tag me when you make yours. I love seeing your crispy creations. Now go. Your air fryer is waiting.
Source: Nutritional Information
Can I make Air Fryer Teriyaki Chicken Wrap ahead of time?
You can prep the components ahead. Cook the chicken, make the sauce, and shred the veggies. Store everything separately in the fridge. Assemble and air fry fresh when you’re ready to eat. This keeps the wrap crispy and prevents sogginess.
How do I store leftover Air Fryer Teriyaki Chicken Wrap?
Store leftover wraps in an airtight container in the fridge for up to 2 days. For best texture, store the chicken, sauce, and veggies separately. Reheat assembled wraps in the air fryer at 350°F for 3-5 minutes to restore crispiness.
How long should you put a chicken wrap in the air fryer?
Cook the assembled wrap at 375°F for 3-4 minutes per side, about 6-8 minutes total. The exact air fryer wrap time depends on your air fryer model and how full the wrap is. Watch for golden brown color and a crispy exterior.
Can I use teriyaki sauce in an air fryer?
Yes, but add it after cooking the chicken. The sugar in teriyaki sauce can burn at high air fryer temperatures. Cook the chicken plain first, then toss it in sauce and cook for another 2-3 minutes. This gives you sticky, glossy chicken without burning.
Is air fried chicken ok for diabetics?
Yes, with some adjustments. Use a low sugar teriyaki sauce or make your own with a sugar substitute suitable for cooking. Pair the wrap with plenty of veggies and use whole wheat tortillas. This makes it a diabetic friendly dinner option.
What to put in teriyaki chicken wraps?
Start with teriyaki chicken as the base. Add shredded cabbage, carrots, and spring onions for crunch. Finish with toasted sesame seeds and fresh cilantro. You can also add bell peppers, snap peas, or avocado for extra flavor and texture.
Is it better to air fry chicken at 375 or 400?
375°F is better for this recipe. It cooks the chicken through without burning the exterior. 400°F can work but requires closer monitoring. The lower temperature gives you more control and prevents the sugar in the sauce from scorching.
Do you put teriyaki sauce on before or after cooking?
After cooking. Cook the chicken plain in the air fryer first. Then toss it in teriyaki sauce and return it to the air fryer for 2-3 minutes. This gives you the sticky glaze without burning the sugar. The chicken stays juicy and the sauce stays glossy.
How do you make chicken tender and not rubbery?
Don’t overcook it. Use a meat thermometer and pull the chicken at 165°F internal temperature. Cut the chicken into even-sized pieces for uniform cooking. If you’re using chicken breast, consider brining it for 15 minutes in salt water for extra tenderness.
Can I cook the whole piece of chicken instead of cutting it into bites?
Yes, but adjust the cooking time. A whole chicken breast will take 12-15 minutes at 375°F. Check the internal temperature at 12 minutes. Let it rest for 5 minutes before slicing for the wrap. The pieces will be more tender this way.