Strawberry Vanilla Cheesecake Layer Cake
Ingredients
Method
- Prepare the strawberry cheesecake and vanilla cake the day before.
- Whip the cream cheese with half of the sugar (50g or ¼ cup).
- Add the strawberries and lemon juice to a blender and pulse to make a puree. Sieve the strawberry puree to remove any seeds.
- Mix the gelatine into warm milk (not hot) and let it bloom for 5-10 minutes. Afterwards, microwave for 10 seconds to melt it slightly. Add the gelatine into the strawberry puree and mix well to combine. Mix the strawberries into the whipped cream cheese.
- Separately, whip the heavy (or double) cream with the remaining sugar until it reaches soft-medium peaks. Fold it into the strawberry cream cheese mixture using a spatula.
- Place the cheesecake mixture into a 20 cm (8-inch) pan or cake ring and let it set in the fridge overnight (minimum 6-8 hours). Alternatively, freeze for 2-3 hours.
- Pre-heat your oven to 170°C (340°F), fan assisted. Prepare two 8-inch (20 cm) cake pans by lining the bottom with baking paper and greasing the sides with butter and flour.
- In a large bowl add the flour, salt, sugar and baking powder. Give them a whisk to combine. Add in the butter, then use your mixer on a low setting to combine them. The mixture shouldn't be sticky or tacky, it should feel like sand.
- Add half of the milk and all the oil into the flour. Mix on medium for 2 minutes, until the mixture looks fluffy like thick buttercream. Make sure to scrape the bottom of the bowl a few times.
- In a small bowl add the remaining milk, vanilla paste, and eggs, whisking quickly. Start pouring the milk mixture over the batter, mixing slowly to incorporate the liquids. Once the liquid is incorporated, stop mixing. The batter needs to be fluffy and quite thick, not runny.
- Divide the cake batter between the two prepped cake pans. Tap the bottom of the pan or use a skewer to swirl the batter around to release any air bubbles.
- Bake both cakes in the middle rack of your preheated oven for 30-32 minutes. Do not open the oven throughout baking. After 30 minutes insert a skewer into the cake to check if it’s cooked through. If the skewer is clean, the cake is ready. If there’s any batter on the skewer, bake for a few minutes longer and check again every 3-4 minutes.
- Once baked, let the cakes cool for 10 minutes in the pan, then ease them out. Place the cake upside down on a cooling rack to flatten the top.
- When the cakes are cooled, cover them in plastic wrap and chill overnight or freeze for at least 40 minutes.
- Cut half of the strawberries into cubes, then add them to a saucepan. Add the sugar, lemon juice and vanilla extract on top, mixing them well.
- Cook over low-medium heat for about 10 minutes or until the fruit breaks into smaller chunks.
- Separately, mix the corn starch and water, making sure there are no lumps. Add the mixture to the saucepan and stir to combine. The sauce should feel slightly runny, but not very liquid. If required, mix more cornstarch and water and add it to the sauce to thicken. Let the compote cool completely before using.
- Cut the remaining strawberries into slices and add to a bowl with a few teaspoons of sugar. Give them a mix around to coat them in sugar, then chill in the fridge for 30-40 minutes. Remove the excess syrup before using the strawberry slices. Use the remaining syrup to brush the cakes.
- For the full method check out my White Chocolate Cream Cheese Frosting post. You will need 3x the quantity indicated in this post.
- Add the biscuits and freeze-dried strawberries to a food processor. Pulse a few times to get a crumbly texture. There should be larger chunks of biscuits for added texture.
- If necessary, level the vanilla cake with a knife to make the layers perfectly flat and even. Add the first layer of cake on the bottom. Pipe a ring of cream cheese frosting on the perimeter of the layer to seal in the filling.
- I recommend using a cake ring for this step. Add the strawberry compote (or jam) and thinly sliced fresh strawberries. Add a thin layer of cream cheese frosting on top of the strawberries to seal them in, levelling it with a spatula.
- Add the layer of strawberry cheesecake on top and gently press to make it stick to the frosting.
- Pipe a ring of frosting on the perimeter of the cheesecake, then fill the inside with strawberry compote. Add more slices of strawberries, then pipe a thin layer of frosting on top to seal them in. Level everything with a spatula.
- Put the remaining vanilla cake layer on top, pressing it gently into place. Place everything in the fridge for 2-3 hours until the frosting hardens.
- Cover the entire cake in cream cheese frosting. Level everything out with a spatula to give it a smooth finish.
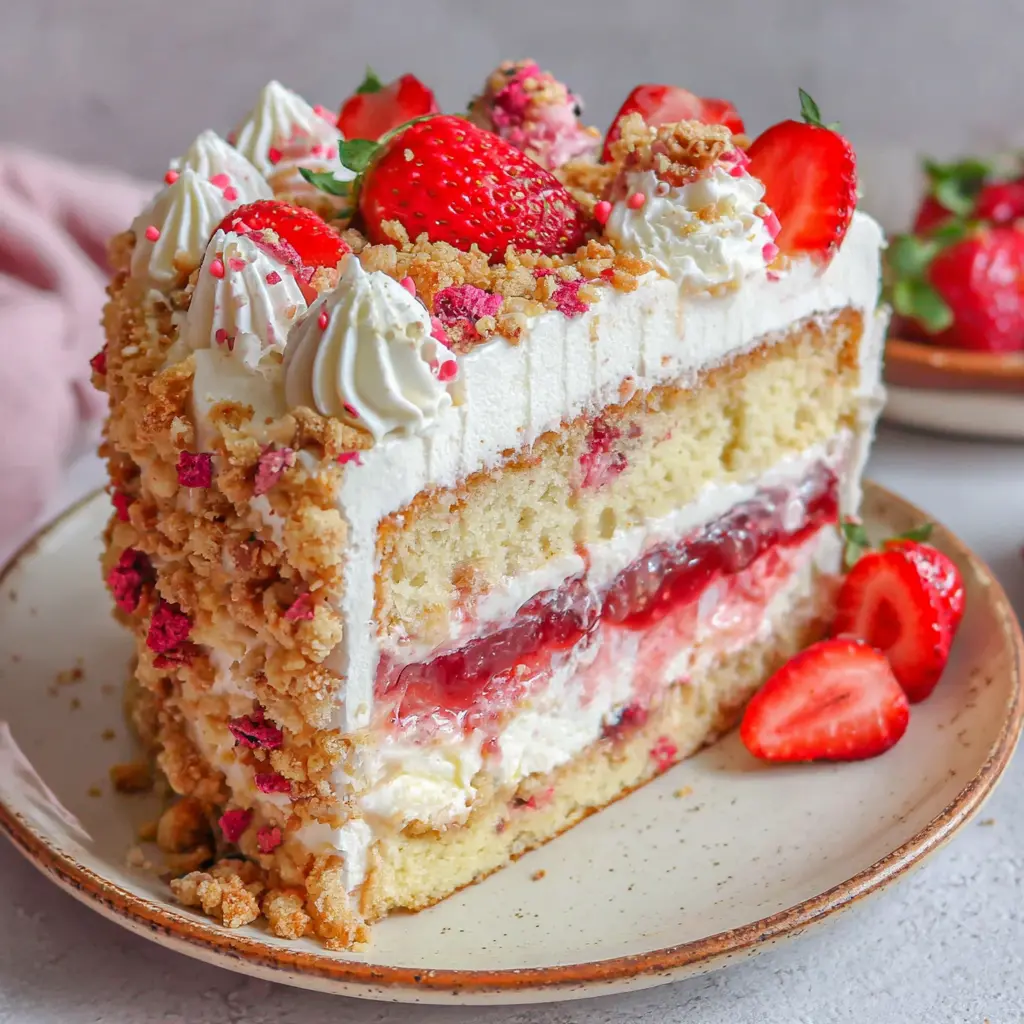
- Fit the frosting piping bag with a cupcake star-shaped nozzle. Angle the nozzle at 45 degrees, then pipe in a swirling motion around the top perimeter of the cake. You can also pipe dollops of frosting to create the border.
- Fill the inside of the ring with some strawberry compote, then sprinkle the crunchy crumbles on top.
- Add more crunchy crumbles on the sides of the cake, towards the bottom. You can add as much or as little as you like.
- Decorate the top with fresh strawberries, berries and mint leaves. Chill the cake for 2-3 hours before cutting and serving.
Nutrition
Notes
- I recommend using a kitchen scale in grams for more accuracy. The cups used for the conversion are standard US customary cups (1 cup flour = 136g). There are many different types of cups across the globe, which is why I strongly recommend using grams instead.
- Fresh strawberries are recommended. If using frozen, make sure you thaw them properly, then drain any excess liquid.
- Cake flour or type 000 flour yields a much softer cake. If you cannot find it, you can still use plain white flour, but the cake won’t be as fluffy. If using plain flour, only mix the flour with the butter for 1 minute.
- Use non flavoured vegetable oil such as sunflower or canola (rapeseed) oil.
- You can replace the strawberry compote with jam to speed up the process.
- You can use plain or vanilla biscuits or graham crackers. Use crunchy biscuits to add more texture.
- Freeze dried strawberries cannot be replaced with fresh fruit. If you do not have it, just leave it out entirely.
Tried this recipe?
Let us know how it was!Why This Strawberry Vanilla Cheesecake Cake Works
The first time I tried to make a layered cheesecake cake, I ended up with something that looked more like a collapsed skyscraper than a dessert. Honestly, it was a mess. The cheesecake layer had a canyon-sized crack, the cake layers were lopsided, and the whole thing slid apart when I tried to slice it. But after many tweaks and a few more failures, I cracked the code. And this Strawberry Vanilla Cheesecake Cake is the result. It’s the dessert I bring to every spring gathering now.
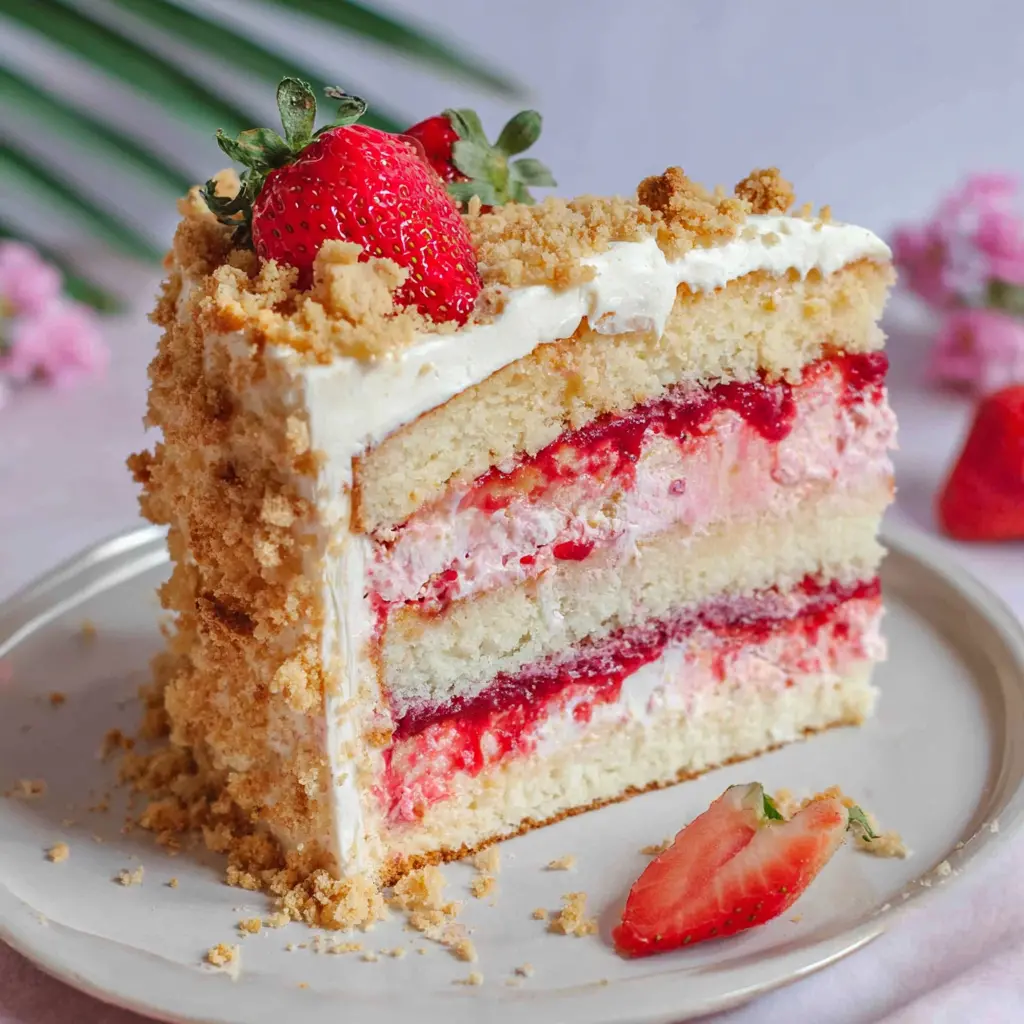
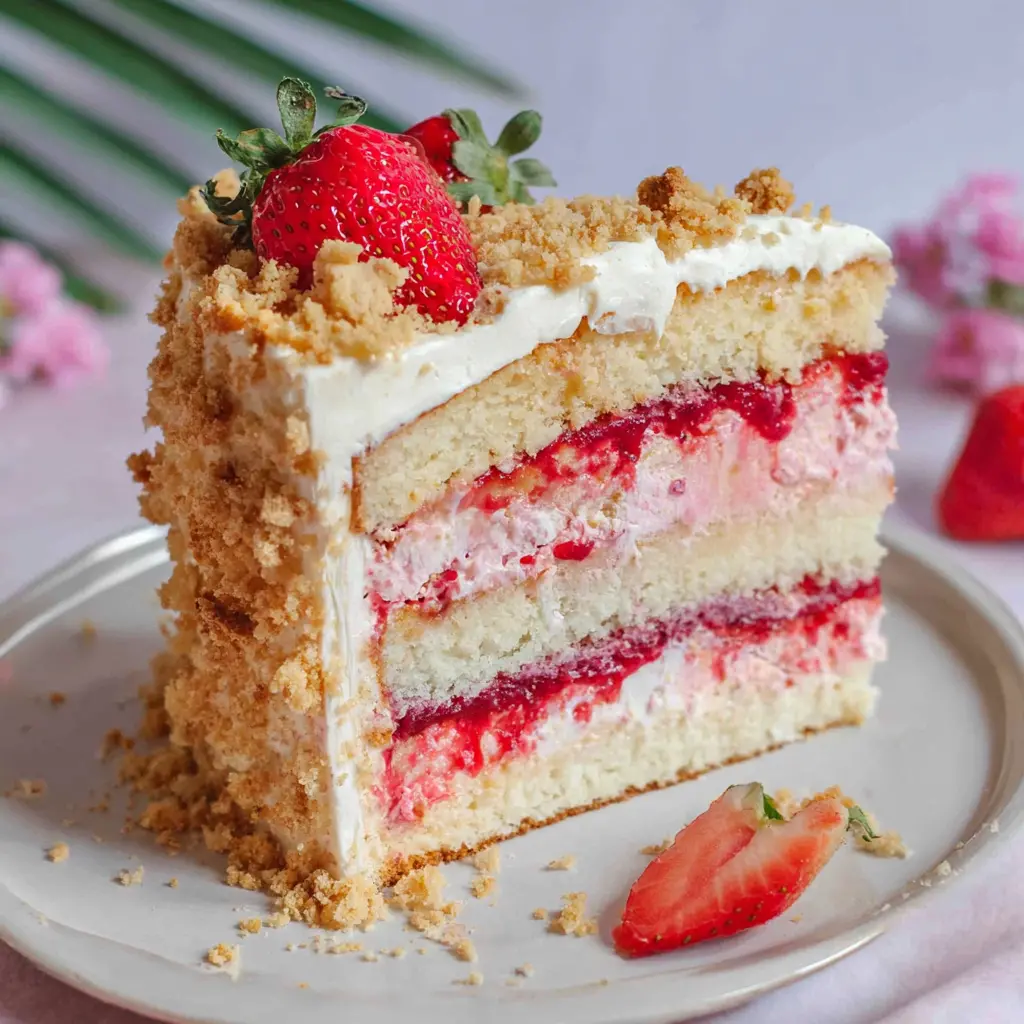
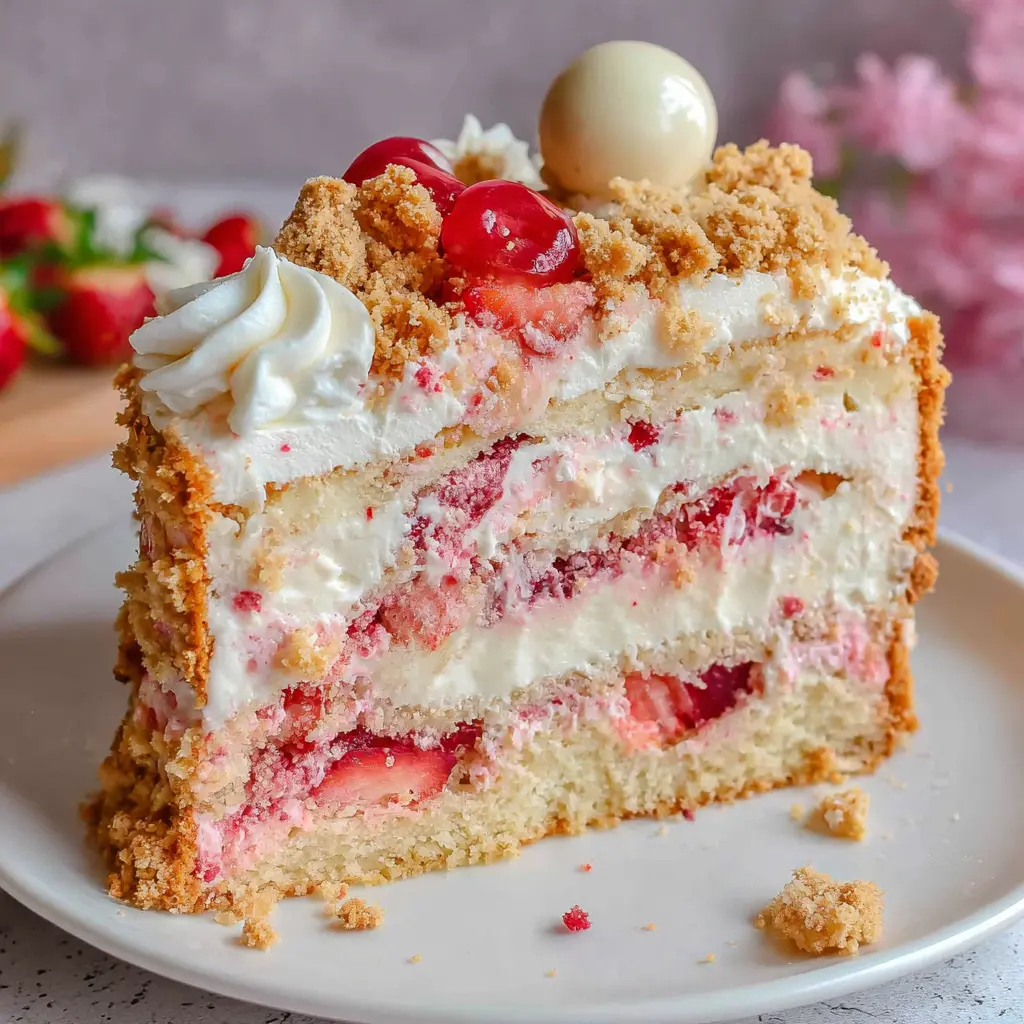
I mean, imagine a slice of moist vanilla cake, a stripe of creamy cheesecake, and a hint of strawberry in every bite. This cake delivers that and more. If you’ve ever wanted to make a dessert that looks like a professional bakery creation but is actually doable at home, you’re in the right place. The secret is in the structure. We’re not just layering random components. Each element is built to support the others. The cheesecake layer is like a firm pillow of creaminess. The strawberry cake is tender but sturdy enough to hold its weight. And the cream cheese frosting ties it all together.
I tested this recipe for Mother’s Day last year. My mom is a tough critic, you know? She took one bite, closed her eyes, and said, “You made this?” That moment made every cracked cheesecake and sunken cake layer worth it. Trust me on this one.
Ingredient Notes
Let’s talk about what goes into this Strawberry Vanilla Cheesecake Cake and why each ingredient matters. I’ve learned that skimping here or there can throw off the whole balance. So pay attention to these details.
Cream cheese. Use full-fat blocks. Not the spreadable tub. Room temperature is non-negotiable for the cheesecake layer. Cold cream cheese creates lumps that never smooth out. For the frosting, you want it cold. I’ll explain why later.
Strawberries. Fresh is best, especially in May when California strawberries are at their peak. You’ll need them for the puree in the cake and the strawberry jam filling. If you use frozen, thaw them first and drain the excess liquid. Otherwise, your cake batter will be too wet.
Vanilla bean paste. This is my secret weapon. It gives you those beautiful vanilla specks and a deeper flavor than extract. You can use vanilla extract in a pinch, but the paste is worth seeking out at Whole Foods or online.
Cake flour. Don’t swap this for all-purpose flour. Cake flour has lower protein content, which means a softer, more tender crumb. It makes a difference in a layered cake recipe like this one. If you don’t have cake flour, you can make a substitute: for every cup of all-purpose flour, remove 2 tablespoons and replace with 2 tablespoons of cornstarch. Sift it together a few times.
White chocolate. You’ll find this in the strawberry crumble topping. It adds a subtle sweetness and helps bind the crumble. Use good quality white chocolate chips or chopped white chocolate. Avoid the cheap stuff that doesn’t melt properly.
How to Make the Cheesecake Layer
This is the part that intimidates most people. I get it. I once forgot to chill the cheesecake layer and it sank into the cake. Now I never skip the chilling step. Here’s the process broken down so it’s foolproof.
First, you’ll make a simple no-bake cheesecake layer. Yes, no-bake. This is a game changer. You don’t need a water bath or a springform pan for this part. The cheesecake sets in the fridge using gelatin. It’s stable, creamy, and won’t crack.
Start by blooming the gelatin in a little cold water. Let it sit for about 5 minutes until it’s spongy. Then warm the milk gently and dissolve the gelatin into it. Let that cool slightly while you beat the cream cheese and sugar together until smooth. Add the lemon juice and mix well.
In a separate bowl, whip the heavy cream until soft peaks form. Fold it into the cream cheese mixture gently. Don’t overmix. You want it light and airy. Then pour it into a 6-inch round cake pan lined with plastic wrap. Smooth the top and refrigerate for at least 4 hours, or overnight. The no-bake cheesecake layer needs that time to firm up completely.
I know this sounds complicated, but it’s actually easier than a baked cheesecake. No water bath. No worrying about cracks. Just set it and forget it.
How to Make the Strawberry Cake
The strawberry cake layers are where the magic happens. The strawberry puree turns the cake batter a delicate blush pink, and when you bite into it, you get bursts of bright berry against the mellow vanilla.
Start by making a strawberry puree. Blend fresh strawberries with a little lemon juice and sugar until smooth. Strain it if you want to remove the seeds. I usually leave them because I like the texture, but it’s up to you.
Now, cream the butter and sugar together for a full 3 to 4 minutes. Don’t rush this. You want it light and fluffy. This incorporates air into the batter, which gives you a tender crumb. Add the vanilla bean paste and eggs one at a time, mixing well after each.
In a separate bowl, whisk together the cake flour, baking powder, and salt. Alternate adding the dry ingredients and the milk to the butter mixture, starting and ending with the flour. Then fold in the strawberry puree. Don’t overmix. Overmixing develops gluten and makes the cake dense. Just mix until the streaks disappear.
Divide the batter between two 6-inch cake pans. Bake at 325°F instead of 350°F. The lower temperature prevents the cheesecake from puffing and cracking later. Bake for about 25 to 30 minutes, or until a toothpick inserted in the center comes out clean. Let them cool in the pans for 10 minutes, then turn them out onto a wire rack.
I once baked these at 350°F because I was in a hurry. The cakes domed like crazy. I had to level them with a serrated knife, and I lost a lot of cake. Learn from my mistake. Low and slow is the way to go.
How to Assemble the Cake
This is where everything comes together. And honestly, this is the most satisfying part. When you lift the springform ring and see those flawless layers, you’ll feel like a baking superstar.
First, make sure all your components are completely cool. The cake layers should be at room temperature. The cheesecake layer should be fully set and cold. If you try to assemble with warm layers, everything will slide apart.
Level the cake layers using a serrated knife. Just saw off the domed tops. You want flat, even layers. Then place one cake layer on your cake stand or serving plate. Spread a thin layer of cream cheese frosting on top. This acts as glue for the cheesecake layer.
Carefully place the no-bake cheesecake layer on top of the frosting. Center it as best you can. Then spread another thin layer of frosting on top of the cheesecake. Place the second cake layer on top, cut side down.
Now, crumb coat the entire cake. This is a thin layer of frosting that seals in the crumbs. Don’t worry about making it perfect. Just cover the cake completely. Refrigerate for 30 minutes to set the crumb coat.
After the crumb coat is firm, apply the final layer of cream cheese frosting. Use an offset spatula for smooth sides. You can leave it rustic or make it perfectly smooth. I like to leave a few peaks for texture.
For the strawberry crumble topping, crush the freeze-dried strawberries and mix with melted white chocolate and crushed plain biscuits. Sprinkle this on top of the cake. Decorate with fresh strawberry slices and white chocolate shavings if you want.
Refrigerate the assembled cake for at least 2 hours before slicing. This allows the flavors to meld and the layers to set. Trust me, it’s worth the wait.
Tips for Perfect Results
I’ve made this Strawberry Vanilla Cheesecake Cake more times than I can count. Here are the tips I wish someone had told me from the start.
Don’t skip the chilling steps. The no-bake cheesecake layer needs a full 4 hours to set. The assembled cake needs at least 2 hours in the fridge. If you rush this, your cake will be a mess. I learned this the hard way when I tried to serve it after only 1 hour of chilling. The layers slid apart like a Jenga tower.
Measure your flour carefully. Use a kitchen scale if you have one. If not, spoon the flour into your measuring cup and level it off. Scooping directly from the bag packs the flour and gives you a dry, dense cake.
Use room temperature ingredients. For the cake batter, your butter, eggs, and milk should all be at room temperature. This helps them emulsify properly. Cold ingredients can cause the batter to curdle.
Don’t overmix the cake batter. I know I said this already, but it’s worth repeating. Overmixing develops gluten and makes the cake tough. Mix just until the flour disappears.
Cool the cake layers completely. If you try to frost warm cake layers, the frosting will melt and slide off. Patience is key here.
Use an offset spatula for frosting. It gives you more control and smoother results. You can find one at any kitchen supply store or online.
If your cream cheese frosting is too runny, it probably means your cream cheese was too warm. Pop it in the fridge for 15 minutes to firm up. Or add a little more powdered sugar.
Common Mistakes & Fixes
Mistake: The cheesecake layer is too soft and won’t hold its shape.
Solution: You probably didn’t let it set long enough. Make sure it chills for at least 4 hours. If it’s still soft, add a little more gelatin next time.
Mistake: The cake layers domed too much.
Solution: Your oven was too hot. Use an oven thermometer to check the temperature. Also, try using cake strips around the pans for even baking.
Mistake: The frosting has lumps.
Solution: Your cream cheese was too cold. Beat the cream cheese alone first until smooth, then slowly add the other ingredients. If lumps persist, strain the frosting through a fine mesh sieve.
Mistake: The layers slide apart when slicing.
Solution: The cake wasn’t chilled long enough. Refrigerate for at least 2 hours after assembly. Use a sharp serrated knife and wipe it clean between slices.
Variations and Substitutions
One of the best things about this Strawberry Vanilla Cheesecake Cake is how adaptable it is. I’ve made it for birthdays, baby showers, and even a casual Sunday dinner. Here are some ways to switch it up.
Different fruit. You can swap the strawberries for raspberries, blueberries, or blackberries. Just make a puree the same way. The cake will be a different color, but it’ll taste just as amazing. If you use blueberries, add a little lemon zest to brighten the flavor.
Different cake flavor. Use a vanilla cake mix instead of making the strawberry cake from scratch. It’s a great shortcut if you’re short on time. Just follow the box instructions and add a teaspoon of vanilla bean paste for extra flavor.
Different cheesecake flavor. You can add lemon zest to the no-bake cheesecake layer for a lemon cheesecake version. Or swirl in some strawberry jam for a marbled effect. Just reduce the eggs to three if you’re using a baked cheesecake recipe.
Gluten-free option. Use a gluten-free flour blend for the cake layers. Make sure it’s a 1:1 blend with xanthan gum. The no-bake cheesecake layer is naturally gluten-free, so just check the graham crackers or plain biscuits you use for the crumble.
Dairy-free option. Use a dairy-free cream cheese alternative. I’ve had good results with the brand Violife. Use coconut cream instead of heavy cream for the no-bake cheesecake layer. The texture will be slightly different, but it’s still delicious.
Make it a no-bake cheesecake cake. Skip the cake layers entirely and use a graham cracker crust as the base. Layer the no-bake cheesecake on top, then add a strawberry glaze. It’s a simpler version that’s perfect for summer.
How to Store and Freeze
This Strawberry Vanilla Cheesecake Cake stores beautifully. Here’s how to keep it fresh.
Refrigerator: Store the cake in an airtight container or wrapped in plastic wrap in the fridge for up to 4 days. The flavors actually get better after a day or two as they meld together. Just make sure it’s covered so it doesn’t absorb fridge odors.
Freezer: You can freeze the unfrosted cake layers for up to 3 months. Wrap each layer tightly in plastic wrap, then in foil. Thaw at room temperature before assembling. The no-bake cheesecake layer can also be frozen for up to 2 months. Thaw in the fridge overnight.
I don’t recommend freezing the assembled cake with the frosting. The texture changes when it thaws. But if you have leftovers, you can freeze individual slices. Wrap them tightly and thaw in the fridge. The crumble topping might get a little soft, but it’s still good.
Reheating: This cake is best served cold or at room temperature. If you want to warm a slice, microwave it for about 10 seconds. Just enough to take the chill off. Don’t overdo it or the frosting will melt.
Serving: Take the cake out of the fridge about 30 minutes before slicing. This lets it soften slightly for cleaner cuts. Use a sharp serrated knife and wipe it clean between slices. Trust me, this makes a huge difference.
Frequently Asked Questions
Conclusion
When you make this Strawberry Vanilla Cheesecake Cake for Mother’s Day or a spring gathering, you’ll see everyone’s face light up. That first slice where you see the perfect layers of vanilla cake, creamy cheesecake, and strawberry goodness. It’s a moment of pure baking pride. I’ve been there, and I know you will be too.
This cake is a labor of love, but every bite makes it worth it. The tender cake, the cool cheesecake, the bright strawberry flavor. It all comes together in a dessert that looks like it came from a fancy bakery but was made right in your kitchen.
I’d love to see your version. For more inspiration, check out my Pinterest boards. Go make some memories. You’ve got this.
Source: Nutritional Information
Can I make Strawberry Vanilla Cheesecake Cake ahead of time?
Yes, absolutely. You can make the no-bake cheesecake layer and the cake layers up to 2 days ahead. Store them separately in the fridge. Then assemble and frost the day you plan to serve it. This takes the stress out of party prep.
How do I store leftover Strawberry Vanilla Cheesecake Cake?
Wrap the cake tightly in plastic wrap or store it in an airtight container in the fridge. It’ll stay fresh for up to 4 days. For longer storage, freeze individual slices wrapped in plastic and foil for up to 2 months.
Can I use frozen strawberries instead of fresh for the strawberry puree?
Yes, you can. Just thaw the frozen strawberries first and drain off any excess liquid. If you don’t drain them, the puree will be too watery and can make the cake batter too wet. I use fresh when they’re in season, but frozen works great year-round.
How do you prevent the cream cheese frosting from being too runny for this layered cheesecake berry dessert?
Start with cold cream cheese for the frosting. Beat it alone until smooth, then slowly add the butter and other ingredients. If it still seems runny, pop it in the fridge for 15 minutes to firm up. You can also add a little more powdered sugar to thicken it.
Can I substitute the plain biscuits with other cookies for the crunchy crumbles in this Strawberry Vanilla Cheesecake Cake?
Absolutely. You can use graham crackers, shortbread cookies, or even vanilla wafers. Just crush them into fine crumbs and mix with the melted white chocolate and freeze-dried strawberries. Each cookie will give a slightly different flavor, so feel free to experiment.