


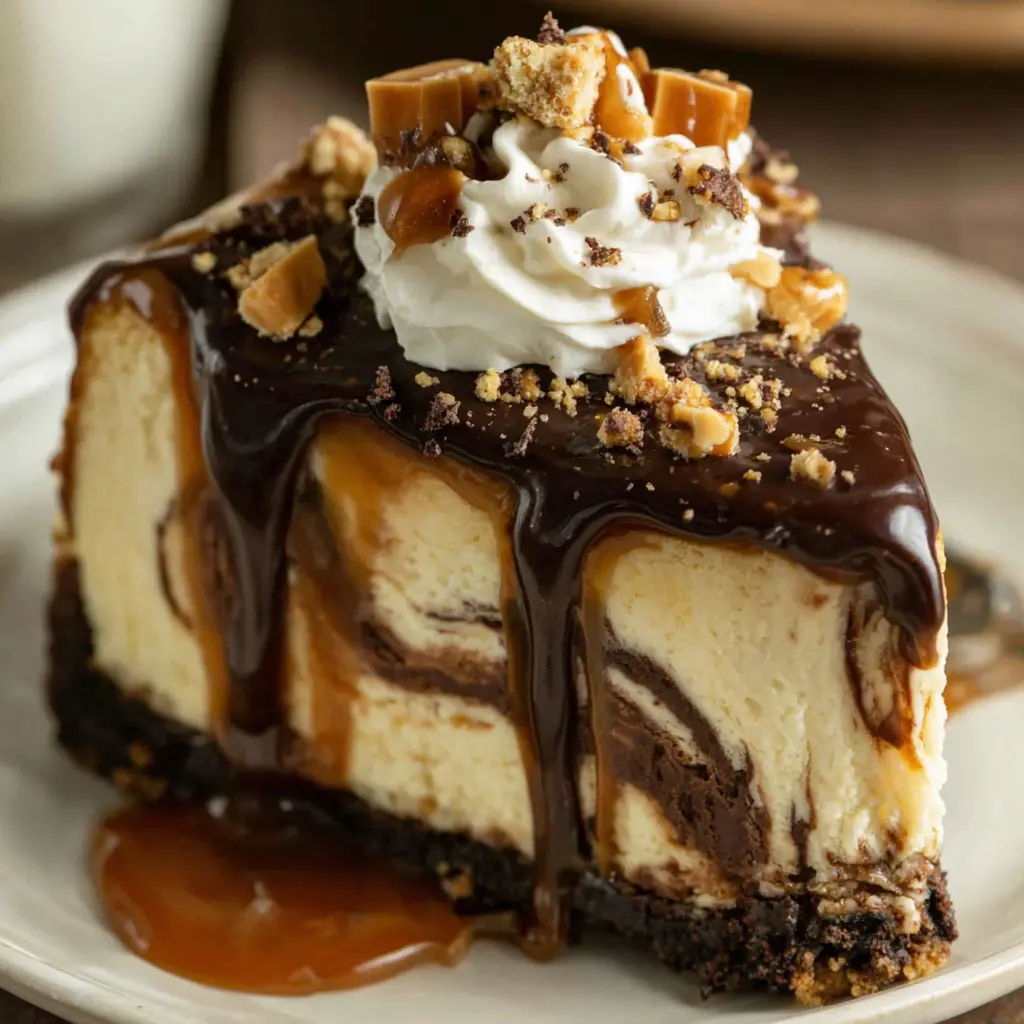

Caramel Coffee Chocolate Cheesecake Cake
Ingredients
Method
- Preheat the Oven: Preheat your oven to 325°F (163°C) and grease a 9-inch springform pan.
- Prepare the Crust: In a medium bowl, mix graham cracker crumbs with melted butter. Press the mixture evenly into the bottom of the prepared pan.
- Make Cheesecake Batter: In a large mixing bowl, beat cream cheese until smooth. Add granulated sugar and vanilla extract, beating until combined. Add eggs one at a time, beating on low speed after each addition. Stir in sour cream and heavy cream until smooth.
- Divide and Flavor the Batter: Divide the batter into three equal parts. Add caramel sauce to one part, chocolate sauce to another, and coffee to the third. Mix each part well.
- Assemble the Cheesecake: Pour the caramel batter over the crust, then drizzle the chocolate batter over the caramel. Add the coffee batter and swirl the three batters together to create a marbled effect.
- Bake: Bake for 55-60 minutes or until the center is almost set. Turn off the oven and leave the cheesecake inside with the door slightly open for 1 hour.
- Cool and Chill: Remove the cheesecake from the oven and refrigerate for at least 4 hours or overnight.
- Garnish and Serve: Top with whipped cream, caramel pieces, and crumbs before serving. Drizzle with additional caramel sauce if desired.
Notes
Tried this recipe?
Let us know how it was!Why You’ll Love This Chocolate Caramel Cheesecake Cake
You know that moment when you want to bring a dessert that stops the conversation? This is that cake. Honestly, I’ve made this for birthdays, dinner parties, and even a casual Sunday where I just needed something amazing. Every single time, people go quiet after the first bite. Then they ask for the recipe.
I’m not going to pretend this is a 30-minute dessert. It’s a project. But it’s a project that breaks down into three totally manageable parts: a moist chocolate cake, a creamy cheesecake layer, and a homemade caramel sauce. You can even spread it across two days if you want. The chocolate caramel cheesecake cake comes together like a beautiful puzzle, and when you slice into it, those layers are just stunning.
What I love most about this recipe is that it looks bakery-level impressive, but it’s actually built on simple, reliable techniques. No fancy equipment. No weird ingredients. Just good baking fundamentals that work every single time. And honestly, if I can pull this off with my chaotic kitchen schedule, you absolutely can too.
Ingredients & Substitutions
Let’s talk about what goes into this layered caramel chocolate dessert. I’ve tested this a bunch of times, and these specific ingredients make a real difference. But I’ll give you some honest swaps too.
For the cheesecake layer: You need full-fat cream cheese. The brick kind, not the spreadable tub. I know it’s tempting to grab the lower fat version, but trust me, the texture won’t be the same. Room temperature is critical here. Let those blocks sit out for at least an hour. Same goes for the eggs and sour cream. Cold ingredients create lumps, and nobody wants lumpy cheesecake.
For the chocolate cake layer: I use strong brewed coffee in the batter. Not because you taste coffee, but because it deepens the chocolate flavor. It’s a trick I picked up years ago and it works so well. You can use hot water instead if you’re sensitive to caffeine, but the coffee really does make the cocoa taste richer. Trust me on this.
For the caramel sauce: Heavy cream and granulated sugar are your friends here. I’ve tried using store-bought caramel in a pinch, and it’s okay, but homemade is so much better. The flavor is deeper, less cloying. And you control the consistency. More on that later.
Substitutions worth knowing: If you need a gluten-free option, use a 1:1 gluten-free baking blend for the cake layers. The cheesecake is naturally gluten-free as long as your cornstarch is certified. For a dairy-free version, you can use plant-based cream cheese and butter, but the texture will be slightly different. I’ve tested it and it works, just don’t expect the exact same creaminess.
Helpful Tips for Perfect Results
I’ve made this chocolate caramel cheesecake cake more times than I can count. And I’ve made plenty of mistakes along the way. Here’s what I wish someone had told me from the start.
Room temperature ingredients are non-negotiable. I know, I sound like a broken record. But cold cream cheese creates stubborn lumps that no amount of mixing will fix. Take everything out of the fridge an hour before you start. The eggs, the cream cheese, the sour cream. Even the heavy cream for the caramel should be at room temp. It emulsifies better.
Use a water bath for the cheesecake. This is the secret to a smooth, crack-free top. I wrap the bottom of my springform pan in a double layer of heavy-duty foil, then place it in a larger roasting pan. Pour hot water halfway up the sides of the springform pan. The gentle, even heat prevents the edges from setting too fast and cracking. Is it absolutely necessary? No. But the difference is noticeable.
Cool the cheesecake slowly. After baking, turn off the oven and crack the door open. Let the cheesecake sit in there for about an hour. This gradual cooling prevents sudden temperature shock, which is what causes those dramatic cracks. Then take it out and let it cool completely on the counter before refrigerating. I usually make the cheesecake layer a day ahead so it’s fully set by the time I assemble.
Dust your cake pans with cocoa powder. Instead of flour, use cocoa powder to grease your cake pans. It keeps the chocolate layers dark and clean-looking, without that white flour residue. Just a simple swap that makes a visual difference.
Don’t overbake the cake layers. You want them perfectly tender, not dry. Check them at the minimum baking time. A toothpick should come out with a few moist crumbs, not clean. The residual heat will continue cooking them as they cool.
Common Mistakes & Fixes
Mistake: The cheesecake has cracks on top.
Solution: This usually means the oven was too hot or it cooled too fast. Next time, use a water bath and let it cool slowly in the oven with the door cracked. You can also cover cracks with caramel sauce. Nobody will know.
Mistake: The chocolate cake layer is dry.
Solution: You likely overbaked it or used too much flour. Check your oven temperature with an oven thermometer. And remember, the coffee keeps it moist. Don’t skip that.
Mistake: The caramel is grainy.
Solution: Keep it at a low boil over medium heat. Hotter heat can push it into a grainy texture. Also, don’t stir it once it starts boiling. Swirl the pan instead.
Mistake: Water seeped into the springform pan.
Solution: Use heavy-duty foil and wrap it tightly. I do two layers, making sure the foil comes up higher than the water level. Better yet, use a slow cooker liner under the foil for extra protection.
Step-by-Step Instructions for Assembly
This is where the magic happens. The cheesecake cake assembly is the part that turns three separate components into one stunning dessert. Take your time here.
First, make sure both the cheesecake layer and the chocolate cake layer are completely cool. Like, refrigerator-cold. Warm layers will make the caramel slide off and the whole thing becomes a mess. I usually chill the cheesecake overnight and the cake layers for at least a few hours.
Place one chocolate cake layer on your serving plate or cake stand. Spread a thin layer of caramel sauce on top. Then carefully place the cheesecake layer on top of that. I use a large offset spatula to lift the cheesecake, but you can also use two big spatulas. Go slow. If the cheesecake cracks, don’t panic. The caramel will hide it.
Add another layer of caramel on top of the cheesecake. Then place the second chocolate cake layer on top. Press down gently to make sure everything is even. Now pour the remaining caramel sauce over the top. Let it drip down the sides. Use a spatula to encourage it if needed.
Here’s the hard part. You need to chill the whole thing for at least 2 hours before slicing. I know, you want to dig in. But this resting time lets the layers set and the caramel firm up slightly. The result is a clean, defined slice that shows off all those beautiful layers.
For the perfect slice, use a sharp knife dipped in hot water. Wipe it dry between cuts. This gives you those bakery-style clean edges. Trust me, it makes a difference.
The Science Behind the Layers
I think understanding the why makes you a better baker. So let’s get a little nerdy for a second.
The coffee in the chocolate cake isn’t just for flavor. It’s acidic, and that acidity reacts with the baking soda to create a tender, airy crumb. It also helps bloom the cocoa powder, which deepens the chocolate flavor. That’s why the cake tastes so rich even though there’s not a ton of chocolate in it.
The sour cream in the cheesecake adds fat and acidity. The fat gives it that velvety texture, and the acid helps tenderize the proteins so the cheesecake isn’t dense or rubbery. Room temperature ingredients ensure everything emulsifies smoothly. Cold cream cheese won’t blend properly, leaving you with tiny lumps that bake into the final texture.
The caramel sauce is a simple sugar syrup. When you heat sugar, it melts and then caramelizes. Adding cream creates an emulsion that keeps the caramel smooth and pourable. If you heat it too fast or stir it too much, the sugar crystals can clump together and create that grainy texture. Low and slow is the way to go.
Storage & Leftovers
This chocolate caramel cheesecake cake stores really well, which is great because you’ll probably have leftovers. I mean, maybe. It disappears fast.
Store the cake covered in the refrigerator for up to 5 days. I use a cake carrier or a large airtight container. If you don’t have one, you can cover it loosely with plastic wrap, just be careful not to smudge the caramel.
For longer storage, you can freeze individual slices. Wrap each slice tightly in plastic wrap, then in foil. They’ll keep for up to 2 months. Thaw them overnight in the refrigerator for the cleanest texture. Don’t try to thaw them at room temperature, the condensation can make the cake soggy.
If you’re serving the cake after it’s been in the fridge, let the slices sit at cool room temperature for about 20 minutes before serving. This takes the chill off and lets the flavors shine. A scoop of vanilla bean ice cream on the side is never a bad idea either.
One more thing about the caramel. If you’re making this ahead, I recommend adding the final caramel drizzle right before serving. The caramel can soak into the cake layers if it sits too long. Store the extra caramel in the fridge and use it on pancakes or ice cream later. It’s so good.
Make-Ahead Strategy
This is one of those desserts that actually benefits from being made ahead. The flavors meld together and the texture improves. Here’s how I break it down.
Up to 3 days ahead: Make the cheesecake layer. Let it cool completely, then refrigerate it in the springform pan. Don’t remove it from the pan until you’re ready to assemble.
Up to 2 days ahead: Bake the chocolate cake layers. Let them cool completely, then wrap them tightly in plastic wrap and keep them at room temperature. You can also freeze them for up to a month.
Up to 1 week ahead: Make the caramel sauce. Store it in a jar in the refrigerator. When you’re ready to use it, warm it gently on the stove or in the microwave. Add a splash of cream if it’s too thick.
The day of serving: Assemble the cake in the morning or early afternoon. Let it chill for at least 2 hours before serving. Add the final caramel drizzle and any garnishes right before you bring it to the table.
Frequently Asked Questions

Final Thoughts
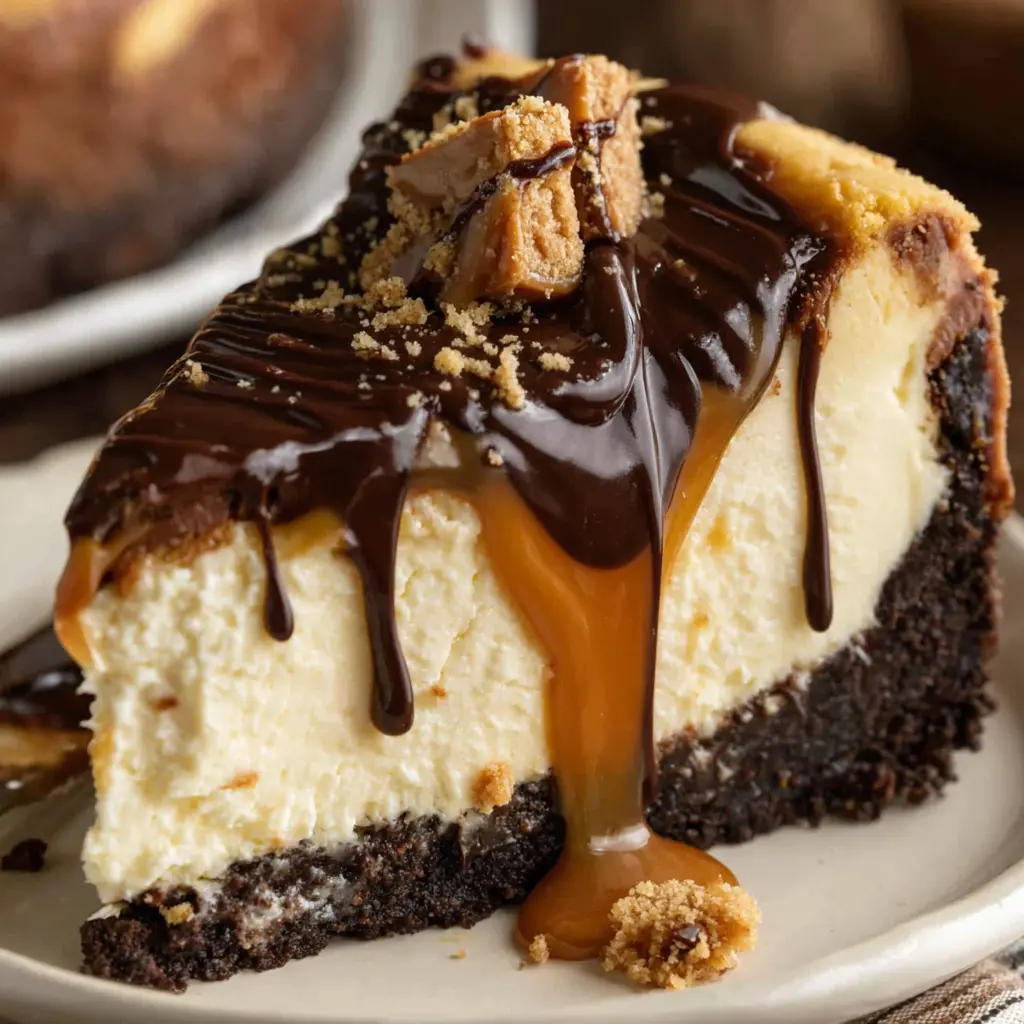
When you slice into this cake and see those layers, you’ll forget all the effort. The moist chocolate cake, the creamy cheesecake, the golden caramel dripping down the sides. It’s a thing of beauty. Honestly, every time I make it, I’m amazed that I actually created something so stunning in my own kitchen.
This is the kind of dessert that makes people say “you made this?” with genuine disbelief. And you did. You absolutely did. It’s not the easiest recipe in the world, but it’s worth every single step. The pride you’ll feel when you present this on a cake stand is unmatched.
Go ahead, impress yourself. I promise you can do this. And when you do, tag me in your photos. I’d love to see your beautiful chocolate caramel cheesecake cake creations. For more inspiration, check out my Pinterest boards for other show-stopping desserts.
Source: Health & Nutrition Research
How do I transfer the cheesecake layer onto the cake?
Use a large offset spatula or two thin spatulas to lift the cheesecake from the pan. If it’s cold, it will hold together well. You can also freeze it for 30 minutes before transferring for extra stability. Don’t worry if it cracks, the caramel covers everything.
Why is my chocolate cake dry?
You likely overbaked it or measured the flour incorrectly. Use a kitchen scale for accuracy. The coffee in the batter helps keep it moist, so don’t skip that. Check the cake at the minimum baking time and use the toothpick test.
Can I freeze a Chocolate Caramel Cheesecake Cake?
Yes, freeze individual slices wrapped tightly in plastic wrap and foil for up to 2 months. Thaw overnight in the refrigerator. The texture stays remarkably good. I wouldn’t freeze the whole assembled cake, it’s harder to wrap properly.
What is the best way to cut clean slices of this cake?
Use a sharp knife dipped in hot water. Wipe it dry between each cut. This gives you those clean, bakery-style slices. Chill the cake well before cutting, at least 2 hours. Cold cake cuts much cleaner than room temperature cake.
Do all ingredients really need to be room temperature?
For the cheesecake, yes. Cold cream cheese creates lumps. For the cake, room temperature eggs and sour cream help the batter emulsify properly. It’s not optional for the cheesecake, but the cake is more forgiving. Take everything out an hour before you start.
Is the water bath absolutely necessary?
Not strictly, but it makes a big difference. Without it, the cheesecake is more likely to crack and the texture might be less creamy. If you skip it, place a pan of hot water on the bottom oven rack to create steam. It helps, just not as much.
Can I make this Chocolate Caramel Cheesecake Cake ahead of time?
Absolutely. Make the components up to 3 days ahead and assemble the day you serve. The flavors actually improve after a day in the fridge. Just add the final caramel drizzle right before serving to keep it looking fresh and beautiful.
Can I use store-bought caramel sauce?
You can, but homemade is much better. Store-bought caramel is often thinner and sweeter. If you use it, warm it slightly and add a pinch of salt to balance the sweetness. It works in a pinch, but the homemade version really elevates this dessert.
What kind of chocolate should I use?
Use a high-quality Dutch-processed cocoa powder for the cake. It gives a darker color and richer flavor. For the caramel, use granulated sugar, not brown sugar. Brown sugar adds molasses flavor that can overpower the caramel.
How do I store leftover Chocolate Caramel Cheesecake Cake?
Cover the cake or store slices in an airtight container in the refrigerator for up to 5 days. If you have extra caramel, store it separately and add it fresh when serving. Let slices sit at room temperature for 20 minutes before eating for best flavor.
Can I use a boxed cake mix for the chocolate layer?
Yes, if you’re short on time. Use a good quality chocolate cake mix and add a tablespoon of instant coffee dissolved in hot water. It deepens the flavor. The homemade version is better, but a box mix still works for this layered dessert.
What if I don’t have a springform pan?
You can use a regular cake pan lined with parchment paper. The cheesecake will be harder to remove, but it’s doable. Let it cool completely, then freeze it for 30 minutes before trying to lift it out. Line the pan with parchment overhang for easier removal.
Can I make this without the coffee?
Yes, substitute hot water for the strong brewed coffee. The cake won’t be as richly flavored, but it will still be good. The coffee doesn’t add a coffee taste, it just deepens the chocolate. If you’re caffeine sensitive, water is fine.