


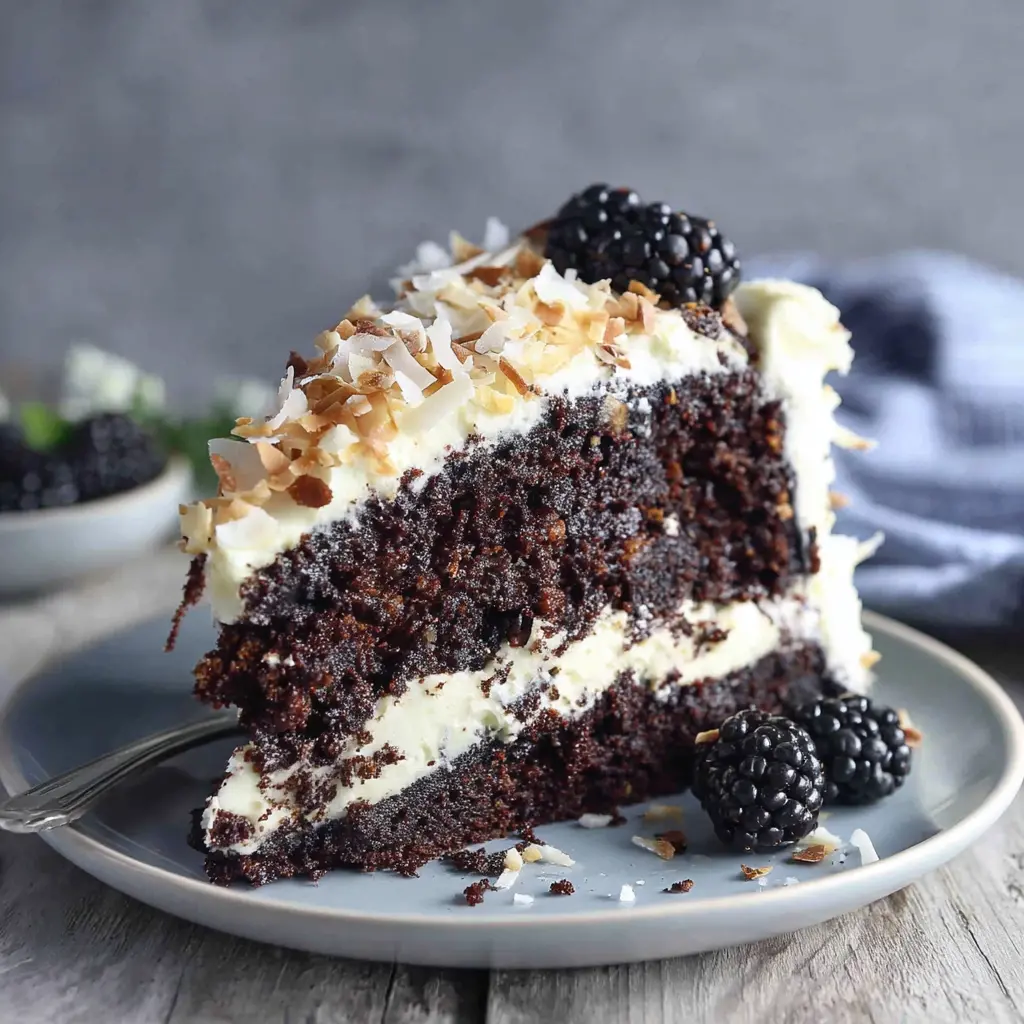

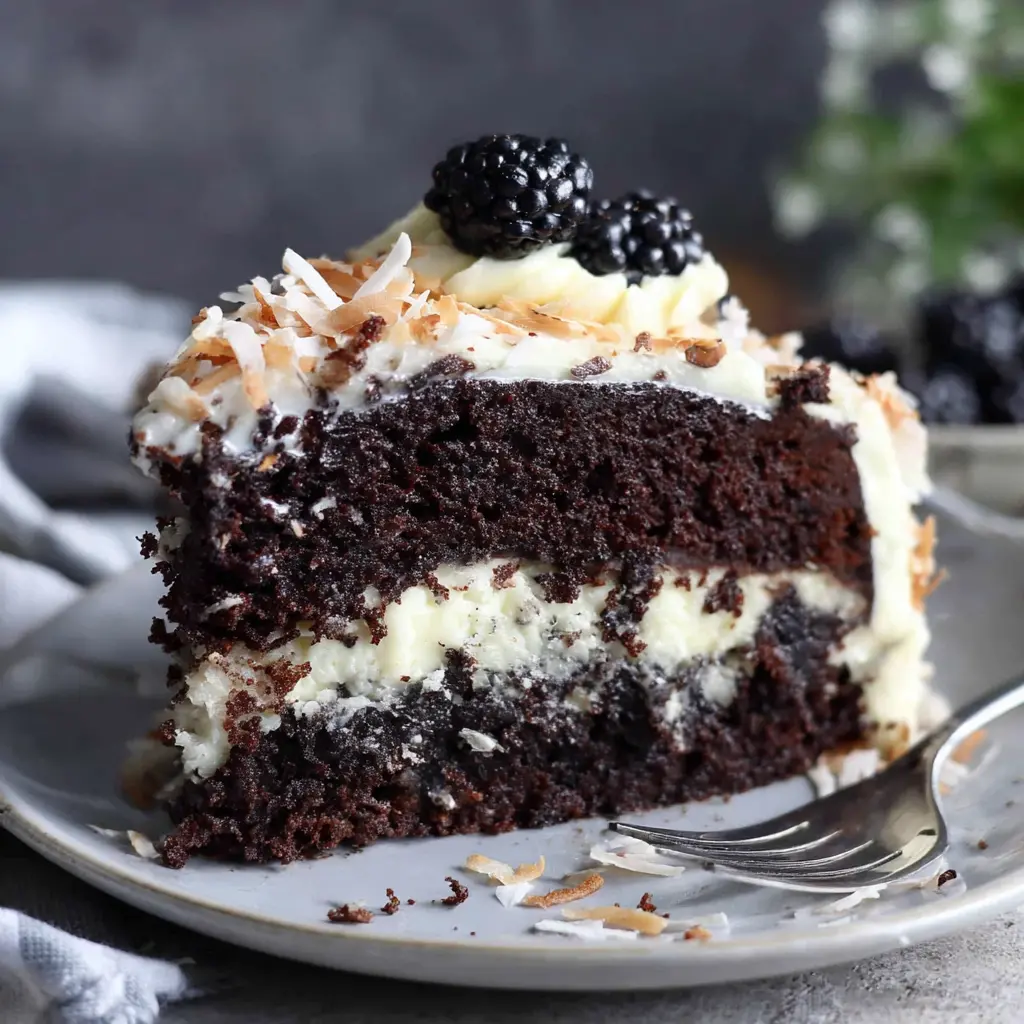
Dark Chocolate Coconut Cream Cake
Ingredients
Method
- Preheat oven to 350 degrees Fahrenheit. Take 3 8-inch round pans, line the bottoms with parchment paper and spray with cooking spray. Set them aside for later.
- In a small pot over medium-low heat, add your water and butter. Once the two are melted and mixed together, remove from heat and whisk in your cocoa powder and chopped chocolate. Then add in your brown sugar, vanilla, and salt.
- In a large bowl, beat together your eggs and yolks. Slowly add it into your chocolate mixture a little at a time, mixing in between.
- Sift your baking soda and flour (make sure you have measured your flour properly--too much flour will ruin the recipe) and slowly add it in to your batter. Mix only until the flour is combined. Do not over mix.
- Divide the batter evenly between your 3 lined and greased pans (if you don’t have 3 pans, see notes). Bake for 25-30 minutes until you can gently push on the cake and it is soft but bounces back or when you insert a toothpick in the center is it is clean but has a few moist crumbs.
- Let the cakes cool in their pans for about an hour, use a knife to loosen edge of cakes before removing from pans. Let cakes cool completely before frosting.
- Reduce temperature from 350 to 325 degrees Fahrenheit. Spread your shredded coconut across a baking tray into a thin layer and bake 5-10 minutes until lightly golden. Cool coconut before assembling cake.
- n a large bowl or stand mixer, add your room temperature butter. Beat butter until it is light and fluffy and has paled in color (about 4 minutes). Then add in about 1/3 of your Eagle Brand® Sweetened Condensed Milk. Cream the two together until they are completely homogenous.
- Add in your vanilla, salt, another 1/3 of your sweetened condensed milk. Mix together until smooth. Add in the remaining 1/3 of your can of sweetened condensed milk and ½ cup of powdered sugar, mix until smooth.
- If your frosting is too soft or not sweet enough you can add another ½ cup of powdered sugar. If your frosting is still too soft, place it in the fridge to chill until you are ready to frost your cakes.
- Once your cakes are cool you are ready to start assembling! If your cakes are domed in the center, take a serrated knife and level them off so they are completely flat.
- Spoon you frosting into a piping bag with a round tip and pipe about 1/3 of the frosting on top of your cake. Then generously sprinkle your toasted coconut on top of the frosting. Stack your second layer of cake on top and repeat the frosting and sprinkling of coconut with the next two layers. After you sprinkle coconut on the top layer, top with blackberries if desired.
Nutrition
Notes
Tried this recipe?
Let us know how it was!Why This Chocolate Coconut Cream Cake Is Worth Every Minute
The first time I attempted a layered cake, it slid off the stand. Honestly, it was a mess. I mean, I’ve baked plenty of cakes before, but something about stacking layers always felt like a high-wire act. But this Chocolate Coconut Cream Cake? It’s the one that changed everything for me. It’s the cake I bring to spring brunches, the one I make for Mother’s Day, the one that gets the “you need to give me this recipe” texts.
I think what makes it so special is that balance. You’ve got this deep, rich chocolate cake that’s perfectly tender. Then there’s that creamy coconut filling that’s not too sweet. And the toasted coconut on top? It adds this nutty crunch that just makes the whole thing sing. It sounds fancy, but honestly, it’s simpler than you’d think. The layers are forgiving, the frosting is stable, and the result looks like you spent all day in the kitchen. You didn’t, but hey, that’s our secret.
This cake is my go-to for spring celebrations. With May here and Mother’s Day around the corner, it’s the perfect showstopper. The tropical flavors feel fresh and bright, but the chocolate keeps it comforting. It’s the kind of cake that makes people pause, take a bite, and just go “wow.” And that’s exactly what I want for you.
Why This Recipe Works
I’ve tested this Chocolate Coconut Cream Cake more times than I can count. And here’s what I’ve learned: the magic is in the details. It’s not about complicated techniques. It’s about understanding why each ingredient does what it does.
The cake itself uses hot water to bloom the cocoa powder. This isn’t just some random step. The hot water helps the cocoa powder release its full flavor, giving you that deep, almost fudgy chocolate taste. And because we’re using Dutch-processed cocoa powder here, it’s even richer. The dark cocoa powder I use adds this complexity that regular cocoa just can’t match.
Then there’s the coconut cream filling. It’s made with sweetened condensed milk, which gives it that luscious, creamy texture without being overly sweet. The shredded coconut adds chew and texture. And the butter in the frosting? Room temperature is non-negotiable. If it’s too cold, you’ll get lumps. Too warm, and your frosting will be a runny mess. Trust me on this.
I also love that this cake is surprisingly forgiving. The layers are sturdy enough to stack without crumbling. The frosting pipes beautifully. And the whole thing can be made ahead, which is a lifesaver when you’re hosting. It’s the kind of recipe that makes you look like a pro, even if you’re just a home baker who’s learned a few tricks along the way.
Ingredients: What You’ll Need
Let’s talk about what goes into this Chocolate Coconut Cream Cake. The list might look long, but I promise, each ingredient has a job to do. And I’ve included notes on substitutions, so you can adapt if needed.
For the cake layers, you’ll need butter, water with a bit of vinegar (this helps with the rise), Dutch-processed cocoa powder, dark chocolate (finely chopped), brown sugar, vanilla, salt, eggs, egg yolks, flour, and baking soda. The brown sugar adds moisture and a hint of caramel. The extra egg yolks? They make the cake incredibly tender.
For the coconut cream filling, you’ll need butter, sweetened condensed milk, powdered sugar, vanilla, salt, and sweetened shredded coconut. The sweetened condensed milk is the star here. It gives the filling that silky, creamy texture that’s just irresistible.
And for the frosting and decoration, you’ll need more butter, powdered sugar, vanilla, salt, and sweetened shredded coconut for toasting. Fresh blackberries on top? They add a pop of color and a touch of tartness that cuts through the sweetness.
One thing I’ll say: use good quality cocoa powder and dark chocolate. It makes a real difference. And please, please, use unsweetened shredded coconut if you can find it. The sweetened stuff works, but I find it too sugary. Unsweetened flakes look more natural and taste better, honestly.
Step-by-Step: Making the Chocolate Coconut Cream Cake
I’m not going to walk you through every single step here, because that’s what the recipe card is for. But I do want to share some insights that will help you nail it. Think of this as my behind-the-scenes commentary.
First, the cake batter. When you add the hot water to the cocoa powder and chocolate, stir it until it’s smooth. You’ll smell that intense chocolate aroma. It’s amazing. Then, when you cream the butter and brown sugar, make sure it’s light and fluffy. This takes a good 3-4 minutes with a stand mixer. Don’t rush it.
The eggs and egg yolks should be at room temperature. Cold eggs can cause the batter to curdle. I usually take them out of the fridge about 30 minutes before I start baking. If you forget, just place them in a bowl of warm water for 5 minutes. Works like a charm.
When you add the flour mixture, alternate it with the buttermilk substitute (water and vinegar). Start and end with the flour. This helps the batter emulsify properly. And don’t overmix. Once you see the last streak of flour disappear, stop. Overmixing develops gluten, and that leads to a tough cake.
Bake the layers until a toothpick inserted in the center comes out with a few moist crumbs. Not clean, but with a few crumbs. That’s the sweet spot. Let them cool in the pan for about 10 minutes, then turn them out onto a wire rack to cool completely. And I mean completely. If you try to frost a warm cake, you’ll end up with a melted mess.
Recipe Variations: Make It Your Own
This Chocolate Coconut Cream Cake is pretty perfect as is, but I get it. Sometimes you want to switch things up. Here are some variations I’ve tried and loved.
Dairy-Free Adaptation: Use a high-quality vegan butter substitute for both the cake and the frosting. For the filling, you can try a dairy-free sweetened condensed milk alternative. Just keep in mind that the texture might be slightly different. I’ve had good results with this, but it’s not exact.
Gluten-Free Version: Swap the all-purpose flour for a good gluten-free baking blend. I like the ones that contain xanthan gum. The cake might be a bit more delicate, so handle it gently. It still tastes amazing.
Different Chocolate: You can use semi-sweet chocolate instead of 72% dark if you prefer a milder chocolate flavor. Just reduce the sugar in the cake slightly. Or try milk chocolate for a sweeter, creamier taste.
Add Some Lime: A bit of lime zest in the coconut filling adds a bright, citrusy note that pairs beautifully with the chocolate. It’s a subtle twist, but it works.
Sheet Cake Version: If you don’t want to deal with layers, bake the batter in a 9×13 inch pan. Adjust the baking time to about 30-35 minutes. Then just spread the coconut cream filling on top and sprinkle with toasted coconut. Easy.
Expert Tips for Success
I’ve made this Chocolate Coconut Cream Cake more times than I can count. And I’ve learned a few things along the way. Here are my best tips to ensure your cake turns out perfectly.
Toast the coconut. I know, it’s an extra step. But it’s worth it. Toasted coconut has this nutty, deep flavor that raw coconut just doesn’t have. Plus, it’s easier to chew. Spread the shredded coconut on a baking sheet and toast at 350°F for 5-7 minutes, stirring halfway through. Watch it closely; it burns fast.
Measure your flour correctly. Use the spoon and level method. Fluff the flour, spoon it into your measuring cup, and level it off with a knife. Or better yet, use a kitchen scale. Over-measuring flour is the number one reason cakes turn out dry.
Room temperature ingredients are key. This isn’t just me being fussy. Room temperature butter, eggs, and milk emulsify better, creating a smoother batter and a more tender cake. It’s science.
Cool the cake completely before frosting. I can’t stress this enough. If the cake is even slightly warm, the frosting will melt and slide right off. Patience, my friend.
Add the shredded coconut to the frosting quickly. As the frosting sits, it forms a slight crust. If you wait too long, the coconut won’t stick. So right after you frost the cake, press the coconut into the sides and top.
For a cleaner look, use chopped dark chocolate mixed with the coconut. I tried a chocolate ganache drip once, but it didn’t look right over the coconut. So instead, I mixed chopped dark chocolate into the toasted coconut and pressed it onto the cake. It looks beautiful and adds another layer of chocolate.
Common Mistakes & Troubleshooting
Common Mistakes & Fixes
Mistake: The cake layers are dry.
Solution: You probably over-measured the flour or overbaked the cake. Use the spoon and level method for flour, and check for doneness a few minutes early. The toothpick should come out with moist crumbs, not clean.
Mistake: The frosting is too runny.
Solution: Your butter was too warm, or you added too much liquid. Pop the frosting in the fridge for 15-20 minutes to firm up, then re-whip. If it’s still too thin, add more powdered sugar.
Mistake: The cake layers domed too much.
Solution: This happens when the oven temperature is too high or the batter is overmixed. Use an oven thermometer to check your temp. And once the layers are cool, just level them with a serrated knife. No one will know.
Mistake: The coconut won’t stick to the frosting.
Solution: You waited too long to add it. Press the coconut into the frosting immediately after you finish frosting the cake. If it’s already formed a crust, try a light mist of water on the frosting before adding the coconut.
Mistake: The cake sticks to the pan.
Solution: Make sure you grease and flour the pans thoroughly. I like to use butter and a dusting of cocoa powder instead of flour, so there’s no white residue on the cake. Let the cake cool in the pan for 10 minutes before turning it out.
Storage & Leftovers
So you’ve made this amazing Chocolate Coconut Cream Cake. Now what? Here’s how to store it and keep it tasting fresh.
Refrigerator: Store the cake in an airtight container or cake carrier in the fridge for up to 5 days. The cream cheese frosting needs to be kept cold. Let the cake sit at room temperature for about 30 minutes before serving to take the chill off.
Freezer: You can freeze the whole cake or individual slices. For the whole cake, pop it in the freezer for a couple of hours to firm up, then wrap it tightly in a double layer of plastic wrap and then foil. Freeze for up to 3 months. Thaw in the fridge overnight.
Make-Ahead Strategy: This is a great cake to make ahead. Bake the cake layers up to 2 days in advance and wrap them tightly in plastic wrap. Store at room temperature. The coconut cream filling can also be made ahead and stored in the fridge. Assemble and frost the day you plan to serve it.
Reheating: This cake is best served at room temperature. But if you want a warm slice, you can microwave it for about 15 seconds. Just be careful not to melt the frosting. Or, for a special treat, serve it slightly warmed with a scoop of vanilla ice cream.

Frequently Asked Questions
Final Thoughts: Go Make This Cake
When you bring this Chocolate Coconut Cream Cake to the table, people will stop and stare. The layers are perfect, the coconut is toasted to a golden brown, and the chocolate is rich and deep. And then they take a bite. That’s the moment. The soft, moist cake, the creamy filling, the crunch of coconut. It’s all there.
I hope you make this cake for someone you love. Maybe for Mother’s Day, or a spring birthday, or just because it’s Tuesday. It’s the kind of cake that makes ordinary moments feel special. And honestly, that’s what baking is all about.
If you make it, tag me in your creation. I want to see your beautiful layers and your toasted coconut. I want to hear about the oohs and ahhs from your family. Because that’s the best part. Now go make memories with this cake. You’ve got this.
For more inspiration, check out my Pinterest boards for more cake ideas and variations.
Source: Nutritional Information
How should I store leftover Chocolate Coconut Cream Cake?
Store it in an airtight container in the fridge for up to 5 days. Let it sit at room temperature for about 30 minutes before serving. The frosting needs to stay cold, but the cake tastes best when it’s not straight from the fridge.
Can this Chocolate Coconut Cream Cake be frozen?
Yes! Freeze the whole cake or individual slices. For the whole cake, freeze it for a couple of hours until firm, then wrap tightly in plastic wrap and foil. Freeze for up to 3 months. Thaw in the fridge overnight.
Why do I need to use unsweetened cocoa powder? Can’t I use Dutch processed?
This recipe uses Dutch-processed cocoa powder for a richer, darker chocolate flavor. Natural unsweetened cocoa powder is more acidic and will react differently with the baking soda. Stick with Dutch-processed for the best results.
Can I omit the coconut extract?
You can, but it will significantly reduce the coconut flavor. The shredded coconut and coconut milk in the filling add some flavor, but the extract really boosts it. If you don’t have it, add a bit more vanilla instead.
Is there a substitute for canned coconut milk?
I haven’t found a perfect substitute. You could try a combination of whole milk and a bit of coconut cream, but the texture might be different. Canned coconut milk is best for that rich, creamy consistency.
Can I omit the shredded coconut?
You can, but then it’s not really a chocolate coconut cream cake, is it? The shredded coconut adds texture and flavor. If you’re not a fan, you could try finely chopped nuts instead, but it won’t be the same.
Can I use plain vanilla or chocolate frosting instead of cream cheese buttercream?
Sure, you can swap the frosting. A chocolate buttercream would be amazing, or a simple vanilla buttercream works too. Just keep in mind that the cream cheese frosting adds a tangy balance to the sweet coconut filling.
Do I have to add the chocolate ganache drip?
I actually skip the ganache drip for this cake. Instead, I mix chopped dark chocolate into the toasted coconut and press it onto the cake. It looks beautiful and adds another layer of chocolate without the drip.
Can I use this cake to make a plain chocolate cake?
Absolutely. Just omit the coconut filling and use a chocolate or vanilla frosting instead. The cake layers themselves are a fantastic chocolate cake recipe. You could even use them for a birthday cake.
How can I tell when this cake is finished baking?
A toothpick inserted in the center should come out with a few moist crumbs, not clean batter. The cake should also spring back when lightly pressed. Start checking a few minutes before the recommended time.
Can this cake be frozen?
Yes, as mentioned above. Freeze the whole cake or individual slices. Wrap tightly to prevent freezer burn. Thaw in the fridge overnight. It’s a great make-ahead dessert for special occasions.
How do I store this cake and how long does it last?
Store in an airtight container in the fridge for up to 5 days. The cream cheese frosting needs refrigeration. Let it come to room temperature for about 30 minutes before serving for the best flavor and texture.
What’s the best way to serve/eat this cake?
I love it at room temperature. The flavors are more pronounced and the texture is perfect. You can also serve it slightly chilled, especially on a warm day. A cup of coffee or tea is the perfect companion.
Can you pipe with this frosting?
Yes, this cream cheese buttercream pipes beautifully. It’s stable enough to hold its shape. Just make sure it’s at the right consistency. If it’s too soft, chill it for a bit before piping.
Is this cake good for stacking?
Absolutely. The cake layers are sturdy and the frosting is stable. Just make sure the layers are completely cool before you start stacking. And use a cake board or a flat plate for a stable base.
Can this cake be made into cupcakes?
Yes! Fill cupcake liners about two-thirds full and bake at 350°F for about 18-20 minutes. Top with the coconut cream frosting and toasted coconut. They’re perfect for parties or a smaller treat.
Can this cake be baked in a loaf pan?
You can, but the baking time will be different. A loaf pan will take longer to bake, about 50-60 minutes. Check for doneness with a toothpick. The texture might be slightly denser, but it’ll still be delicious.
Can this cake be baked in a bundt pan?
I haven’t tested this, but it should work. Grease the pan well and bake for about 45-55 minutes. The cake might be a bit more delicate, so let it cool completely before removing from the pan.
Can I bake this cake in two, 6-inch round pans?
Yes, but the layers will be thicker. Bake for about 35-40 minutes. Check for doneness with a toothpick. You might need to adjust the frosting amount, as you’ll have taller layers.
Can I bake this cake in two, 9-inch round pans?
Yes, the layers will be thinner. Bake for about 25-30 minutes. Keep an eye on them, as they’ll bake faster. The toothpick test is your best friend here.
Can this cake be baked in a 13×9 inch pan?
Absolutely. Bake the batter in a greased 13×9 inch pan at 350°F for about 30-35 minutes. Let it cool completely, then spread the coconut cream filling on top and sprinkle with toasted coconut. Easy and impressive.