

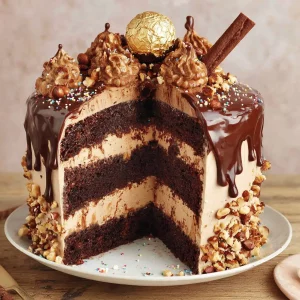


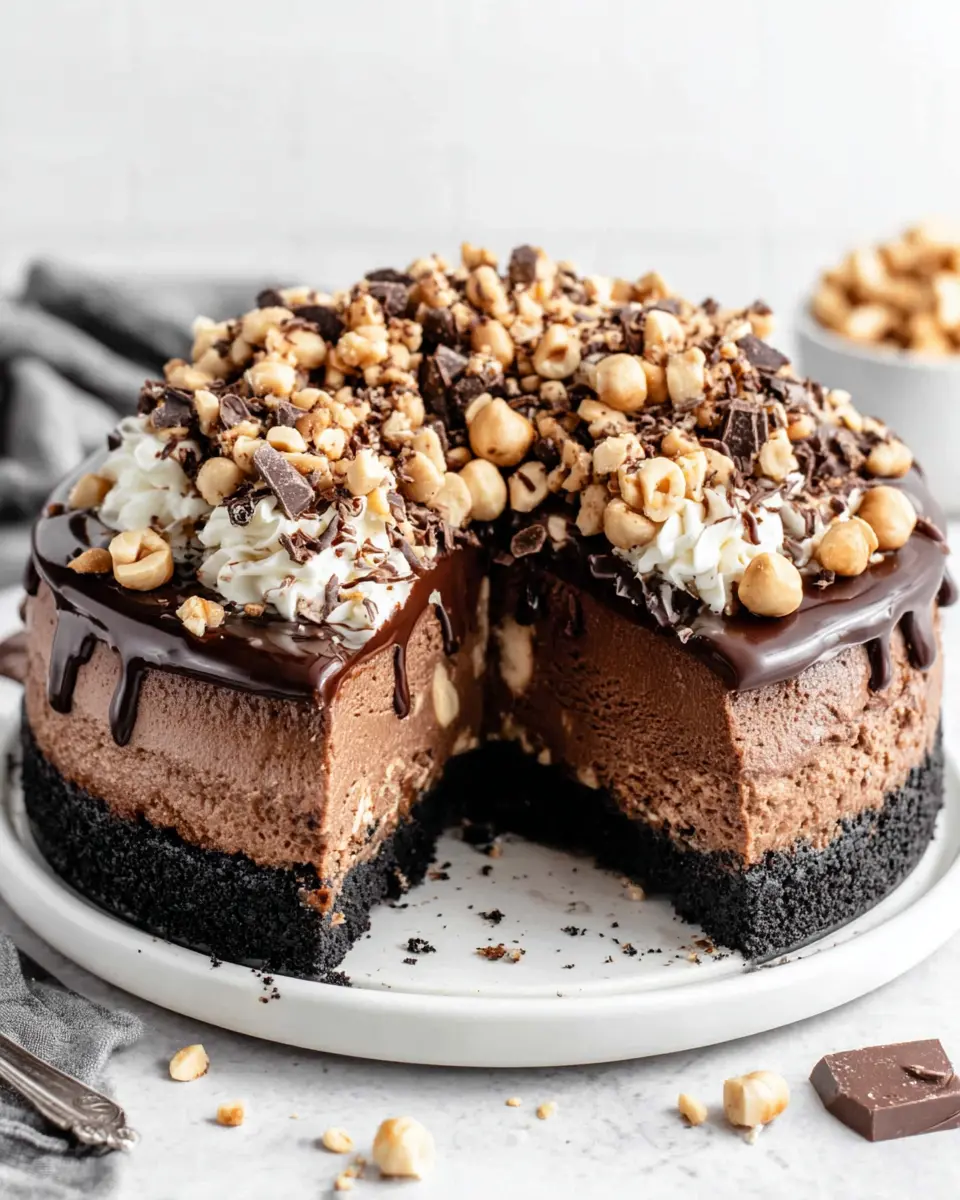
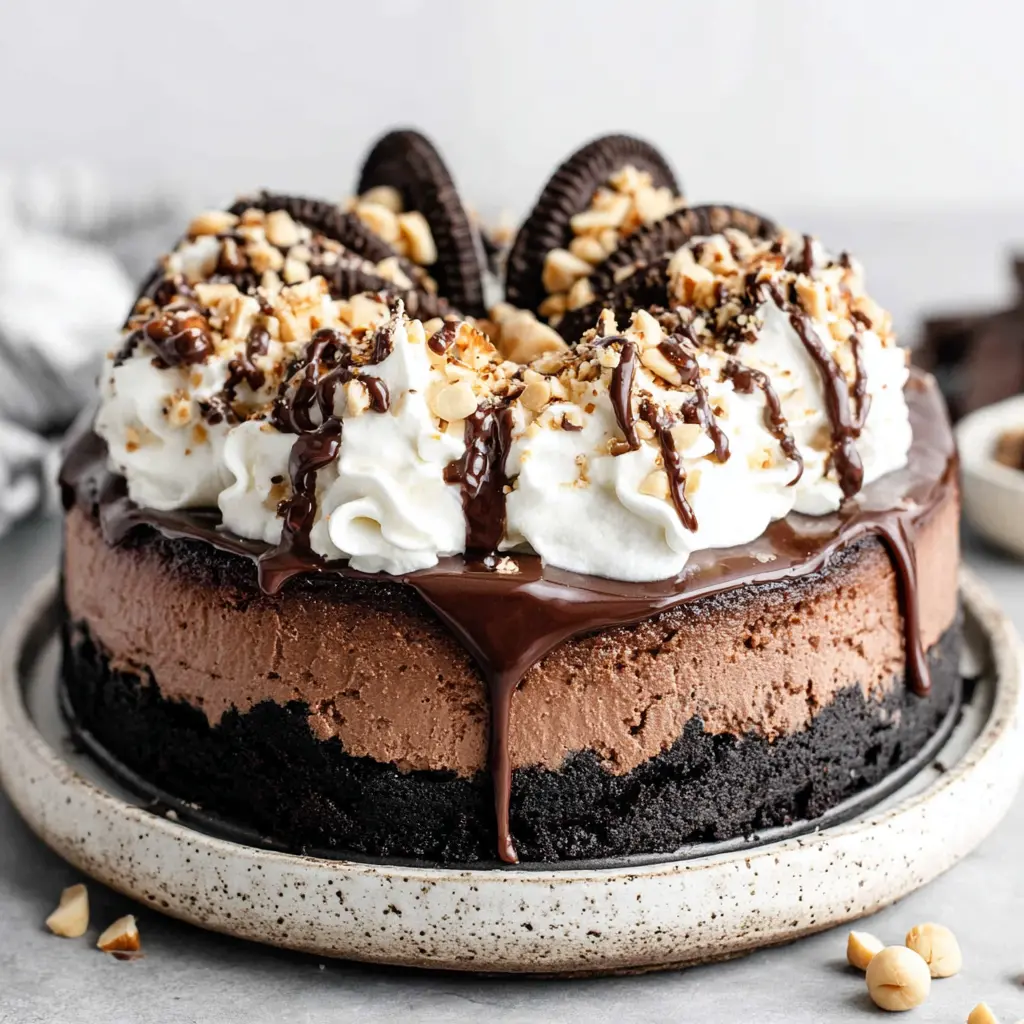
Nutella Chocolate Hazelnut Cheesecake Cake
Ingredients
Method
- Preheat the oven to 400 F. Wrap a 9-inch springform cheesecake pan in aluminum foil to prevent leaks. Set the wrapped pan aside. Place about an inch of water in a 10 or 12-inch cake pan to create a water bath.
- Combine crushed chocolate cookies and butter to form the crust. Press the mixture evenly across the bottom and up the sides of the cheesecake pan. Set aside.
- Preheat the oven to 375 F.
- Combine butter and sugar in the bowl of a stand mixer fitted with the paddle attachment, or use a large mixing bowl and hand mixer. Stir on low until combined and smooth. Scrape the sides of the bowl.
- Add eggs one at a time. Stir after each addition and scrape the bowl.
- Add chocolate hazelnut spread, heavy cream, and salt. Beat the mixture on low speed until well mixed and smooth. Scrape the sides of the bowl as needed.
- Pour the cheesecake filling into the prepared cookie crust. Place the cheesecake in the water bath. Put the cheesecake and water bath on the center rack of the oven.
- Bake at 375 F for 15 minutes. Without opening the oven door, lower the temperature to 325 F and bake an additional 50-60 minutes until the cheesecake center is set but still jiggles slightly.
- Once the cheesecake is ready, crack open the oven door. Turn off the oven, but leave the cheesecake inside with the door cracked open for 20 minutes to cool gradually and prevent cracks.
- After 20 minutes, remove the cheesecake from the oven, then remove it from the water bath. Set the springform pan on a rack to cool for 30-60 minutes. Loosely cover the cheesecake with plastic wrap and place it in the refrigerator to cool completely. If the cheesecake is still warm, place a paper towel on top, under the plastic wrap, to catch condensation.
- Refrigerate the cheesecake in the pan for at least 4 hours, preferably overnight.
- Once the cheesecake has completely chilled, make the optional toppings.
- To make the Nutella ganache: Combine chocolate hazelnut spread and heavy cream in a small microwave-safe bowl. Microwave for 30 seconds at 50% power. Stir. Repeat as needed until smooth and slightly runny. Let it rest for a few minutes until no longer hot, then drizzle over the chilled cheesecake.
- To make the Frangelico whipped cream: Place heavy cream in a chilled mixing bowl. Use the whisk attachment if using a stand mixer. Whip the heavy cream at low speed until bubbles form. Add powdered sugar. Whip at medium speed until it just thickens, but no distinct peaks form. Add hazelnut liquor. Increase speed to high and whip until medium-to-firm peaks form. Pipe the whipped cream around the edge of the cheesecake, and serve any extra on the side, if desired.
- Decorate the cheesecake with Ferrero Rocher truffles and chopped toasted hazelnuts. Enjoy!
- Store extra cheesecake in the refrigerator, loosely covered, for 3 days.
Notes
Tried this recipe?
Let us know how it was!Why You’ll Absolutely Love This Chocolate Hazelnut Cheesecake Cake
Honestly, you know that feeling, right? You’re scrolling online, maybe on Pinterest, and you see these gorgeous, multi-layered desserts, and your first thought is, “Wow, but I could never make that.” I’ve been there, so many times. Combining a rich chocolate cake with a creamy cheesecake layer? It sounds like a baking Everest, I get it.
But what if I told you this Chocolate Hazelnut Cheesecake Cake is designed to be your next show-stopping masterpiece, without the overwhelm? It’s true! We’re talking about a truly decadent dessert cake that looks incredibly impressive, yet each component is totally manageable. I mean, we all want to impress our friends and family, especially with spring celebrations around the corner, don’t we? This recipe is your secret weapon.
This isn’t just a chocolate hazelnut cheesecake; it’s a celebration of textures and deep, harmonious flavors. You get that irresistible crunch of a hazelnut crust, the velvety smooth chocolate hazelnut cheesecake filling, and a moist chocolate sponge cake layer, all crowned with a glossy ganache. It’s the kind of dessert that makes people gasp when you bring it out, and then sigh with pure bliss after the first bite. Trust me, it’s worth every bit of effort, and I’m here to guide you through every step.
Getting Ready: Essential Ingredients for Your Decadent Dessert Cake
Before we dive into the fun part, let’s talk ingredients. Quality really does make a difference here, you know, especially when you’re aiming for a gourmet cake. I always recommend grabbing your cream cheese and eggs from Ralphs or Vons a day or two before you plan to bake, just so they have time to come to room temperature. This isn’t being fussy, it’s the difference between a lumpy batter and a perfectly smooth, velvety smooth cheesecake.
For the Irresistible Hazelnut Crust
For the base of our chocolate hazelnut cheesecake cake, we’re using Oreo cookies. I mean, who doesn’t love an Oreo crust? You’ll crush these up with some melted butter. If you don’t have a food processor, which works really well for crushing cookies for the crust, don’t worry! Just place the cookies in a freezer-weight bag and use a rolling pin. You want fine crumbs here, almost like sand, so it forms a solid foundation.
For the Rich Chocolate Hazelnut Cheesecake Filling
This is where the magic happens for our layered hazelnut cream cake. You’ll need good quality cream cheese, granulated sugar, large eggs, and of course, Nutella spread. I think it’s important to use a chocolate hazelnut spread you truly love the taste of, as it’s a star flavor here. A little salt balances all that richness beautifully. Remember, having your cream cheese at room temperature is key; it blends so much better and more efficiently, preventing any lumps.
For the Silky Ganache Topping
A decadent dessert cake isn’t complete without a gorgeous topping. For our ganache, it’s all about heavy whipping cream and more Nutella. You’ll want to heat the cream just until it’s simmering, then pour it over the Nutella. Let it sit for a minute, then whisk until it’s glossy and smooth. It’s so good, you’ll probably want to spoon it straight from the bowl, honestly.
Step-by-Step Recipe Instructions for Your Chocolate Hazelnut Cheesecake Cake
Alright, let’s get into the nitty-gritty of how we build this amazing chocolate hazelnut cheesecake cake. I know this looks like a lot of steps, but trust me, we’ll break it down, and you’ll see it’s simpler than you thought. Each part is really quite straightforward on its own.
How to Make the Hazelnut Crust
First things first, let’s get that crust ready. You’ll combine your crushed Oreo cookies with melted butter. Press this mixture firmly into the bottom of your springform pan. I always use the back of a measuring cup to really compact it; you want it nice and dense so it doesn’t crumble when you slice it later. Pop it into the oven for a bit, just to get it set and fragrant, you know, that incredible buttery smell.
Preparing the Chocolate Hazelnut Cheesecake Filling
Now for the creamy heart of this dessert. In a large bowl, you’ll beat your room temperature cream cheese until it’s super smooth. Then, gradually add the granulated sugar, mixing until it’s just combined. Don’t overmix here; we’re trying to incorporate, not aerate. Gently beat in the eggs, one at a time, followed by the Nutella spread and a pinch of salt. You’ll have this luscious, velvety smooth batter that smells absolutely divine, honestly, it’s a preview of the rich flavors to come.
Baking and Chilling Your Cheesecake Layer
This is probably the most crucial part for a perfectly creamy, crack-free cheesecake. You’ll pour your filling over the baked crust. Now, for the water bath. This isn’t just a suggestion; it’s a chef’s secret! A water bath maintains an even temperature, which prevents cracks in the surface of your cheesecake. It creates a moist, gentle baking environment. I mean, who wants a cracked cheesecake after all that work?
You’ll bake it until the edges are set but the center still jiggles slightly. This is important: turn off the oven when the cheesecake still jiggles slightly because it will continue to set during cooling. Waiting until it’s completely firm leads to an over-baked, less creamy cheesecake. Once it’s baked, vent the oven gradually. This gradual cooling prevents extreme temperature changes that can cause cracks. Let it cool completely in the oven with the door ajar, then on the counter, and finally, into the fridge for a good, long chill. Chilling time is your friend here; it’s essential for stability.
Decorating Your Decadent Dessert Cake
Once your cheesecake is perfectly chilled and firm, it’s time to make it shine. You’ll prepare your silky ganache topping and pour it over the top. Then comes the fun part: garnishing! Toasted chopped hazelnuts are a must for that extra crunch and rich hazelnut dessert cake flavor. You can combine all your toppings together and chop them all at once for ease. Just don’t use a food processor for chopping these toppings; the crumbs will be too small. A nice rough chop is all you need for that textural contrast. Remember, none of the decorating is mandatory, but it just makes your homemade cheesecake extra-fancy and truly Instagram-worthy.
Pro Tips for a Perfect Chocolate Hazelnut Cheesecake Cake Result
Look, making a chocolate hazelnut cheesecake cake can feel like a big project, but with a few pro tips, you’ll nail it every time. These are the little things I’ve learned over the years that really make a difference.
-
Room Temperature is Your Friend: I can’t stress this enough. Bring all your ingredients, especially the cream cheese and eggs, to room temperature before you start. It makes for a much smoother, lump-free batter, which means a creamier cheesecake. Honestly, it’s a game-changer.
-
The Water Bath is Non-Negotiable: For a crack-free, perfectly creamy chocolate hazelnut cheesecake filling, a water bath is your best friend. It provides gentle, even heat, preventing the cheesecake from baking too quickly and cracking. It’s a small extra step, but worth it, I promise.
-
Don’t Overbake: This is a common mistake. Turn off the oven when the center of the cheesecake still has a slight jiggle. It’ll continue to set as it cools, giving you that perfectly tender, luscious texture. Overbaking leads to a dry, less creamy result, and nobody wants that.
-
Cool Down Slowly: After baking, leave the cheesecake in the cooling oven with the door ajar for at least an hour. This gradual cooling process helps prevent those dreaded cracks that can happen from a sudden temperature change. Patience is key here, you know.
-
Toast Those Hazelnuts: Hazelnuts aren’t usually sold toasted, but you can toast them yourself. Just spread them on a baking sheet and pop them in a warm oven for about 10-15 minutes, until they’re fragrant and their skins start to peel. It really brings out their rich, nutty flavor, making your rich hazelnut dessert cake even better. Extra toasted hazelnuts are so good over granola or yogurt, too!
-
Clean Slices: When you’re ready to cut into your beautiful chocolate hazelnut cheesecake cake, use a “hot water dip” method for your knife. Dip a sharp knife in hot water, wipe it clean, and then make your cut. Repeat for each slice. It keeps your cuts clean and sharp, which is essential for that perfect presentation.
-
Timing Your Toppings: Most chocolate hazelnut spreads will firm up in the refrigerator, making the cheesecake difficult to slice neatly. Apply your ganache and any other toppings just before serving. If you have leftovers, slice the remaining cheesecake into portions before refrigerating. This makes serving later so much easier, honestly.
Delicious Variations for Your Chocolate Hazelnut Cheesecake
While this chocolate hazelnut cheesecake cake recipe is amazing as is, I love to play around with flavors and textures. Here are a few ideas if you’re feeling adventurous or want to customize it a bit.
-
Crust Creativity: While Oreos are classic, you could totally use other chocolate sandwich cookies or even chocolate graham crackers for the crust. I’ve even seen people use Biscoff cookies for a different spiced note, which is pretty good, you know, for a change.
-
Ganache Galore: If you want to completely coat the cheesecake in a layer of ganache, just double the ganache recipe. Then pour it over your chilled chocolate hazelnut cheesecake, spreading as needed for even distribution. It creates a truly dramatic, rich chocolate hazelnut dessert cake effect.
-
Topping Twists: Instead of just the Nutella ganache, maybe drizzle some dulce de leche over the top, or even a simple caramel sauce. It adds another layer of sweetness and visual appeal. You could also garnish with some fresh berries, especially in spring, to cut through the richness a bit.
-
Hazelnut Spread Swap: While Nutella is widely available at places like Trader Joe’s and Whole Foods, any other chocolate hazelnut spread will do as a substitute. There are some great brands out there if you want to explore different flavor profiles or ingredient lists.
Storage & Freezing Guidelines for Your Chocolate Hazelnut Cheesecake Cake
You’ve put in the work to create this incredible chocolate hazelnut cheesecake cake, so let’s make sure it lasts! Proper storage is key to enjoying those rich flavors for days.
Store leftover Nutella cheesecake in the refrigerator for up to 4 days. I always press a sheet of wax paper or parchment paper right up against the exposed cheesecake to keep the interior from drying out or absorbing other odors from the fridge. The top, with its ganache shell, probably doesn’t need covering.
Make-Ahead & Freezing Tips
Good news for busy bakers in Los Angeles! You can totally make this cheesecake ahead of time. You can prepare the chocolate hazelnut cheesecake batter 2-3 days before you plan to bake it. Just keep it covered in the fridge. The chocolate ganache can also be made up to 3 days ahead and stored in a covered container in the fridge; just gently melt it to a fluid state before using.
To freeze the baked cheesecake, which I totally recommend doing before decorating with drizzle or rosettes, chill it for at least 4 hours. Then, wrap it tightly in a double thickness of plastic wrap, and then again in foil. Place it in a gallon freezer bag with all the air removed. It’ll keep in the freezer for up to 3 months! To thaw, just remove the foil and plastic wrap, place it on a plate, and let it thaw in the fridge for 12-24 hours (or overnight) before you plan to serve. Apply your toppings just before serving, you know, for peak freshness and presentation.
Reheating Leftovers? Not Really!
Cheesecake, especially a layered dessert like this, is best served chilled or at room temperature. Reheating isn’t really a thing for cheesecake; it can alter the creamy texture. So, just thaw and enjoy!
Serving Suggestions & Perfect Pairings
When you finally present your gorgeous chocolate hazelnut cheesecake cake, you want to make sure it gets the spotlight it deserves. Garnish with some extra chopped toasted hazelnuts for that added crunch and flavor. A light dusting of powdered sugar can also look really elegant, I think. For a truly decadent dessert, you could even add a dollop of homemade whipped cream, maybe with a hint of vanilla, on the side.
This cake is incredibly rich, so for perfect pairings, I suggest serving it with something that will cut through that richness. A strong cup of coffee or a simple glass of cold milk is just right. Or, honestly, just a glass of sparkling water with a squeeze of Meyer lemon. It’s all about balance, you know.
Common Cheesecake Troubleshooting
Baking is a journey, and sometimes things don’t go exactly as planned. Don’t worry, I’ve had my share of baking woes, and I’ve learned a few things the hard way. Here are some common issues you might run into with a rich hazelnut dessert cake and how to fix them.
Common Mistakes & Fixes for Your Chocolate Hazelnut Cheesecake Cake
Mistake: Cracks all around the cheesecake surface.
Solution: This is usually due to overbaking or a sudden temperature change during cooling. Make sure you use a water bath, don’t overbake (it should still jiggle slightly in the center), and cool it gradually in the oven with the door ajar. I mean, it really helps.
Mistake: The cheesecake has a sunken center.
Solution: A sunken center can happen if the cheesecake isn’t fully set or if it was overmixed, incorporating too much air. Make sure you’re baking until that slight jiggle, and be gentle when mixing the batter, especially after adding eggs.
Mistake: The crust is soggy or crumbly.
Solution: A soggy crust often means it wasn’t baked long enough or the butter ratio was off. Make sure you press the crumbs firmly into the pan and bake it until it’s just right, golden brown and fragrant. If it’s too crumbly, you probably needed a bit more melted butter to bind it.
Mistake: The ganache topping is too thin or too thick.
Solution: If it’s too thin, let it cool a bit longer; it will thicken as it chills. If it’s too thick, gently warm it over a double boiler or in the microwave for a few seconds, stirring until it reaches the right consistency. It’s all about finding that perfect pour, you know.
Mistake: Cheesecake is tough or rubbery.
Solution: This is almost always a sign of overmixing, especially once the eggs are added. Overmixing develops gluten in the cream cheese, leading to a tough texture. Mix only until just combined, I think. You want that velvety smooth texture, not a bouncy one!
Frequently Asked Questions
Your Chocolate Hazelnut Cheesecake Cake Awaits!
When you finally pull this masterpiece from the fridge, perfectly chilled and gleaming, you’re going to feel such a surge of pride, honestly. That first slice, revealing those distinct layers of crisp crust, creamy chocolate hazelnut cheesecake, and fluffy chocolate sponge cake, is just magical. The aroma alone is enough to make mouths water, and that first indulgent bite? Pure bliss. It’s rich, it’s decadent, and it’s all thanks to your amazing effort.
You’ve totally got this! Don’t be shy about tackling this impressive layered dessert. With these tips and a little patience, you’ll be serving up a gourmet cake that will earn you endless compliments. I mean, who doesn’t love being called a master baker? Go ahead, embrace the challenge, and share your stunning creations with me! I love seeing what you make. And for more inspiration, check out my Pinterest boards.
Source: Nutritional Information