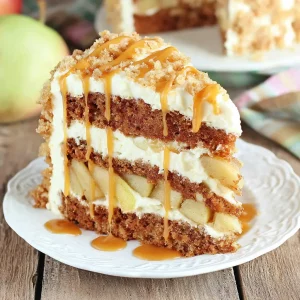


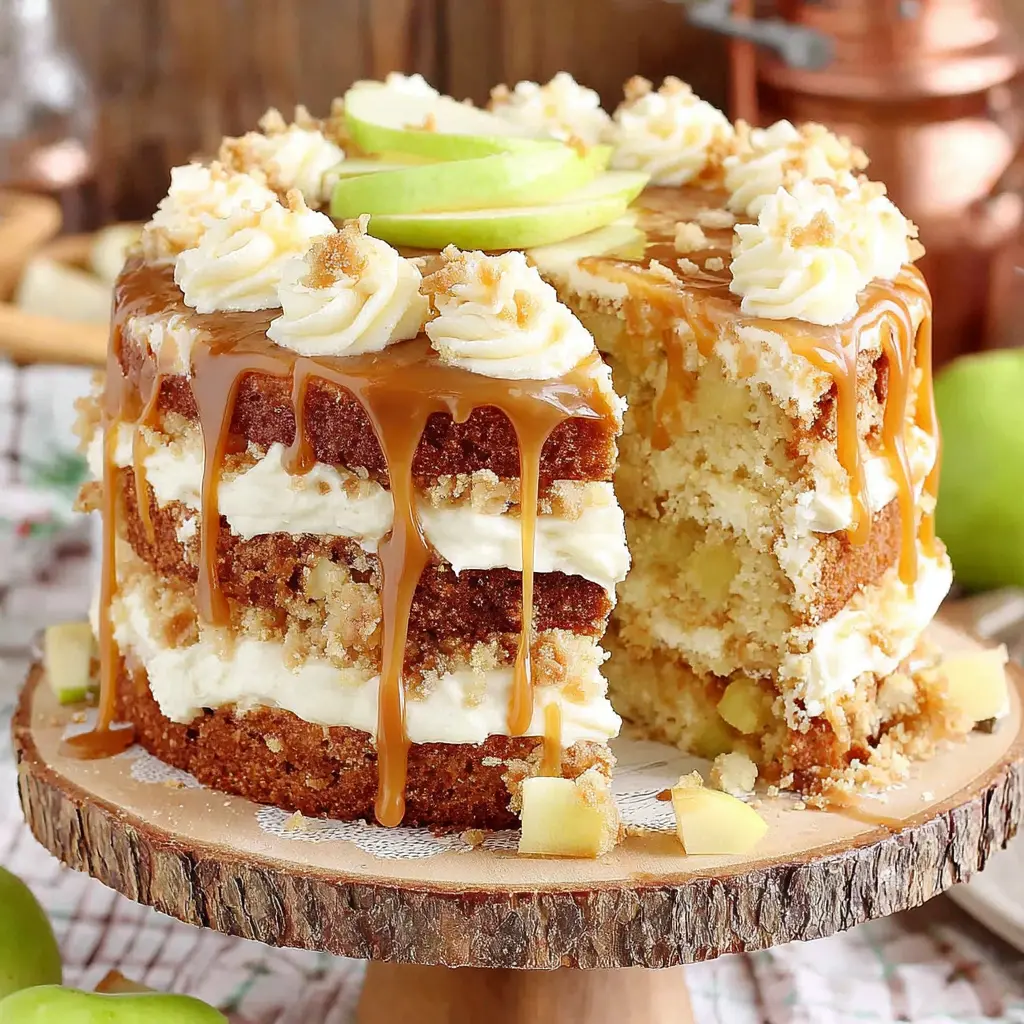
Spiced Caramel Apple Layer Cake
Ingredients
Method
- Warm the heavy cream in a bowl in the microwave and then set aside.
- In a large saucepan, add the sugar, corn syrup, and water. Stir gently to incorporate the ingredients.
- Cook over medium to medium-high heat, stirring gently, until the sugar dissolves and the mixture is bubbling.
- Stop stirring and allow the mixture to boil undisturbed until it begins to darken in color. You want the mixture to reach a honey color, but no darker. The syrup will change from light in color to dark very quickly, so it's important to watch closely and remove the pan from the heat as soon as it's light-medium honey color.
- Once removed from heat, carefully and slowly pour in the warm heavy cream (the mixture will hiss and bubble). Stir to full incorporate the cream.
- Add butter and salt and stir to combine. Add vanilla.
- Allow sauce to cool a bit, then pour into a jar. Continue to cool, until ready to use.
- Peel apples and dice into small pieces (about 1/2 inch cubes).
- Add apples, brown sugar, butter, cinnamon and salt into a skillet and cook over medium-high heat.
- Cook 3-5 minutes, or until the apples begin to soften, but still have some texture. Remove from heat and set aside.
- Preheat oven to 350°F.
- Prepare three 8" cake pans by lightly greasing the sides of the pans and then dusting with flour, then line the bottom of the pans with parchment paper.
- In a medium bowl, combine flour, baking powder, salt and spices. Whisk, then set aside.
- In the bowl of an electric mixer, beat butter until smooth. While mixing, slowly add sugar and continue to beat until the butter and sugar are well combined and the mixture is light and fluffy. Don't skimp on the mixing at this stage.
- While mixing, add the eggs one at a time, blending at least 10-20 seconds between each additional egg. Mixing well to incorporate some air is important in this step.
- Add vanilla and oil, and blend well to combine.
- Add sour cream and blend.
- Reduce the mixer speed to low, and pour in about half of the milk, then half of the flour mixture. Repeat with milk and flour. Blend just until all ingredients are well combined. Stop mixer and scrap down the sides of the bowl, and stir (just a couple times) by hand just to make sure all ingredients are well blended.
- Add 1 1/2 cups of the cooked spiced apples (from recipe above) to the bowl and use a large spatula to fold the apples into the batter. Stir just until evenly combined. (Reserve the remaining spiced apples for when the baked cake is being assembled)
- Divided batter evenly into prepared pans.
- Bake in preheated 350°F. oven for 22-28 minutes, or until the cake has a slight dome and a toothpick inserted in the center comes out clean, or with a few moist crumbs, but no wet batter.
- Cool cakes in pans for 5-10 minutes, then carefully remove and continue cooling on a wire cooling rack (leave the parchment on the bottoms at this point). Once cakes are mostly cool, wrap well in plastic wrap and place cakes in the freezer. This will help keep them moist as they fully cool, and will make them easy to handle (stack and frost) when you're assembling the cake.
- Cut cold butter into a few large pieces and then, in the bowl of an electric mixer, beat butter until smooth.
- Add cream cheese and blend until fully combined and smooth.
- Add about half of the powdered sugar, then while the mixer is running, pour in the caramel sauce. The caramel sauce should be no warmer than room temperature. Stop the mixer and scrape down the sides of the bowl as needed. Continue blending and add the remaining powdered sugar, vanilla and salt.
- The frosting should be thick, creamy and fluffy. If by chance your kitchen is very warm, or the caramel sauce was too warm when you added it, place the bowl of frosting in the fridge to firm up, then beat once more before use.
- Level and split cake layers as desired.
- For easy assembly, add the frosting to a large piping bag fitted with a large round tip. This is optional.
- Begin with a layer of cake on the plate or cake stand of your choice. Add a layer of frosting by piping a large spiral, then spread as needed with an offset spatula. Alternatively, scoop a large dollop of frosting onto the cake layer, and spread as needed with an offset spatula.
- Add some of the spiced apples, using a spatula to press into the frosting just a bit.
- Add a drizzle of caramel sauce on top of the frosting.
- Repeat layers of cake, then frosting, apples, and caramel drizzle.
- On top of the cake, add a generous topping of apples.
- Enjoy!
Nutrition
Notes
Tried this recipe?
Let us know how it was!The First One Slid Right Off the Stand
Honestly, the first Caramel Apple Layer Cake I ever made was a disaster. I mean, a complete structural failure. The layers shifted, the filling oozed out, and the whole thing looked like a delicious but tragic landslide. I remember standing there, spatula in hand, thinking, “This is not the bakery-worthy moment I planned.”
But here’s the thing about layered cakes. They’re not actually that hard once you understand a few key principles. The problem is most recipes just give you ingredients and steps without explaining the why. And when you’re dealing with something as rich and moist as an apple caramel dessert cake, the stakes are higher. Too much moisture and you get a soggy mess. Too little and it’s dry and crumbly.
This version is different. I’ve tested it about six times to get the balance just right. The layers are tender but sturdy. The caramel frosting is silky but holds its shape. And the whole thing comes together without any special equipment or pastry school skills. I’m honestly pretty proud of how it turned out.
Why This Recipe Works
Let me tell you what makes this Caramel Apple Layer Cake different from the ones that end up in tears. It’s not one big trick. It’s a handful of small choices that add up to something really special.
First, there’s apple butter. I know it’s not a standard cake ingredient, but it’s a game-changer. Apple butter has concentrated apple flavor and natural pectin, which helps keep the cake moist without making it heavy. It’s like a secret weapon for texture.
Second, the spiced layer cake uses a mix of brown sugar and regular sugar. Brown sugar adds moisture and a deeper flavor that plays off the cinnamon and allspice. It’s not just sweet. It’s complex.
And third, the salted caramel frosting. This isn’t one of those buttercreams that’s just sweet and boring. The homemade caramel sauce adds a toasty, buttery depth that makes every bite interesting. Plus, the salt cuts through the sweetness so it’s not cloying.
The combination of tender apple cake, spiced layers, and that rich caramel frosting is honestly one of the best things I’ve baked in a long time. And I’ve baked a lot of cakes.
Ingredients You’ll Need
Before we get into the process, let’s talk about what goes into this cake and why each ingredient matters. I’ve learned the hard way that substitutions without understanding can mess things up.
The Apples. You can use any apples you like for this recipe, but I prefer a mix of tart and sweet. Granny Smith and Pink Lady are my go-to. The tartness balances the caramel’s sweetness. Medium or large apples are easier to peel and grate than smaller ones, so keep that in mind.
The Spices. We’re using cinnamon, allspice, and freshly grated nutmeg. Pre-ground nutmeg is fine, but fresh really does make a difference. It’s warmer and more aromatic. Trust me on this one.
The Dairy. Sour cream and whole milk add richness and tenderness. The acid in the sour cream reacts with the baking powder to create a lighter crumb. It’s not just for flavor. It’s doing actual work in there.
The Caramel. Heavy cream, sugar, corn syrup, and butter. The corn syrup is important because it prevents crystallization. If you skip it, you risk ending up with grainy caramel instead of smooth, silky sauce. I’ve made that mistake before. It’s not fun.
The Science Behind Moist Cake Layers
I know this sounds a little nerdy, but understanding why things work makes you a better baker. So bear with me for a second.
Apple cake layers tend to be dense because apples release moisture as they bake. That extra water can make the cake heavy and gummy if you’re not careful. The trick is to balance the liquid ingredients so the cake stays tender without turning into a brick.
Apple butter helps here because it’s concentrated. You get apple flavor without as much water. The pectin in the apple butter also helps bind the batter, which gives the cake structure. It’s like a natural stabilizer.
Brown sugar is another key player. It’s more acidic than white sugar, which helps activate the baking powder. Plus, it attracts and holds moisture, so the cake stays soft longer. That’s why a brown sugar frosting or cake tends to be more tender than one made with just white sugar.
And the sour cream? The fat and acid work together to tenderize the gluten. You end up with a crumb that’s soft but not fragile. It’s the difference between a cake that holds its shape and one that crumbles when you try to lift a slice.
I mean, you don’t have to know all this to make a good cake. But I think it helps when things go wrong. You can look at the problem and think, “Oh, maybe I need more acid” or “The moisture balance is off.” It makes troubleshooting way easier.
How to Make the Caramel Sauce
If you’ve never made caramel before, don’t worry. We’ll go slow. The key is patience and paying attention.
Start by combining the sugar, corn syrup, and water in a heavy-bottomed saucepan. Swirl it gently to combine, but don’t stir once it’s on the heat. Stirring can cause crystallization, which is the enemy of smooth caramel.
Cook over medium heat until the mixture turns the color of an old penny. That’s the visual cue. If you have a candy thermometer, you’re looking for about 215°F. But honestly, the color is more reliable. It should be a deep amber, not pale or burnt.
Once it hits that color, remove it from the heat and carefully add the heavy cream. It will bubble up violently, so stand back. Whisk until smooth, then add the butter and salt. Stir until the butter melts and everything is combined.
Let it cool slightly before using. The caramel will keep in the fridge for a good month, so you can make this in advance. If it thickens too much after chilling, microwave it in 5 to 10 second intervals until it’s pourable but not warm.
Common Caramel Mistakes & Fixes
Mistake: The caramel is grainy.
Solution: This usually happens if sugar crystals form during cooking. Next time, don’t stir once the sugar is on the heat. Swirl the pan instead. You can also add a teaspoon of lemon juice to help prevent crystallization.
Mistake: The caramel is too thin.
Solution: You probably didn’t cook it long enough. Let it simmer a bit longer next time. It should coat the back of a spoon. If it’s already made and too thin, you can simmer it again to reduce it.
Mistake: The caramel is burnt.
Solution: This happens fast. Once it passes that amber color, it goes to burnt in seconds. Next time, pull it off the heat a little earlier. If it’s already burnt, you have to start over. Sorry. I’ve done this more times than I’d like to admit.
How to Make the Apple Cake Batter
The cake batter comes together pretty quickly, but there are a few things to watch for.
First, make sure your ingredients are at room temperature. Cold eggs or cold sour cream won’t emulsify properly, and you’ll end up with a lumpy batter. Pull everything out of the fridge about an hour before you start.
Cream the butter, sugar, and brown sugar together until light and fluffy. This takes about 2 to 3 minutes. Don’t skimp on this step. The air you incorporate here is what gives the cake its lift. It’s not just mixing. It’s building structure.
Add the eggs one at a time, beating well after each. Then stir in the vanilla and oil. The oil adds extra moisture that butter alone can’t provide. It’s a trick I learned from making carrot cake.
In a separate bowl, whisk together the flour, baking powder, salt, and spices. This ensures everything is evenly distributed. Then add the dry ingredients to the wet in three additions, alternating with the sour cream and milk. Start and end with the flour mixture.
Fold in the grated apples and apple butter. Don’t over mix at this stage. Just fold until everything is combined. Over mixing develops gluten, which makes the cake tough and dense.
Divide the batter evenly between three 8-inch cake pans. I use a kitchen scale to make sure each pan gets the same amount. It’s more reliable than eyeballing it.
Bake at 350°F for about 25 to 30 minutes, or until a toothpick inserted in the center comes out clean. The tops should be golden brown and spring back when lightly touched.
Let the cakes cool in the pans for 10 minutes, then turn them out onto a wire rack to cool completely. And I mean completely. Frosting a warm cake is a disaster waiting to happen.
How to Make the Buttercream
This is where the magic happens. The caramel buttercream is rich, smooth, and not too sweet.
Start by beating the cream cheese and butter together until smooth. This takes about 2 minutes. Scrape down the sides of the bowl to make sure everything is incorporated.
Gradually add the powdered sugar, about a cup at a time, beating on low speed. Once it’s all in, add the vanilla and a pinch of salt. Then drizzle in the cooled salted caramel sauce and beat until light and fluffy.
The consistency should be spreadable but not runny. If it’s too thick, add a tablespoon of milk. If it’s too thin, add another half cup of powdered sugar. You want it to hold its shape when you spread it, but still be soft enough to work with.
If you’re making the frosting ahead of time, store it in an airtight container in the fridge for up to a week. Bring it to room temperature and rewhip it before using. It comes right back to life.
How to Assemble the Cake
This is the part that used to stress me out. But once you have a system, it’s actually pretty straightforward.
First, level the cake layers. Use a serrated knife to slice off the domed tops. Wait until the cakes are completely cool. Warm cakes are too fragile and will crumble.
Place the first layer on your cake stand or plate. Spread a thin layer of buttercream on top. Then pipe a ring of buttercream around the edge. This is called a frosting dam, and it’s the key to keeping the filling in place. Without it, the caramel apple filling will just slide out.
Spoon some of the spiced apples into the center of the ring and spread them evenly. Drizzle a little caramel sauce on top. Then add the next layer and repeat.
Once all three layers are stacked, apply a thin crumb coat. This is a thin layer of buttercream that seals in the crumbs. Don’t worry about making it perfect. Just cover the cake and smooth it out as best you can.
Chill the cake in the freezer for about 10 minutes. This helps the crumb coat set and prevents the layers from sliding when you add the final coat of frosting.
After the chill, apply the final layer of buttercream. Use an offset spatula to smooth it out. If you want the rustic look, leave some swirls. If you want it perfectly smooth, use a bench scraper and take your time.
Drizzle the remaining caramel sauce over the top and let it drip down the sides. Add some apple slices or chopped nuts if you like. Then step back and admire your work.
Apple Variety Comparison for Baking
Not all apples are created equal when it comes to baking. Some hold their shape, some turn to mush, and some are just too sweet. Here’s a quick guide based on what I’ve learned.
Granny Smith. These are the gold standard for baking. They’re tart, firm, and hold their shape beautifully. The tartness balances the sweet caramel and brown sugar. I use these in almost every apple dessert I make.
Pink Lady. These are sweet-tart and stay firm when baked. They’re my second choice after Granny Smith. The flavor is a little more complex, with floral notes that work well with the spices.
Honeycrisp. These are sweet and juicy, but they can get a little soft in the oven. They’re fine for this cake, but I wouldn’t use them alone. Mix them with a firmer apple for better texture.
Fuji or Gala. These are very sweet and tend to break down more. They’re better for applesauce than for cake. If that’s all you have, they’ll work, but the texture won’t be as good.
Braeburn. These are firm and slightly tart. They’re a solid choice if you can find them. They hold up well and add good flavor.
My personal recommendation is a 50/50 mix of Granny Smith and Pink Lady. You get the tartness and structure from the Granny Smith and the sweetness and complexity from the Pink Lady. It’s a winning combination.
Recipe Tips for Best Results
I’ve made this cake enough times to know where things can go wrong. Here are the tips that make the biggest difference.
Measure your flour correctly. Use the spoon and level method or a kitchen scale. Scooping directly from the bag packs the flour and gives you too much, which leads to a dry cake. I learned this the hard way. A kitchen scale is the most reliable option.
Don’t over mix the batter. Once the flour goes in, mix just until combined. Over mixing develops gluten and makes the cake tough. It’s one of the most common mistakes, and it’s so easy to avoid.
Cool the cake layers completely before frosting. I know it’s tempting to speed things up, but warm cake will melt your buttercream. You’ll end up with a sloppy mess instead of clean layers.
Use a cake lifter to move thin layers. They’re fragile and can crack if you try to lift them with your hands. A thin metal spatula works too.
Pipe a buttercream ring around each layer before adding the filling. This keeps the caramel apple filling in place and prevents the layers from sliding. It’s a small step that makes a huge difference.
Chill the cake after stacking. Ten minutes in the freezer helps everything set and makes the final coat of frosting much easier to apply.
If your frosting is too thick, add a tablespoon of milk. If it’s too thin, add half a cup of powdered sugar. The consistency should be spreadable but not runny.
Substitutions and Variations
One of the things I love about this recipe is how adaptable it is. Here are some substitutions and variations that work well.
Gluten-Free. You can substitute the all-purpose flour with a gluten-free flour blend. I recommend one that includes xanthan gum for structure. The texture will be slightly different, but it still works.
Dairy-Free. Use vegan butter and a dairy-free cream cheese alternative. For the sour cream, use a plain dairy-free yogurt or buttermilk alternative. The caramel sauce can be made with coconut cream instead of heavy cream. It won’t be quite as rich, but it’s still good.
Egg-Free. You can use a vegan egg replacer. I’ve tested this with a flax egg, and it works, but the cake is a little denser. A commercial egg replacer might give better results.
Nut-Free. The base recipe is already nut-free, so no changes needed. If you’re adding nuts for garnish, just leave them off.
Variation: Cupcakes. This batter makes great cupcakes. Just reduce the baking time to about 15 to 18 minutes. Start checking at 15 minutes. Top with the caramel buttercream and a drizzle of caramel sauce.
Variation: Two 8-Inch Layers. The recipe as-is will also work in two 8-inch pans. The layers will be thicker, so you’ll need to bake them a little longer. Start checking at 30 minutes. For three 8-inch pans, 1.5 times the recipe.
Variation: Add Nuts. Chopped walnuts or pecans add great crunch. Sprinkle them between the layers and on top of the cake. Toast them first for more flavor.
Storage and Make-Ahead Tips
This cake is actually better the next day. The flavors meld together and the texture softens even more. Here’s how to store it and how to make it ahead.
Refrigerating. Store the cake in an airtight container or cake carrier in the fridge. It will keep for 3 to 4 days. Use toothpicks to prop the plastic wrap away from the frosting so it doesn’t smudge. Let it sit at room temperature for about 30 minutes before serving. It’s best enjoyed cool but not cold.
Freezing Unfrosted Layers. Bake the cake layers ahead of time, wrap each one tightly in plastic wrap, then in aluminum foil. Freeze for up to 3 months. Thaw in the fridge overnight or at room temperature for 2 to 3 hours before frosting.
Freezing Frosted Cake. Freeze the fully assembled cake uncovered until the frosting hardens. Then wrap it in plastic wrap and aluminum foil. Thaw in the fridge overnight. This works well for up to a month.
Freezing Individual Slices. Wrap each slice in plastic wrap and place them in an airtight container. Freeze for up to 3 months. Thaw in the fridge or at room temperature.
Make-Ahead Caramel. The caramel sauce can be made up to a month in advance. Store it in an airtight container in the fridge. Bring it to room temperature before using. If it’s too thick, microwave it in short bursts.
Make-Ahead Frosting. The buttercream can be made up to a week in advance. Store it in the fridge. Bring it to room temperature and rewhip it before using.
Reheating. If you want to serve the cake warm, microwave individual slices for about 10 to 15 seconds. For the whole cake, let it sit at room temperature for an hour. Don’t microwave the whole thing. The frosting will melt.
Frequently Asked Questions
More Caramel Apple Desserts to Try
If you love this cake, you’ll probably enjoy some of these other caramel apple desserts. They’re all built on the same flavor combination but in different forms.
Caramel Apple Cheesecake Bars. A buttery shortbread crust topped with a creamy cheesecake layer, spiced apples, and a drizzle of caramel. They’re easier than a full cheesecake and perfect for sharing.
Apple Cider Caramel Cupcakes. Light and fluffy apple cider cupcakes topped with the same caramel buttercream from this recipe. They’re great for parties or just because.
Caramel Apple Hand Pies. Flaky pastry filled with spiced apples and caramel sauce. They’re portable, which makes them perfect for picnics or lunchboxes.
Baked Caramel Apples. Whole apples cored and baked until tender, then drizzled with caramel and topped with crushed nuts. It’s a simple dessert that feels special.
I think the caramel apple flavor combination is one of the best in baking. The sweetness of the caramel, the tartness of the apples, and the warmth of the spices just work together. You really can’t go wrong.
When You Make This Cake
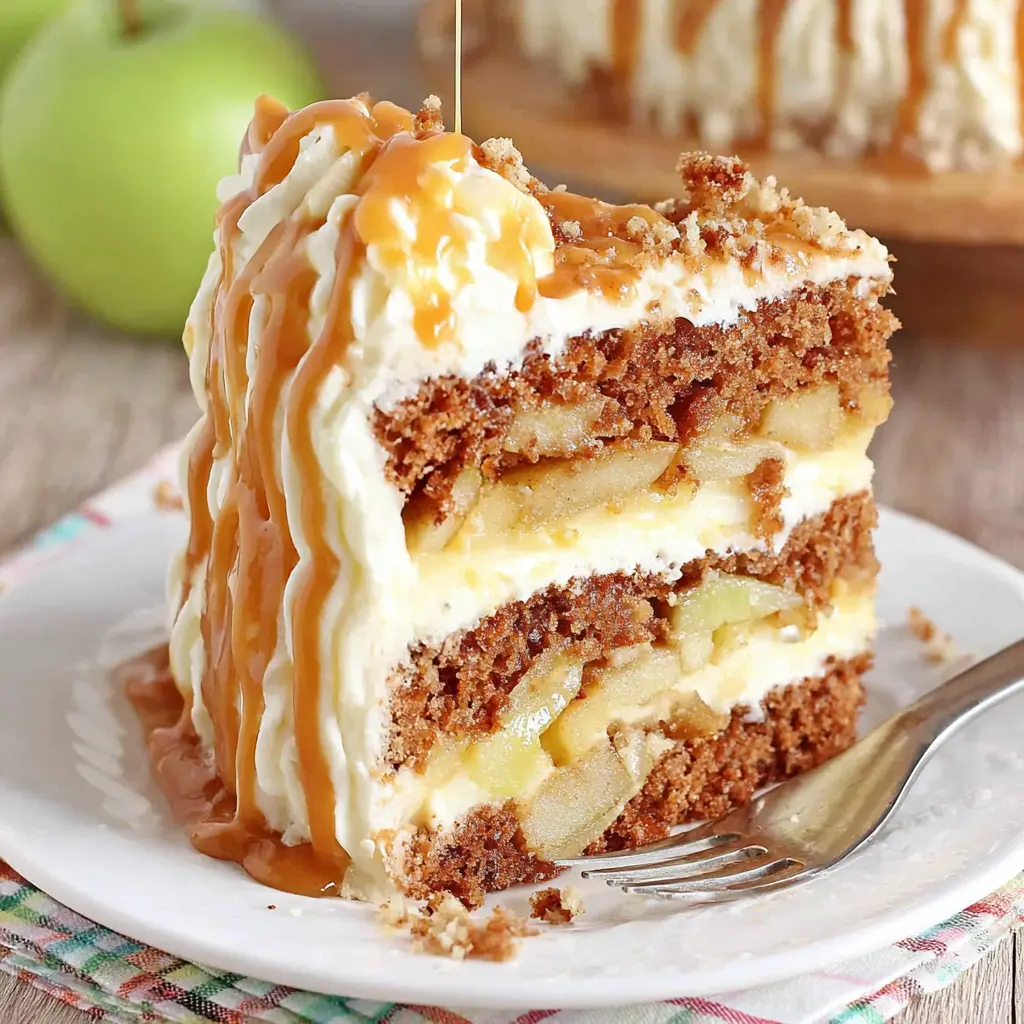
When you bring this cake to the table, people will notice. The layers are clean, the caramel drips down the sides, and the spiced aroma fills the room. It’s the kind of dessert that gets compliments before anyone even takes a bite.
And when you slice into it, that first reveal is so satisfying. The tender crumb, the apple filling, the creamy frosting. It all comes together in one perfect bite.
I hope this recipe gives you the confidence to tackle a layered cake. It’s not as hard as it seems, and the results are so worth it. Once you understand the basics, you can adapt this to any flavor combination you like.
For more inspiration and variations, check out my Pinterest boards. I share tons of ideas there for different fillings, frostings, and decorations.
When you make this Caramel Apple Layer Cake, tell me how it goes. Tag me in your slice shot. I’d love to see how it turns out. And if something goes wrong, don’t worry. That’s how we learn. I’ve made plenty of mistakes in the kitchen, and I’m still here, still baking.
Happy baking, everyone.
Source: Nutritional Information
Can I use a different frosting for this Caramel Apple Layer Cake?
Absolutely. A classic cream cheese frosting or a simple vanilla buttercream would work well. The caramel flavor will be less pronounced, but the apple and spice flavors will shine through. Just make sure the frosting is thick enough to hold the layers in place.
Can I add nuts to the apple cake layers?
Yes, chopped walnuts or pecans add great crunch and flavor. Fold about half a cup into the batter along with the apples. You can also sprinkle them between the layers and on top of the frosting for decoration. Toast them first for extra depth.
Can I make the salted caramel frosting ahead of time?
Yes, store it in an airtight container in the refrigerator for up to a week. Bring it to room temperature and rewhip it before using. This brings back the smooth, fluffy texture. If it seems too thick after chilling, add a splash of milk while rewhiping.